
How to Install RethinkDB on your Synology NAS
Introduction
RethinkDB is an open-source, document-oriented database designed to make real-time applications fast and scalable. It's a popular choice for developers who want to build web applications that require real-time updates and complex queries. If you have a Synology NAS, you can install RethinkDB to run a database server locally on your device. This allows you to create and manage databases without relying on a third-party service or cloud provider.
In this tutorial, we will guide you through the process of installing RethinkDB on your Synology NAS. We'll cover everything you need to know, from downloading and configuring the necessary packages to creating a database and accessing it from your application. Whether you're a seasoned developer or just getting started, this guide will help you get RethinkDB running on your Synology NAS in no time. So, let's get started!
Disclaimer: Please note that any actions taken based on this tutorial are at your own risk. The author is not liable for any resulting damages, data loss, or issues. Always exercise caution when working with computer systems. By using this tutorial, you assume responsibility for any consequences that may arise from following the instructions provided.
Step 1: Install Docker on Synology NAS
In this guide, we'll not explain how to build RethinkDB from sources. Instead, we'll use Docker to install and run it on your Synology NAS.
If you're already familiar with Docker, you may be able to skip this step. Docker is a widely-used tool that simplifies running software on your device that's not available in the Synology Package Center. To learn more about Docker and its advantages, click here.
If you haven't installed Docker yet, it's simple and quick to set up. Just head to the Synology Package Center and search for the "Docker" package. Click "Install" to start the process.
Step2: Create a Docker container for RethinkDB
Download the RethinkDB container image from the online repository
To create a container, go to the "Container" section on the left side of the Docker application interface. Then, click the "Create" button to open the "Create Container" window.
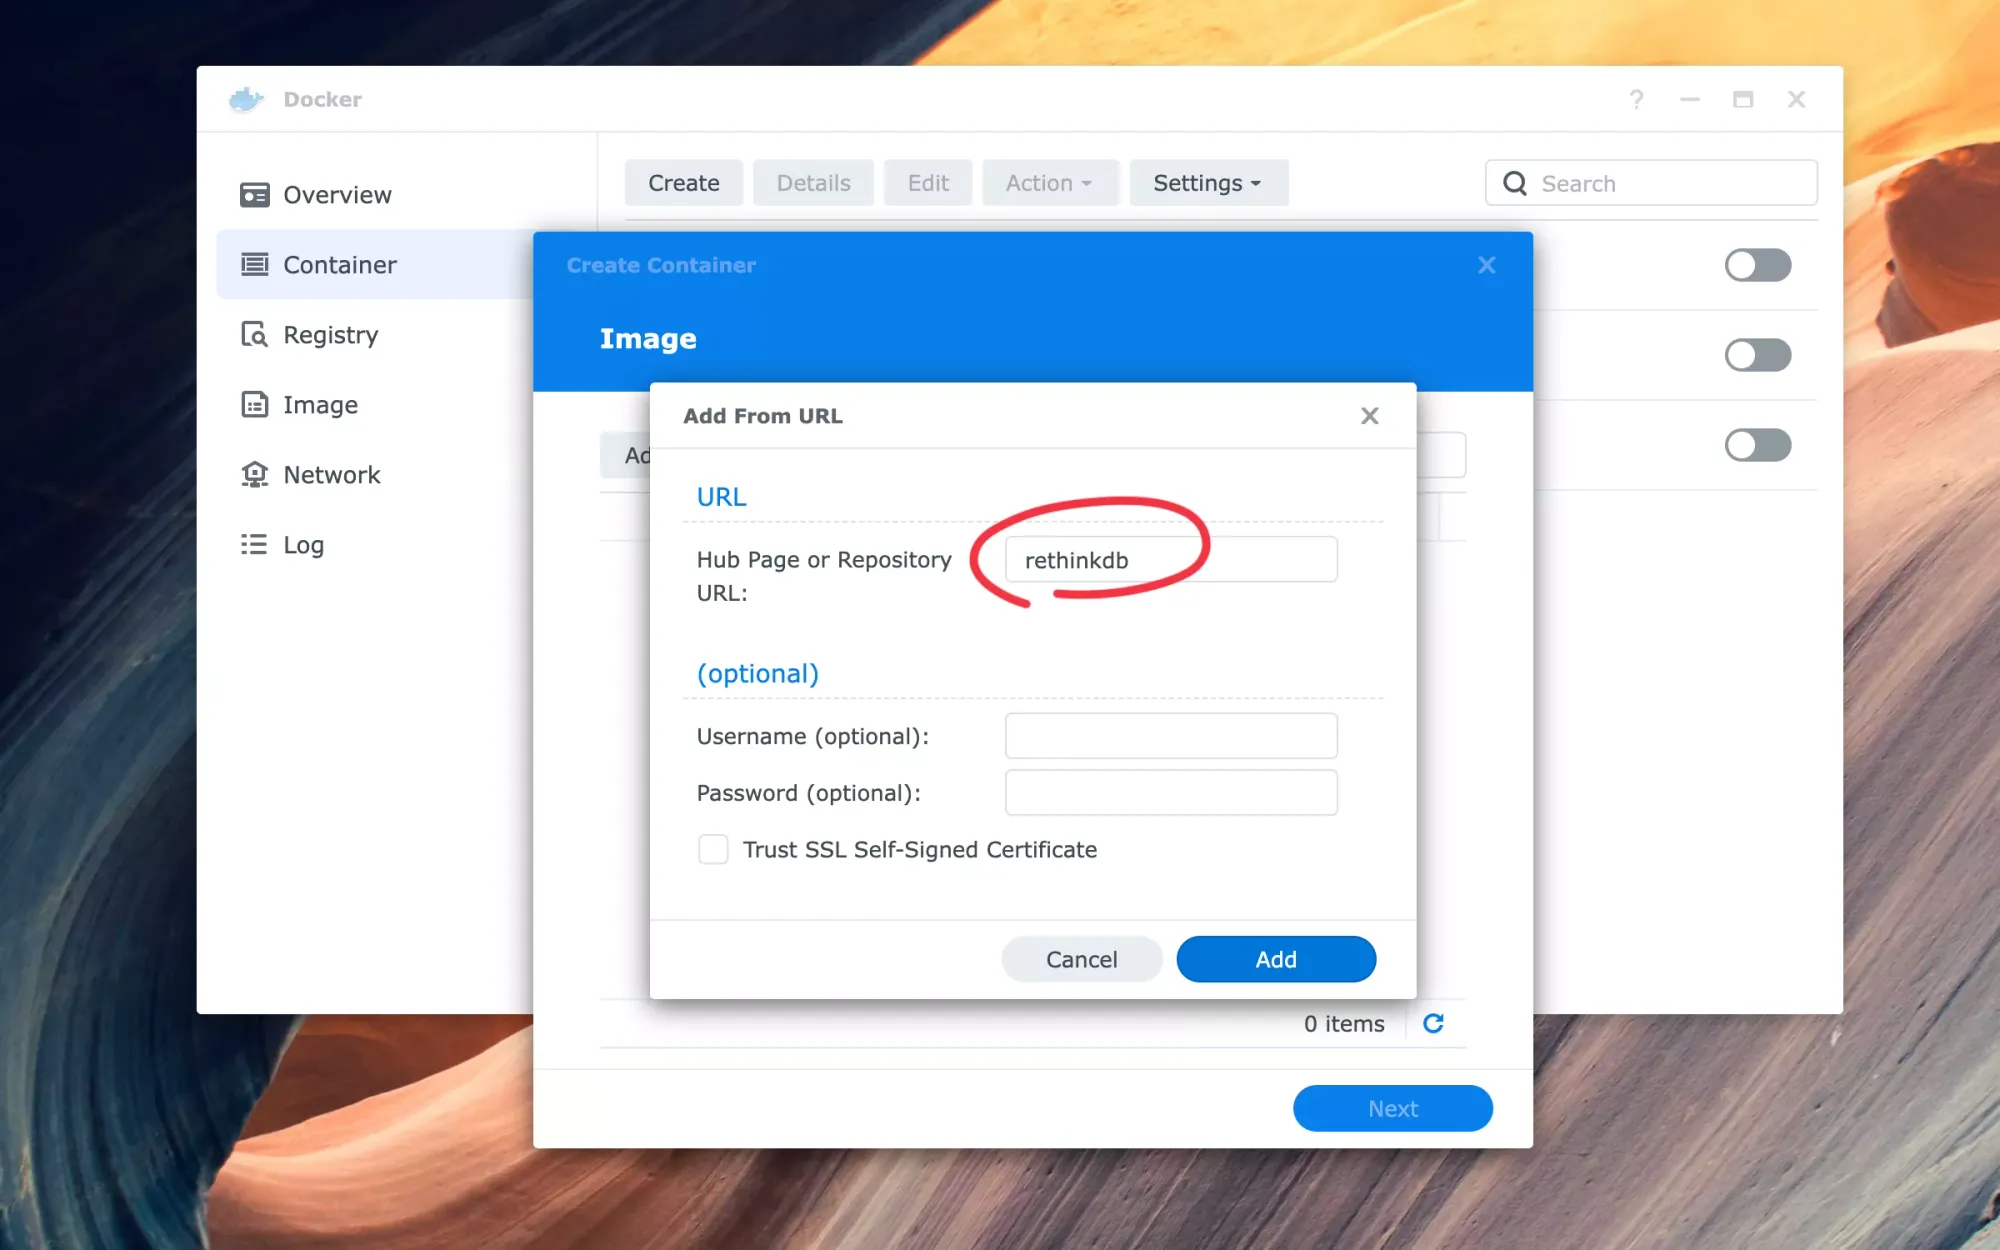
After that, you need to specify where to find the desired image for your RethinkDB container. Click the "Add" dropdown button and select "Add From URL".

Just type "rethinkdb" (without quotes) in the URL field and click "Add".
It is important to select the right tag for your RethinkDB installation when prompted. For this tutorial, we recommend sticking with the default option, which will download the latest available version. Simply click on the "Select" button to start the download process. The latest version of RethinkDB as of writing this tutorial is 2.4.2.
Once the image has finished downloading, you can proceed to create your container by clicking the "Next" button.
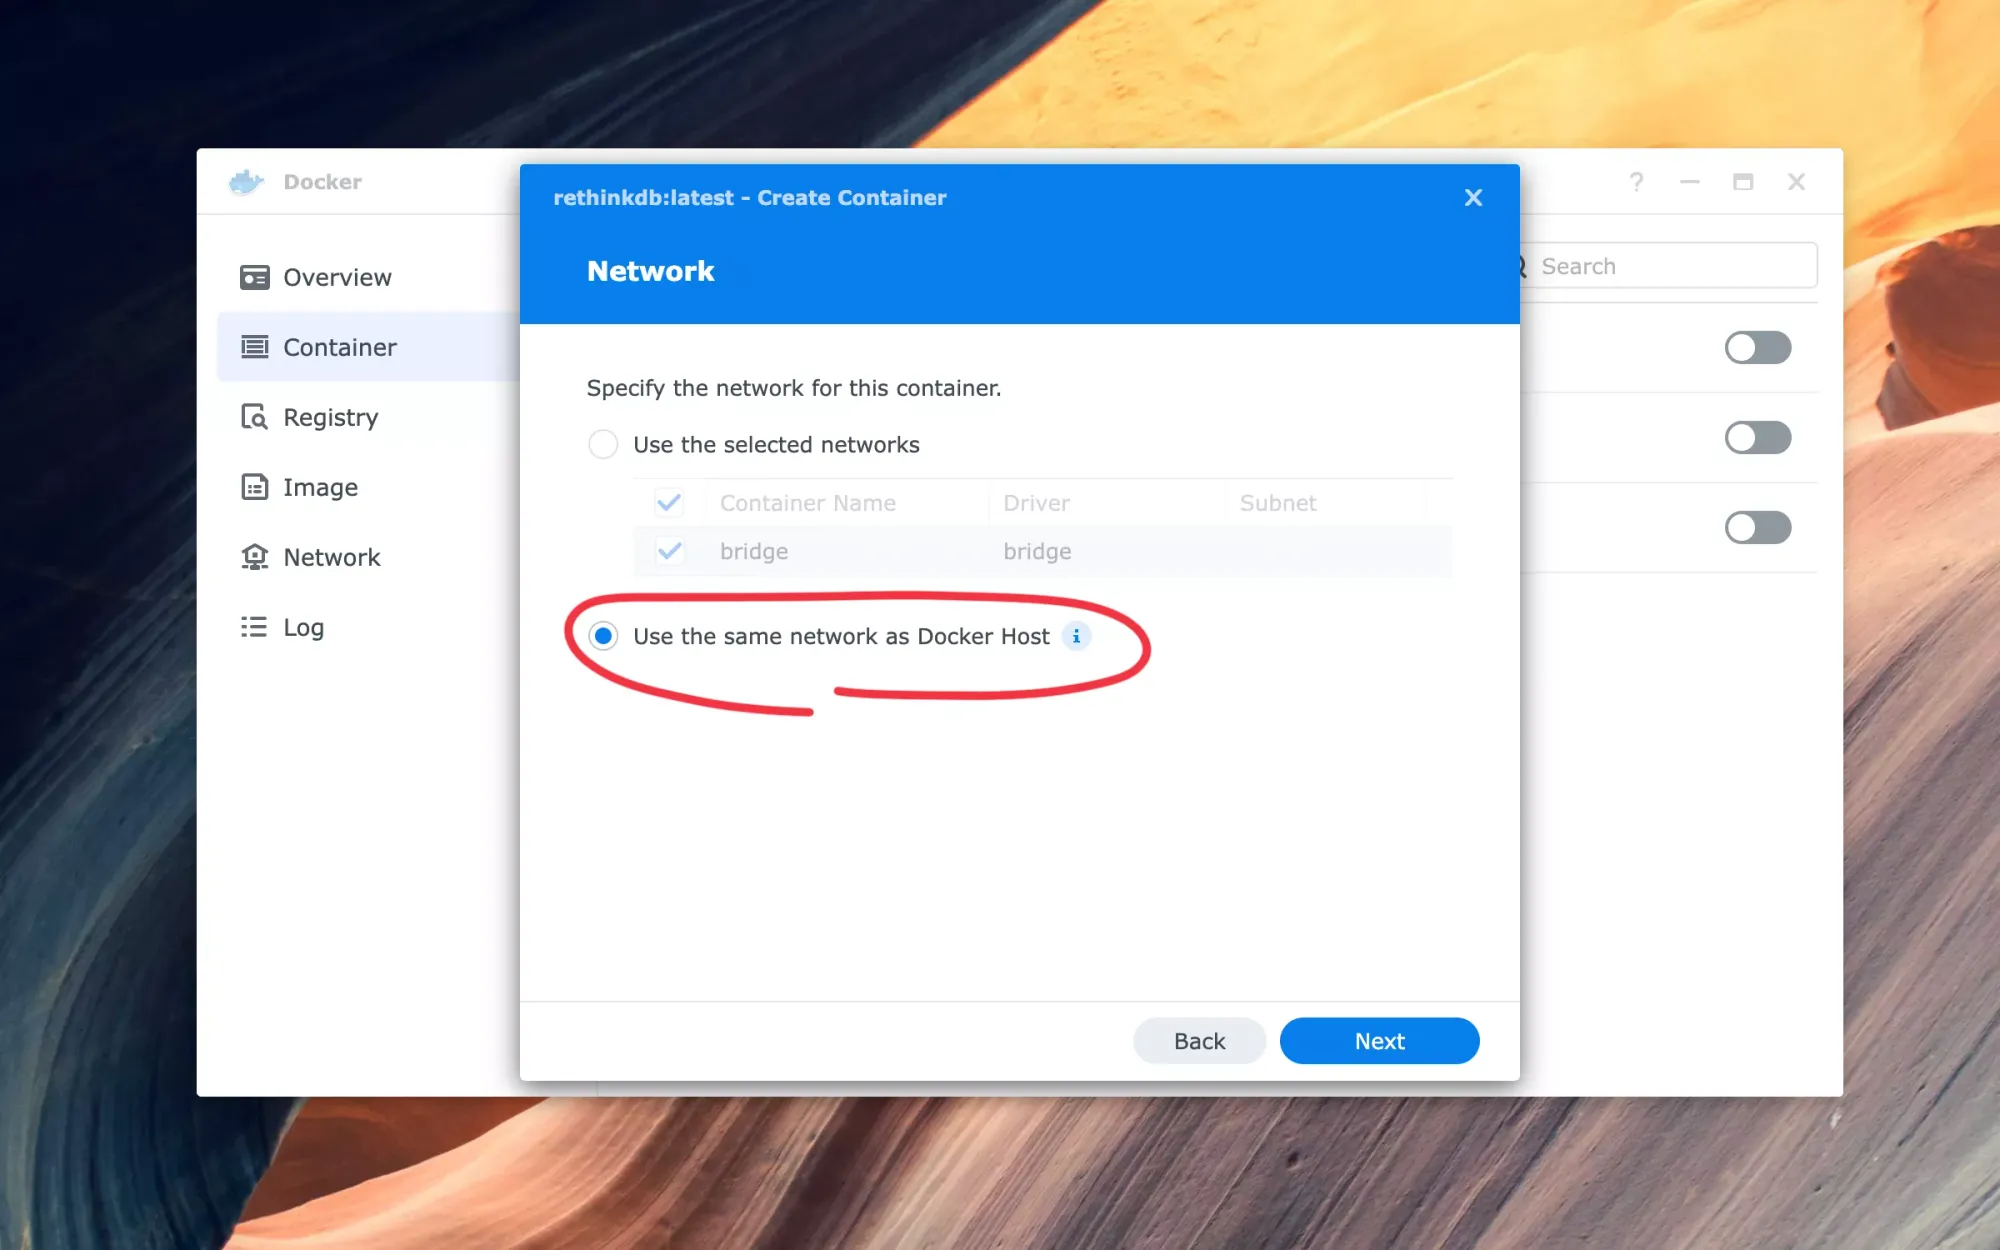
Choose the network settings for the RethinkDB container
When setting up the container, you'll need to specify the network it will use. Opt for "Use the same network as Docker Host" and proceed to the next step. With this option, the container and your Synology NAS will share the same IP address, making it simpler to connect to RethinkDB.
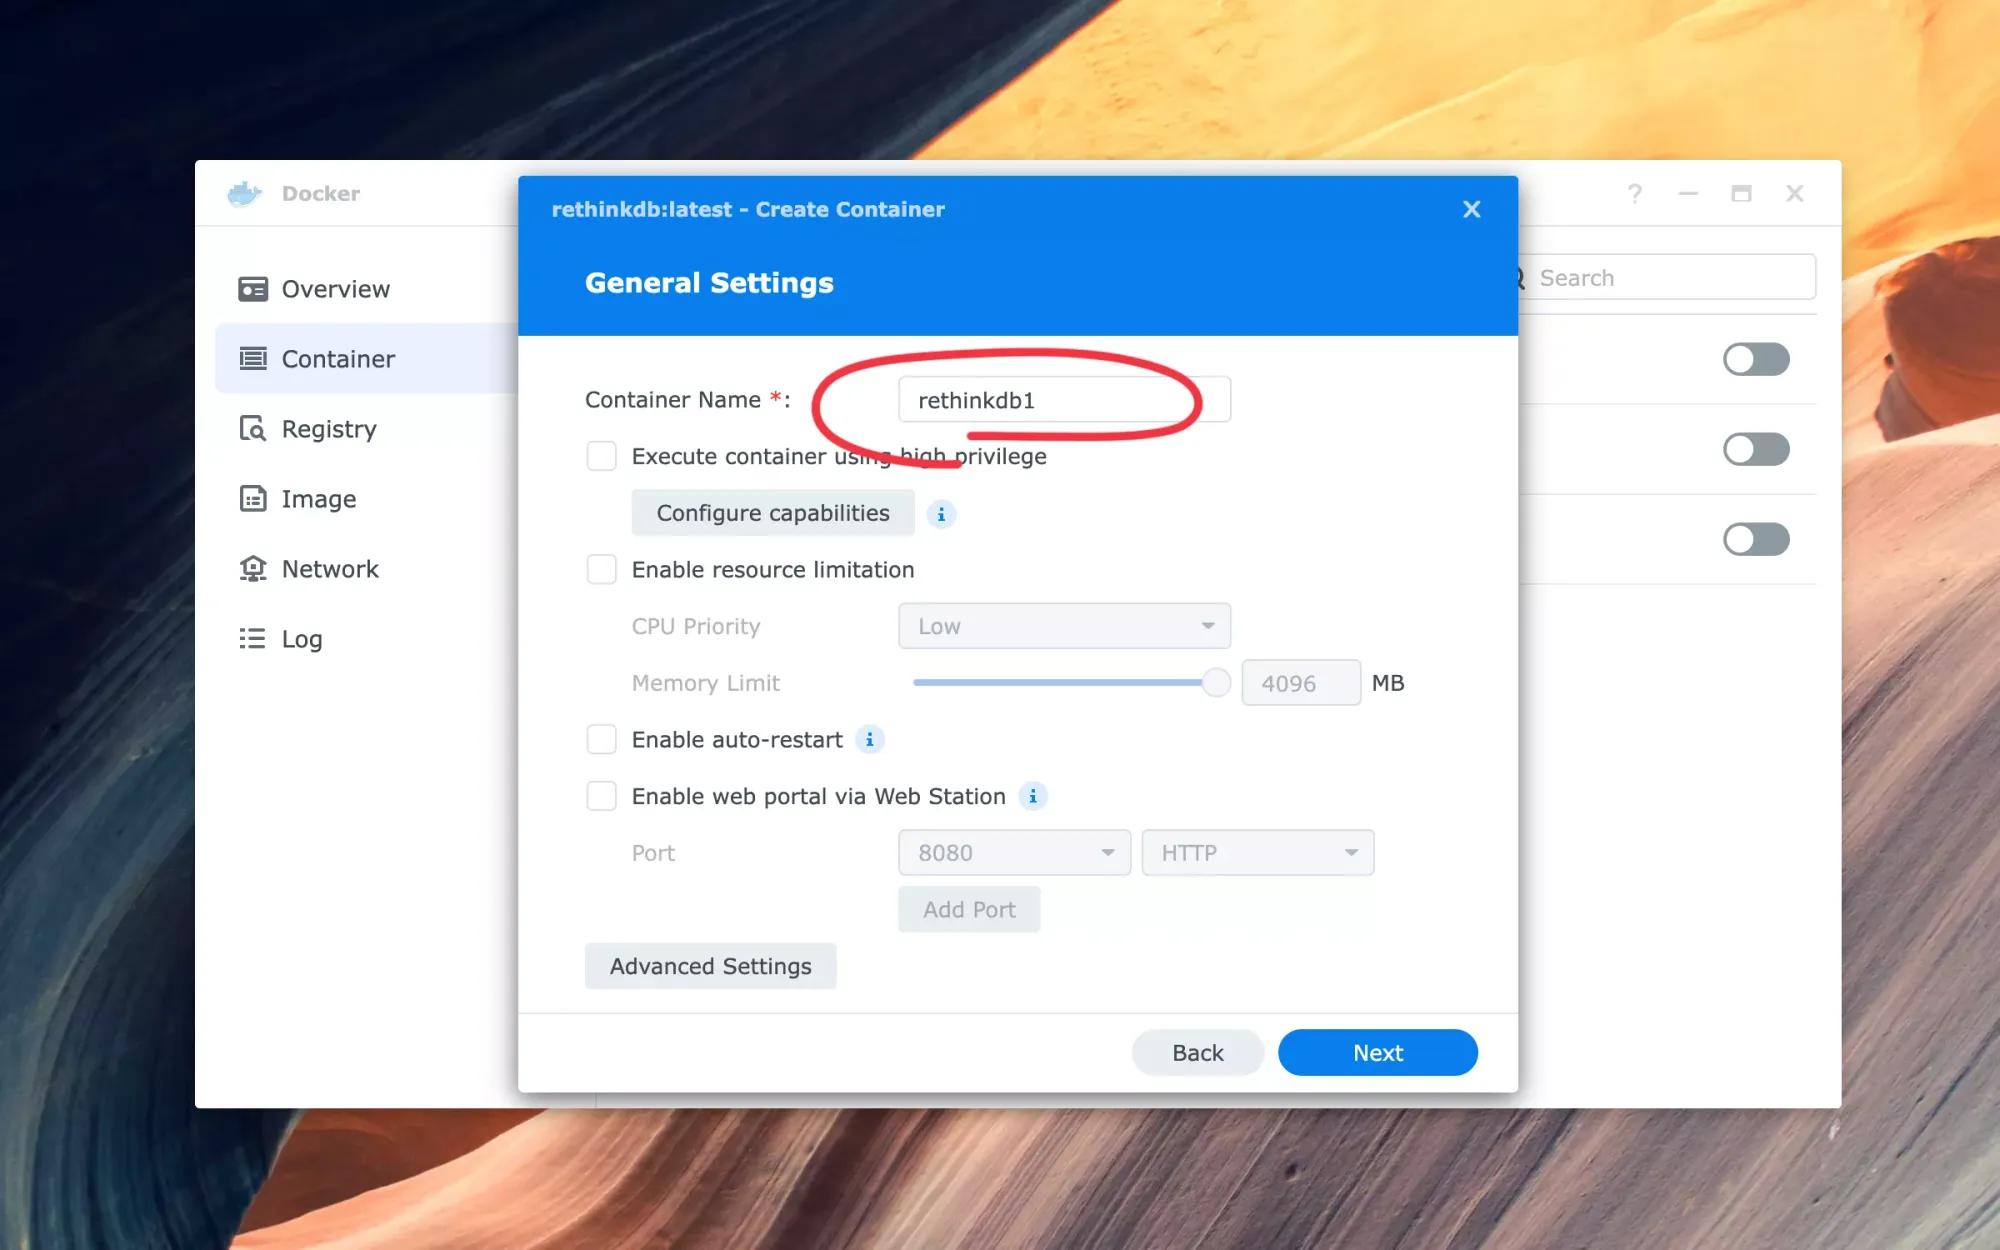
Choose the general settings for the RethinkDB container
When you access the General Settings screen, you'll see numerous options to manage the resources that the Docker container can use. While you can customize some settings, it's advisable to keep most of them at their default values.
Configure the Admin UI port and other settings for RethinkDB
The default command that runs when Docker starts is "rethinkdb --bind all". To customize settings such as the port number for the Admin UI, go to "Advanced Settings", select the "Execution Command" tab, and add the following command:
rethinkdb --bind all --http-port 8181
This changes the Admin UI to run on port 8181 instead of the default 8080, which can be useful if you have other applications running on the default port. If you want to modify additional configuration options, you can find the full list here.
Store RethinkDB data persistently in a shared folder
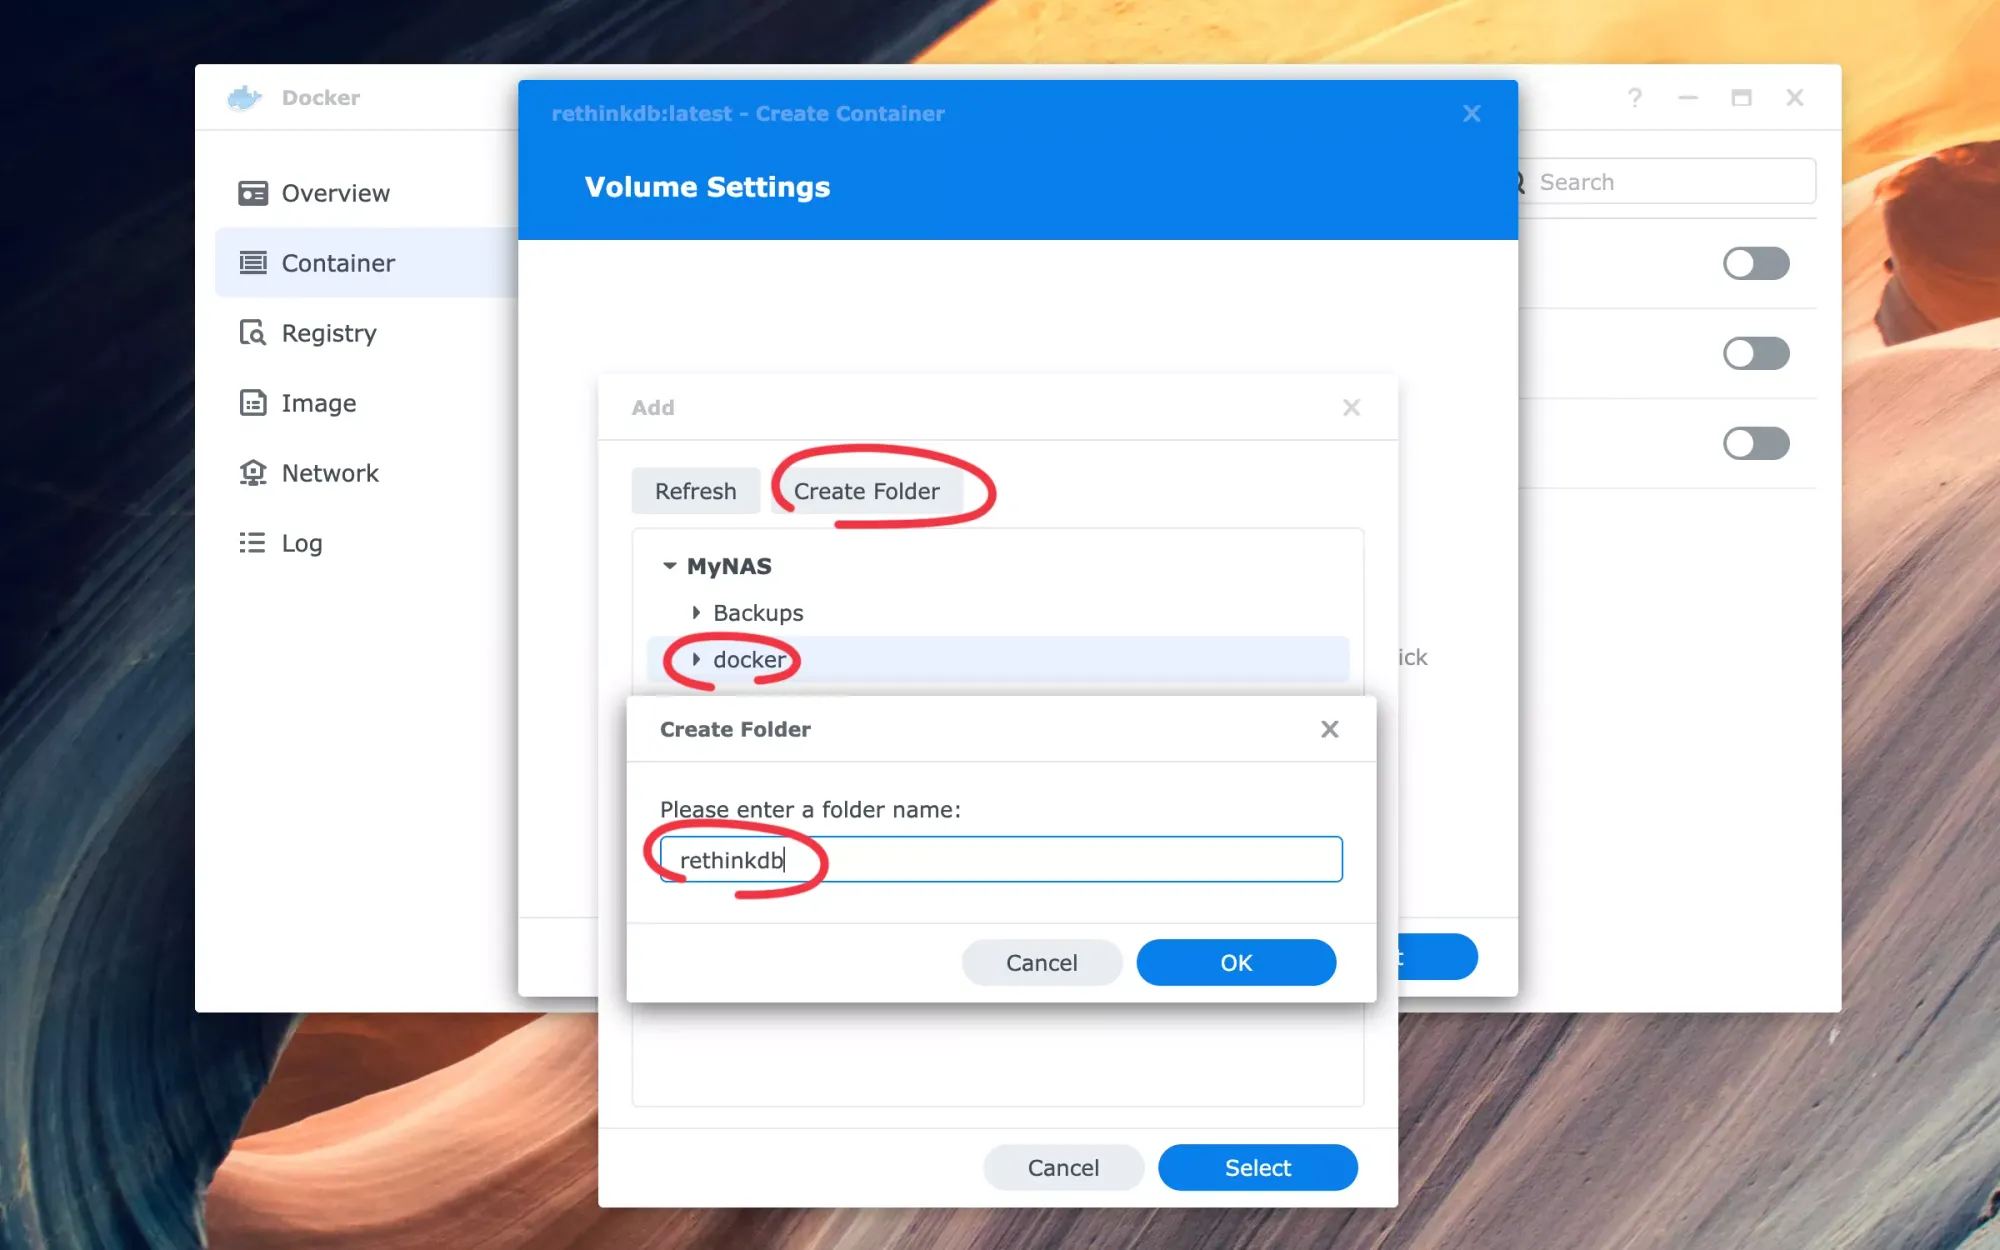
In order for RethinkDB to store its data, you need to map the volume to a shared folder on your Synology NAS. Simply choose the "Add Folder" option and then "Create Folder". Name the folder "rethinkdb" (without quotation marks), and click "OK". Then, click "Select" to complete the mapping process.
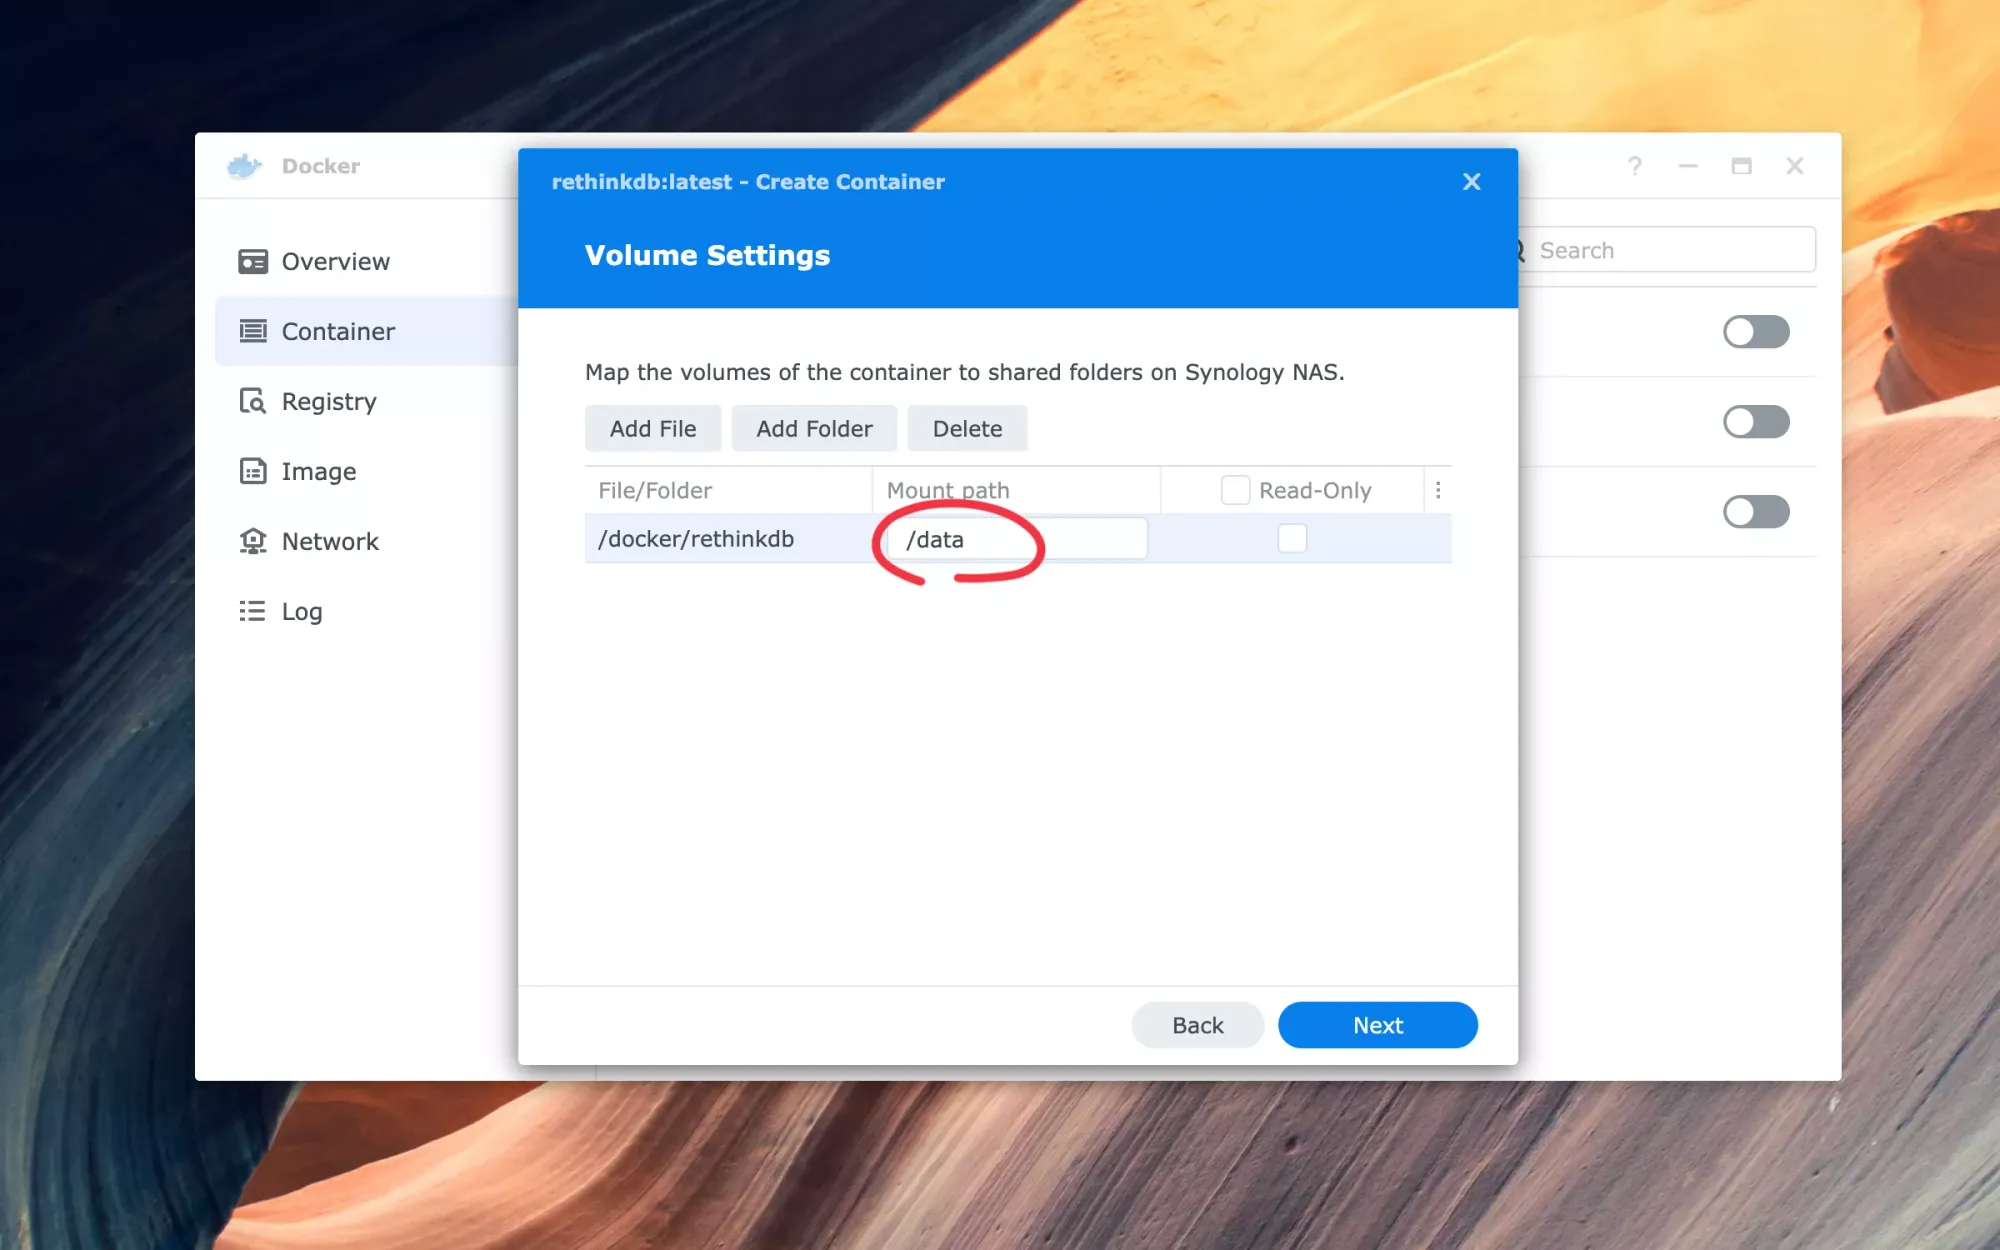
Enter "/data" (without quotes) as the mount path and click "Next".
Once the volume has been successfully mapped to the shared folder, a summary window will appear. This window allows you to review all the settings that you have established. If everything is correct, you may proceed by selecting the "Done" button.
You know have RethinkDB running on your NAS
Once you have completed all the necessary steps, the RethinkDB server should be up and running on your Synology NAS. To check if it's working properly, you can open the Admin UI in your browser by entering your NAS IP address followed by the selected port number (8181).