
Install Ghost blogging platform and MySQL on Synology NAS
A brief introduction to Ghost and its capabilities as an online publishing tool
As you may already be aware, Ghost is an effective online publishing tool many individual bloggers use and love for its simplicity.
If you're considering to setup Ghost for a new blog or site, you should keep in mind that it differs from the other alternatives. For example, Ghost doesn't offer the same level of customisation you may be already familiar with by using WordPress.
The first time you start Ghost, you see its beauty, its simplicity and how its clean UI delivers the optimal experience for both readers and writers. To do that, Ghost's developers built only the essential functionalities and never planned to make the backend extensible with plugins.
Of course, you can easily create or customise Ghost's themes by learning a bit of HTML, CSS, Javascript and Handlebars. Depending on what type of customisation you want to achieve, most of the time, you can use the code injection feature through Ghost's Admin interface.
Ghost is not only giving you the ability to inject code globally on the header or footer of the theme but also for a specific post or page.
Other than guiding you on how to install Ghost, what else I cover in this tutorial?
Not only I'll guide you on how to install Ghost on your Synology NAS using MySQL, but I'll help you with making your Ghost installation accessible from inside your local area network or exposing it to the internet based on your preferences.
I'll explain how to open a specific port on your router, how to configure a domain for your Ghost blog, some solutions to common problems you could face and a detailed guide to set up your Ghost database.
However, in this guide, I'll not focus on making your network, Ghost blog or MySQL server more secure. So, you're fully aware that it's up to you to check if the following configurations don't compromise the security of your network or your Synology NAS.
Step 1: Install Docker on your Synology NAS
Possibly you've already installed and used Docker in your Synology NAS before, and if that's the case, you can skip this step.
In a few words, to install Ghost and MySQL, we'll use Docker because it's the easiest way to run software that isn't available in the Synology Package Center.
For example, because Docker containers isolate the software from its environment, it's less likely that software installed with it hurts your Synology NAS operating system. When you don't need a container anymore, you delete it, and it's like you never installed it before. You can read more about Docker and how it works here.
Unlike other tutorials that explain how to install Ghost or any other software using Docker, here, you'll never find yourself typing "docker compose" on a terminal or pasting scripts where sometimes it's difficult to understand what these commands are doing.
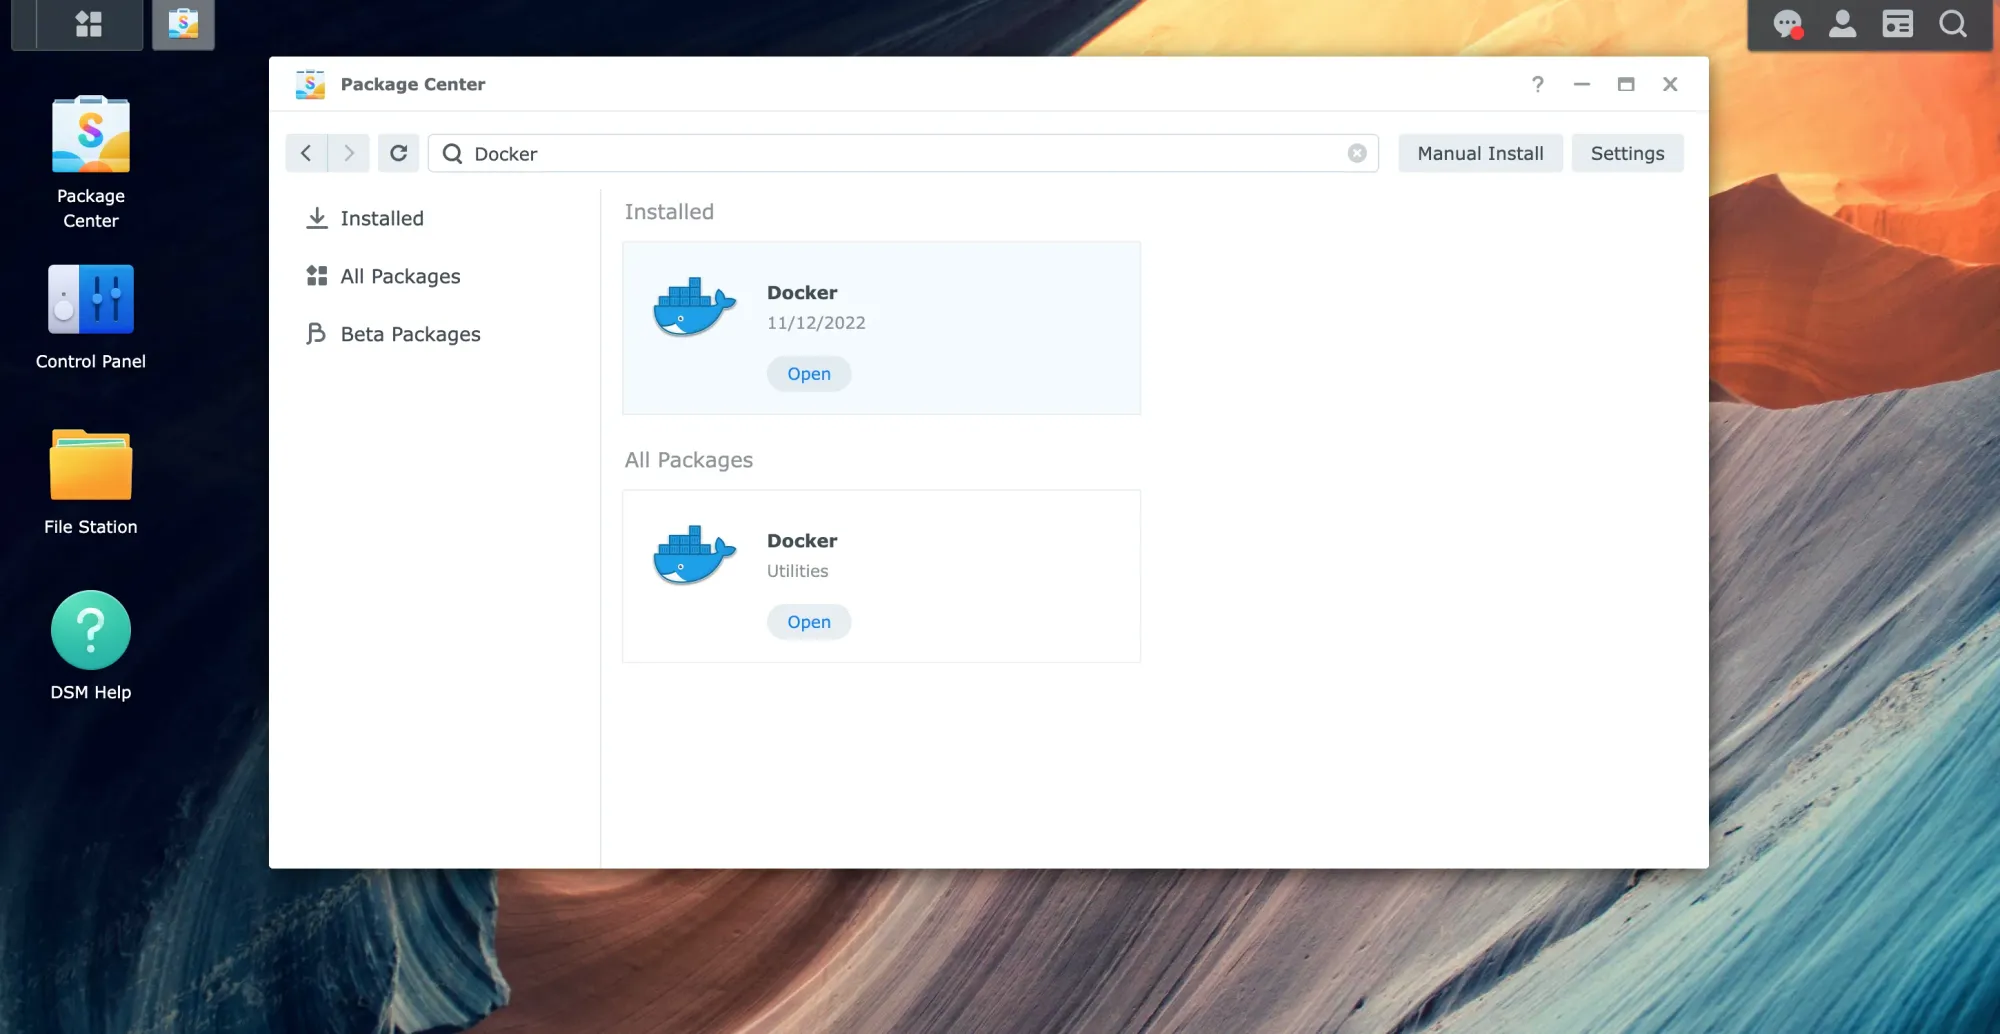
Now that you know that, to install Docker, head to the Package Center, search for it and click "Install".
Step 2: Install MySQL using Docker
Ghost CMS requires a MySQL database to store your blog posts and pages unless you want to run it for development purposes. If that's the case you could choose SQLite3 (which is not what we intend to do in this guide).
If you haven't already installed MySQL on your Synology NAS, you should follow this guide: How to install MySQL on your Synology NAS using Docker.
Make sure you create a database and user as shown in "Specify some initialisation settings for MySQL" of the linked guide, and take note of the entered values, as we will need them later in this guide.
Step 3: Create a Docker container for Ghost
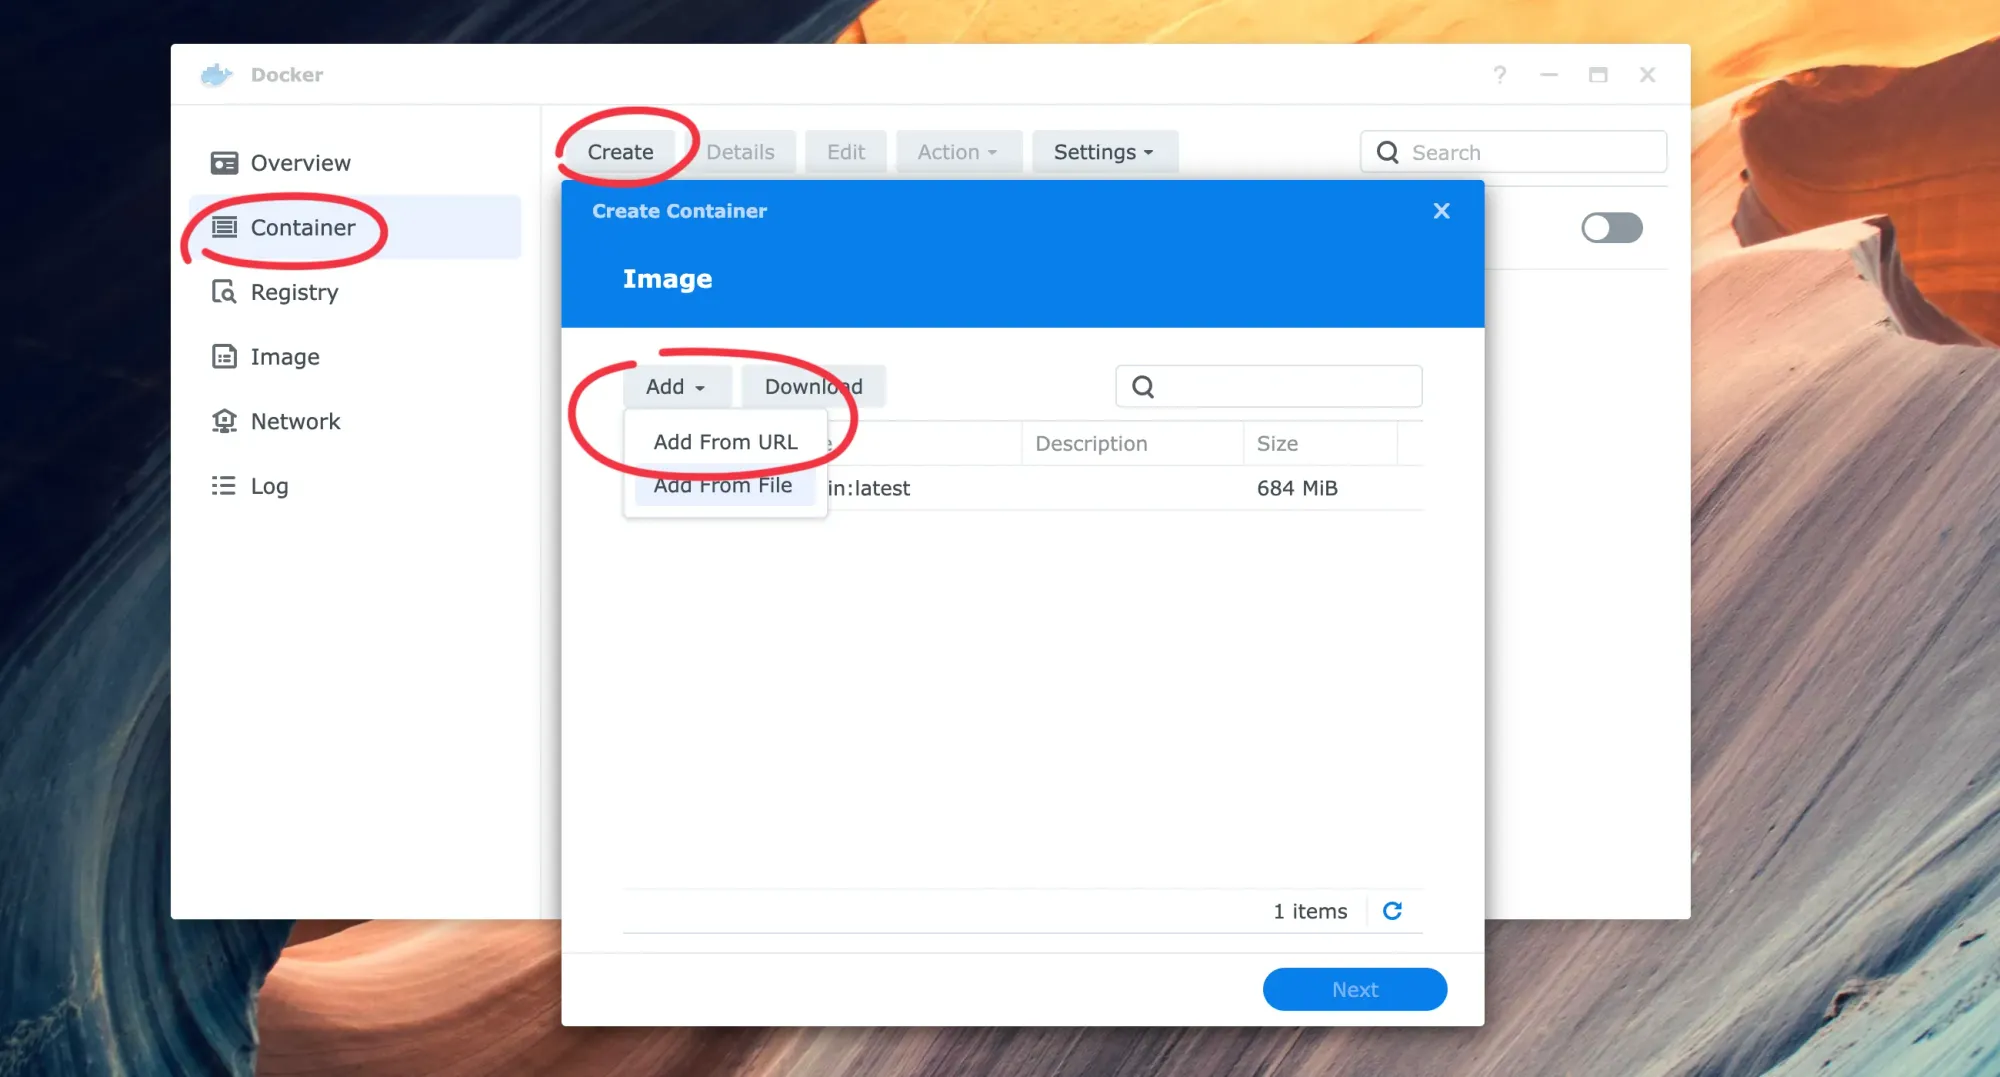
Download the Ghost image from the online repository
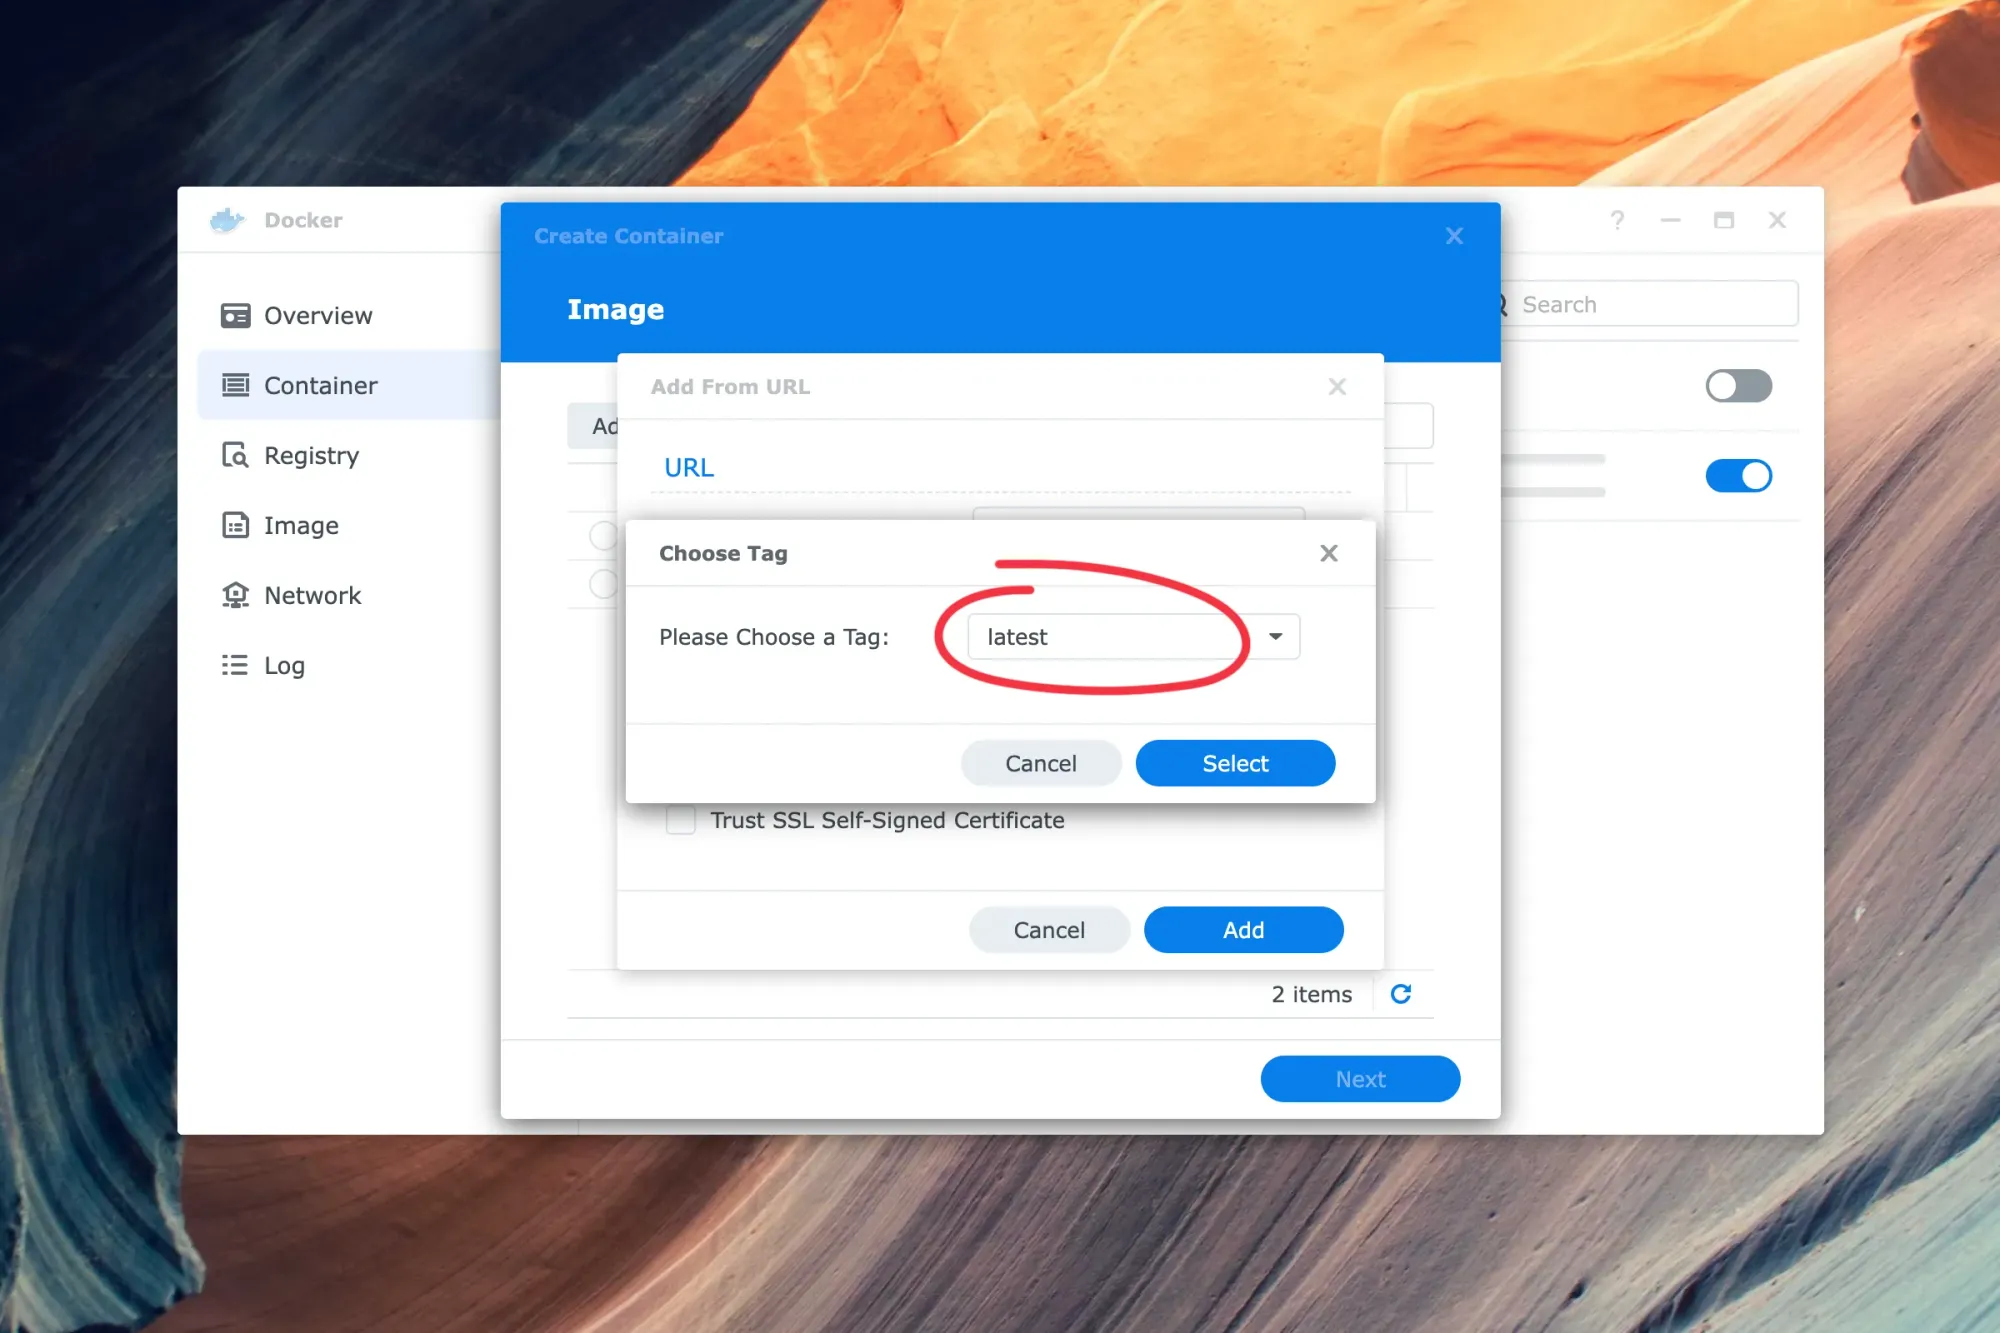
In the Docker application, go to the "Container" section on the left side, and click "Create" to open the "Create Container" window. Now you need to specify where to find the Ghost image for Docker. Click on the "Add" dropdown button and then "Add From URL".
Just type "ghost" (without quotes) in the URL field and click "Add".
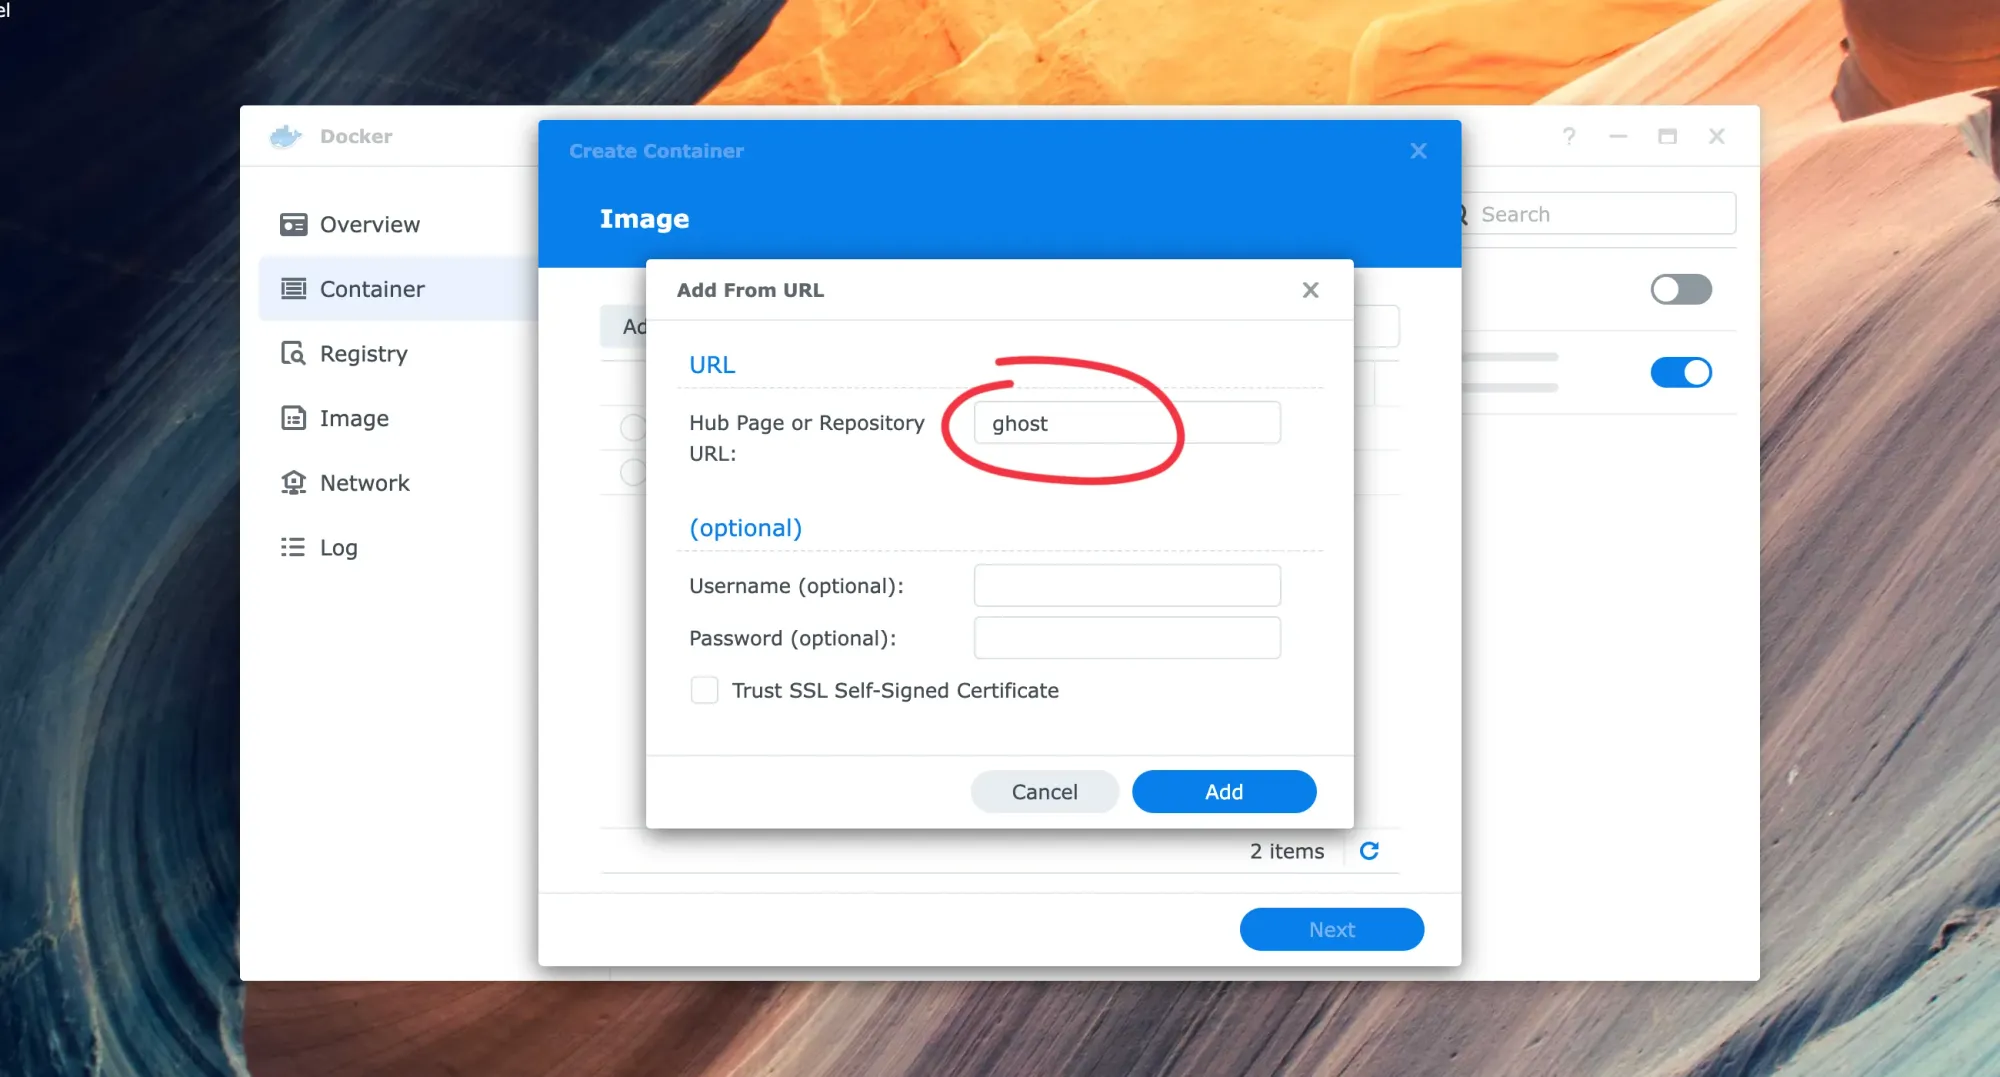
When asked to choose a tag, keep the default value to select the latest version of Ghost and click the "Select" button to start the download of the image. Once the image has been downloaded successfully, you should be able to select it and click "Next" to proceed with the setup.
Choose the network settings for the Ghost container
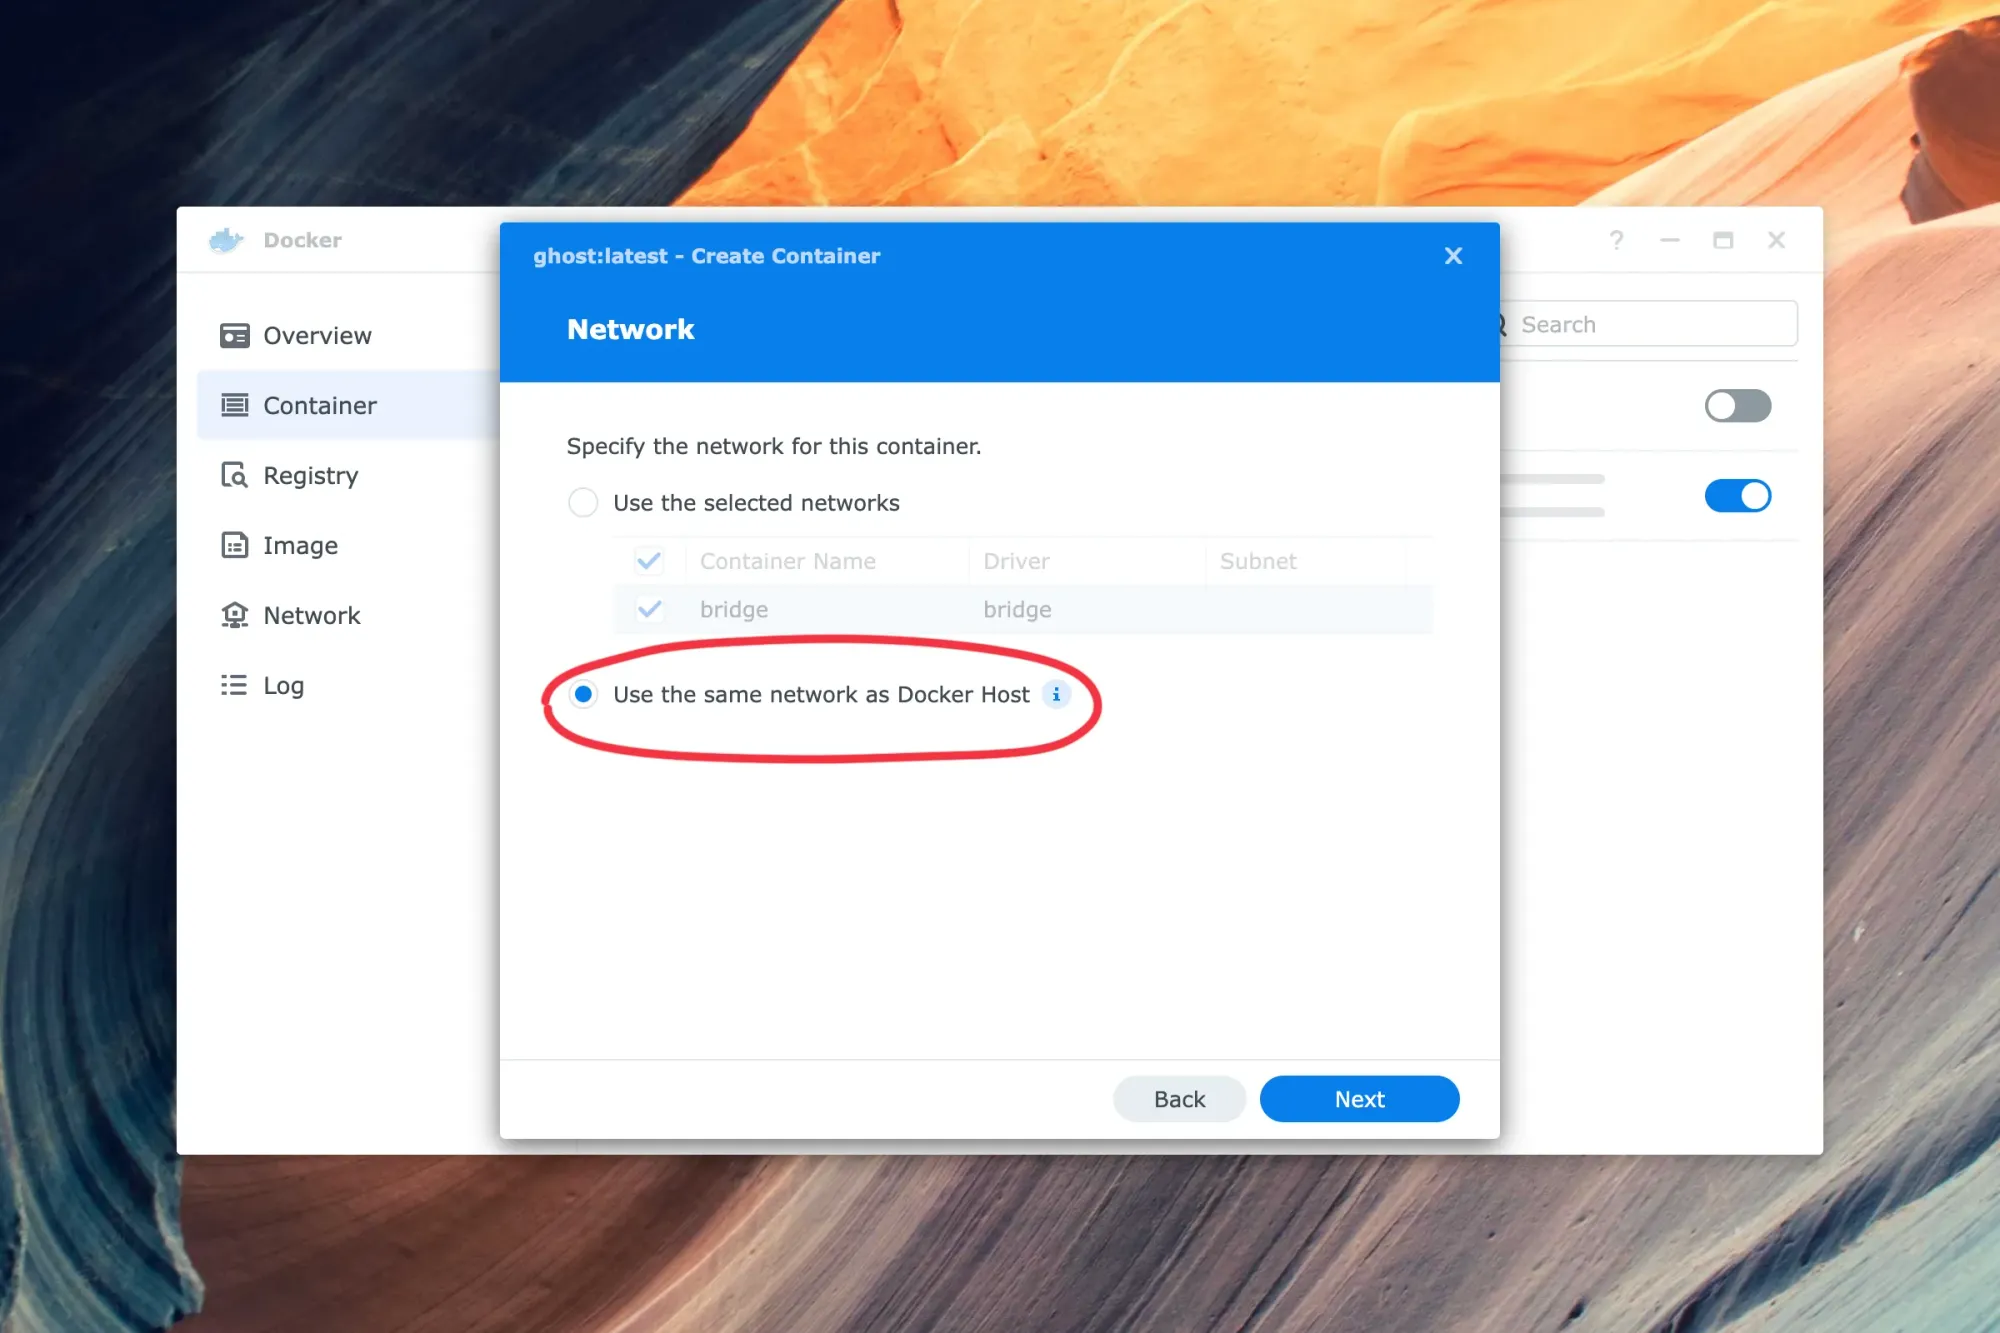
When asked to specify the network for the container, select "Use the same network as Docker Host" and click "Next".
To better understand the above choice, let's assume that the local IP address of your NAS device is 192.168.0.50. Once Ghost is installed, you'll be able to access it by typing in the browser the same IP of your NAS followed by the default port used by Ghost (http://192.168.0.50:2368).
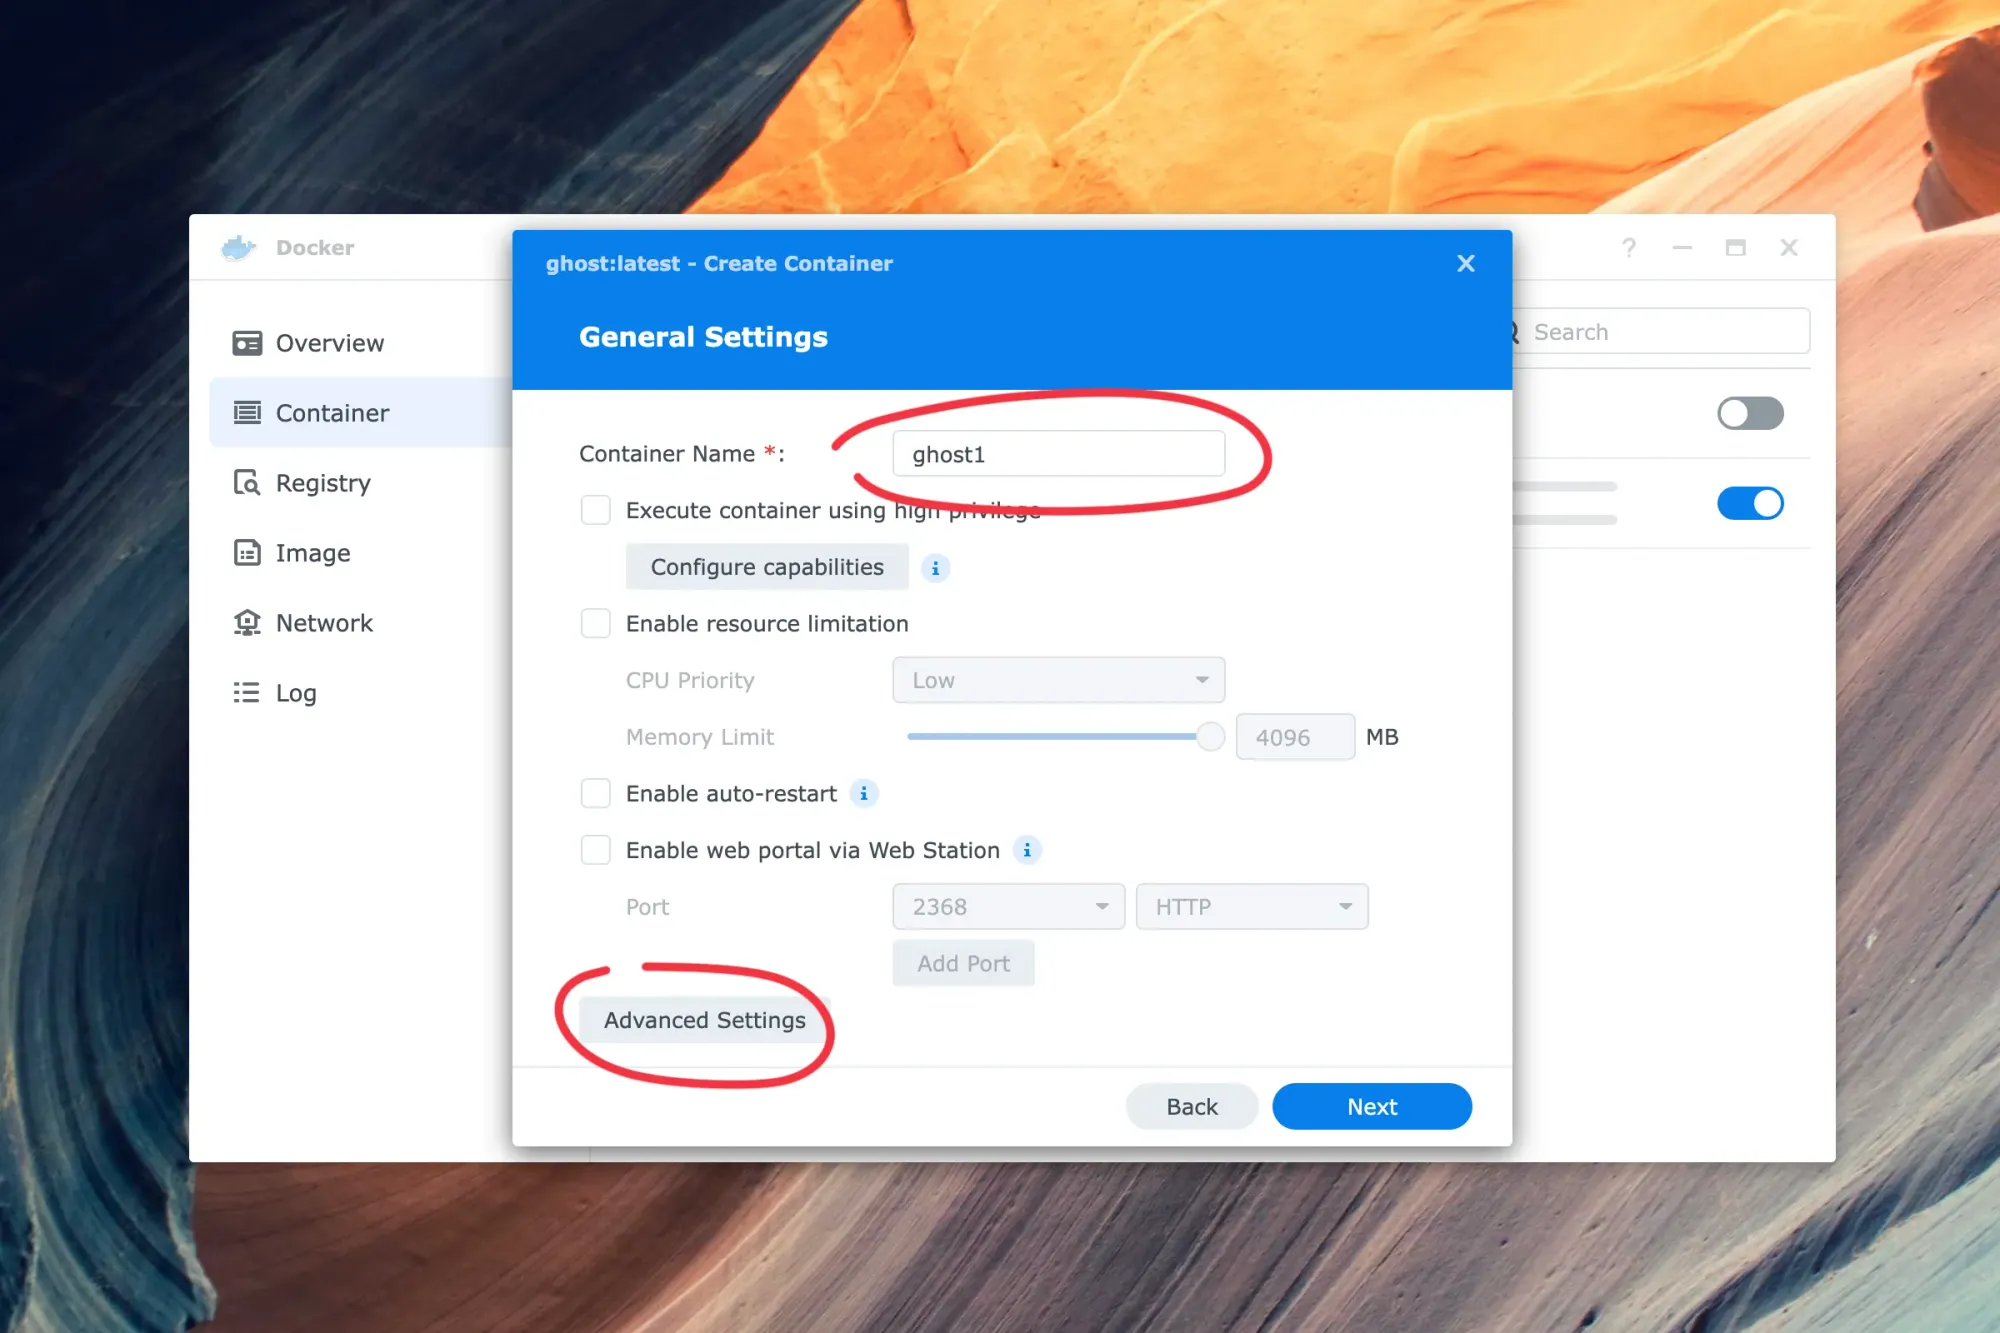
Choose the general settings for the Ghost container
On the General Settings screen, you'll be presented with different options to limit the resource consumption of the container, change the container name and a few others that you can leave as per default.
Set your Ghost blog URL and tell Ghost how to connect to a MySQL database
Before proceeding to the next screen, click "Advanced Settings", so you can add some environment variables that will be used by Ghost every time you start the container.
You need to specify the credentials to connect to the database and the default URL by adding the following environment variables:
database__client: mysql
database__connection__host: 192.168.0.50
database__connection__database: sampledatabase
database__connection__user: sampleuser
database__connection__password: mysqlSampleUserPass
url: http://192.168.0.50:2368
Make sure to replace the above values with the correct ones. The "url" and "database__connection__host" should match your Synology NAS IP address.
If you're thinking of why I asked you to enter that specific IP address and not your public IP address or domain name, it's because, if you wish to, you can change it later, along with other steps you'll have to follow later in this guide.
If you intend to keep your Ghost blog only visible inside your local network, then no other steps will be required.
Your Ghost DB user and password should match the ones you entered when installing MySQL (see step 5 of the linked guide). Once done, click "Save" and then "Next".

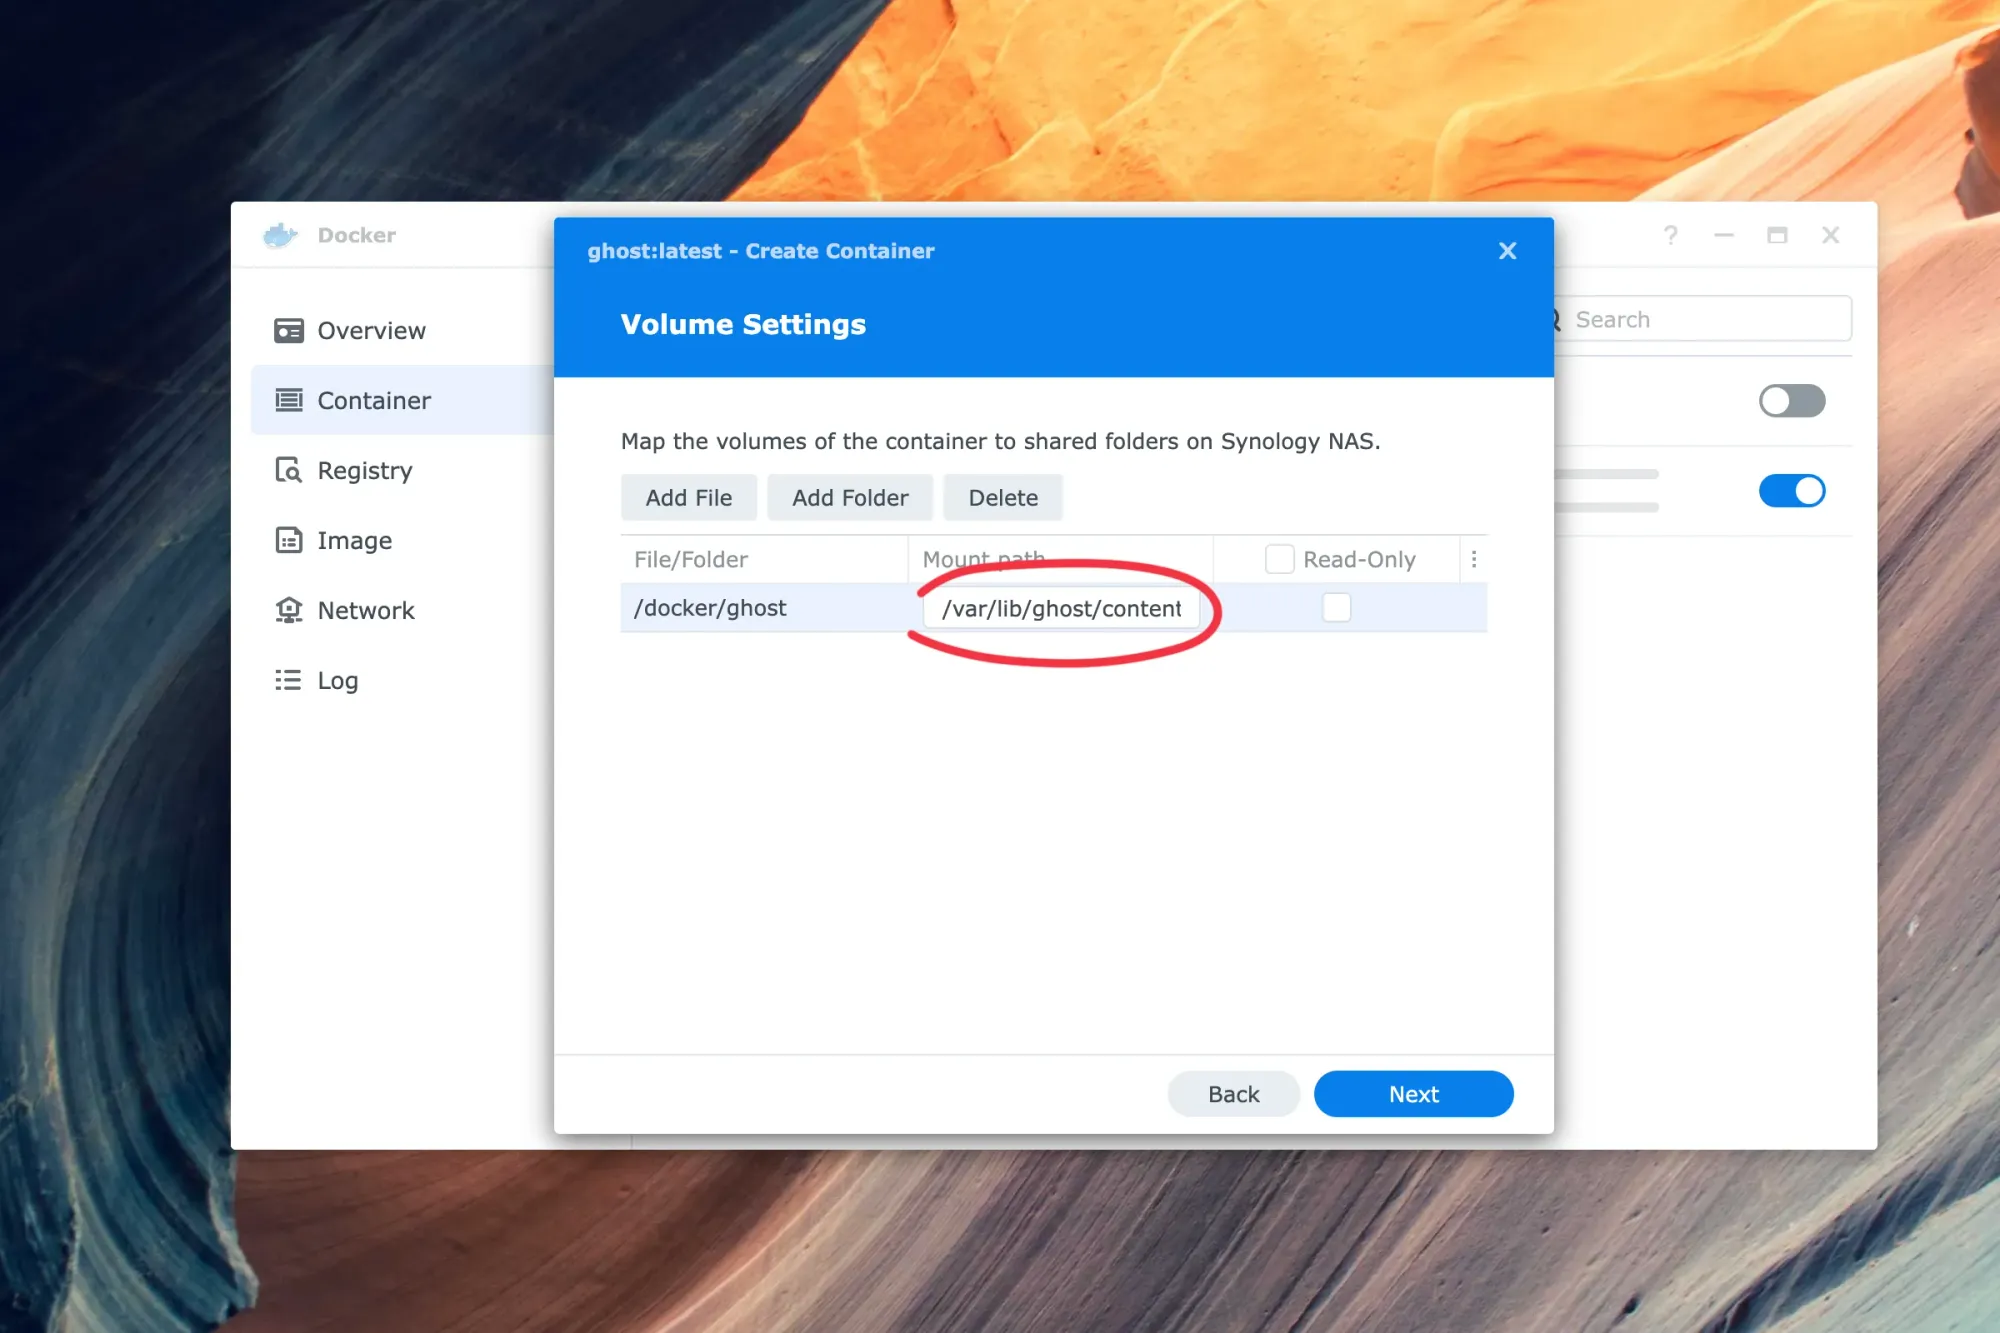
Volume Settings: tell Docker to store Ghost's images, themes and other data in a shared folder
You need to map the volume to a shared folder on your Synology NAS, so that Ghost can store its data. Click "Add Folder", "Create Folder", type "ghost" (without quotes) when requested to enter a folder name, click "OK", and then "Select".
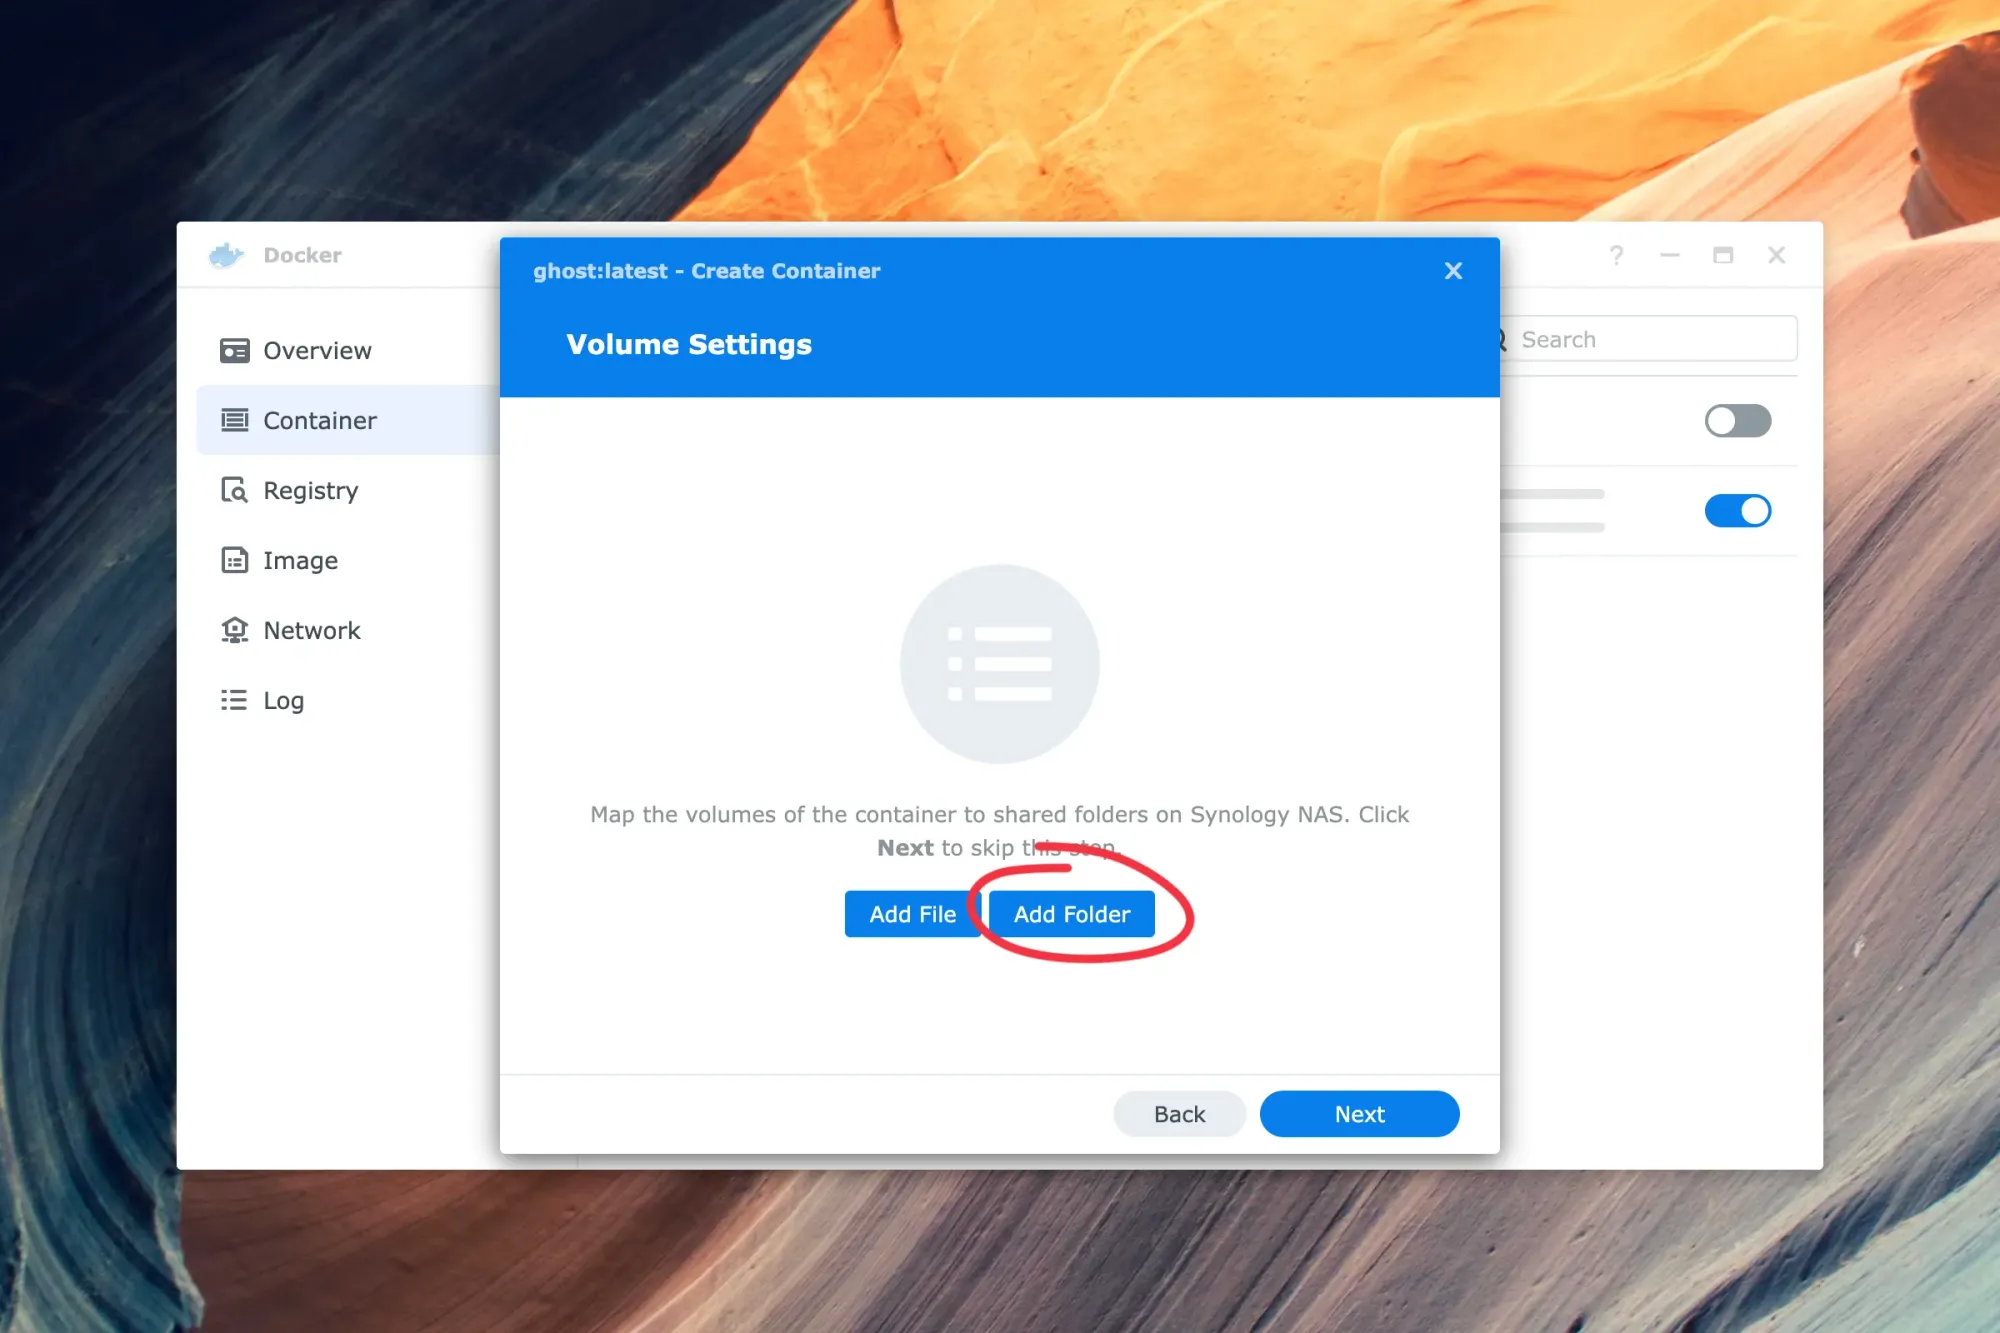
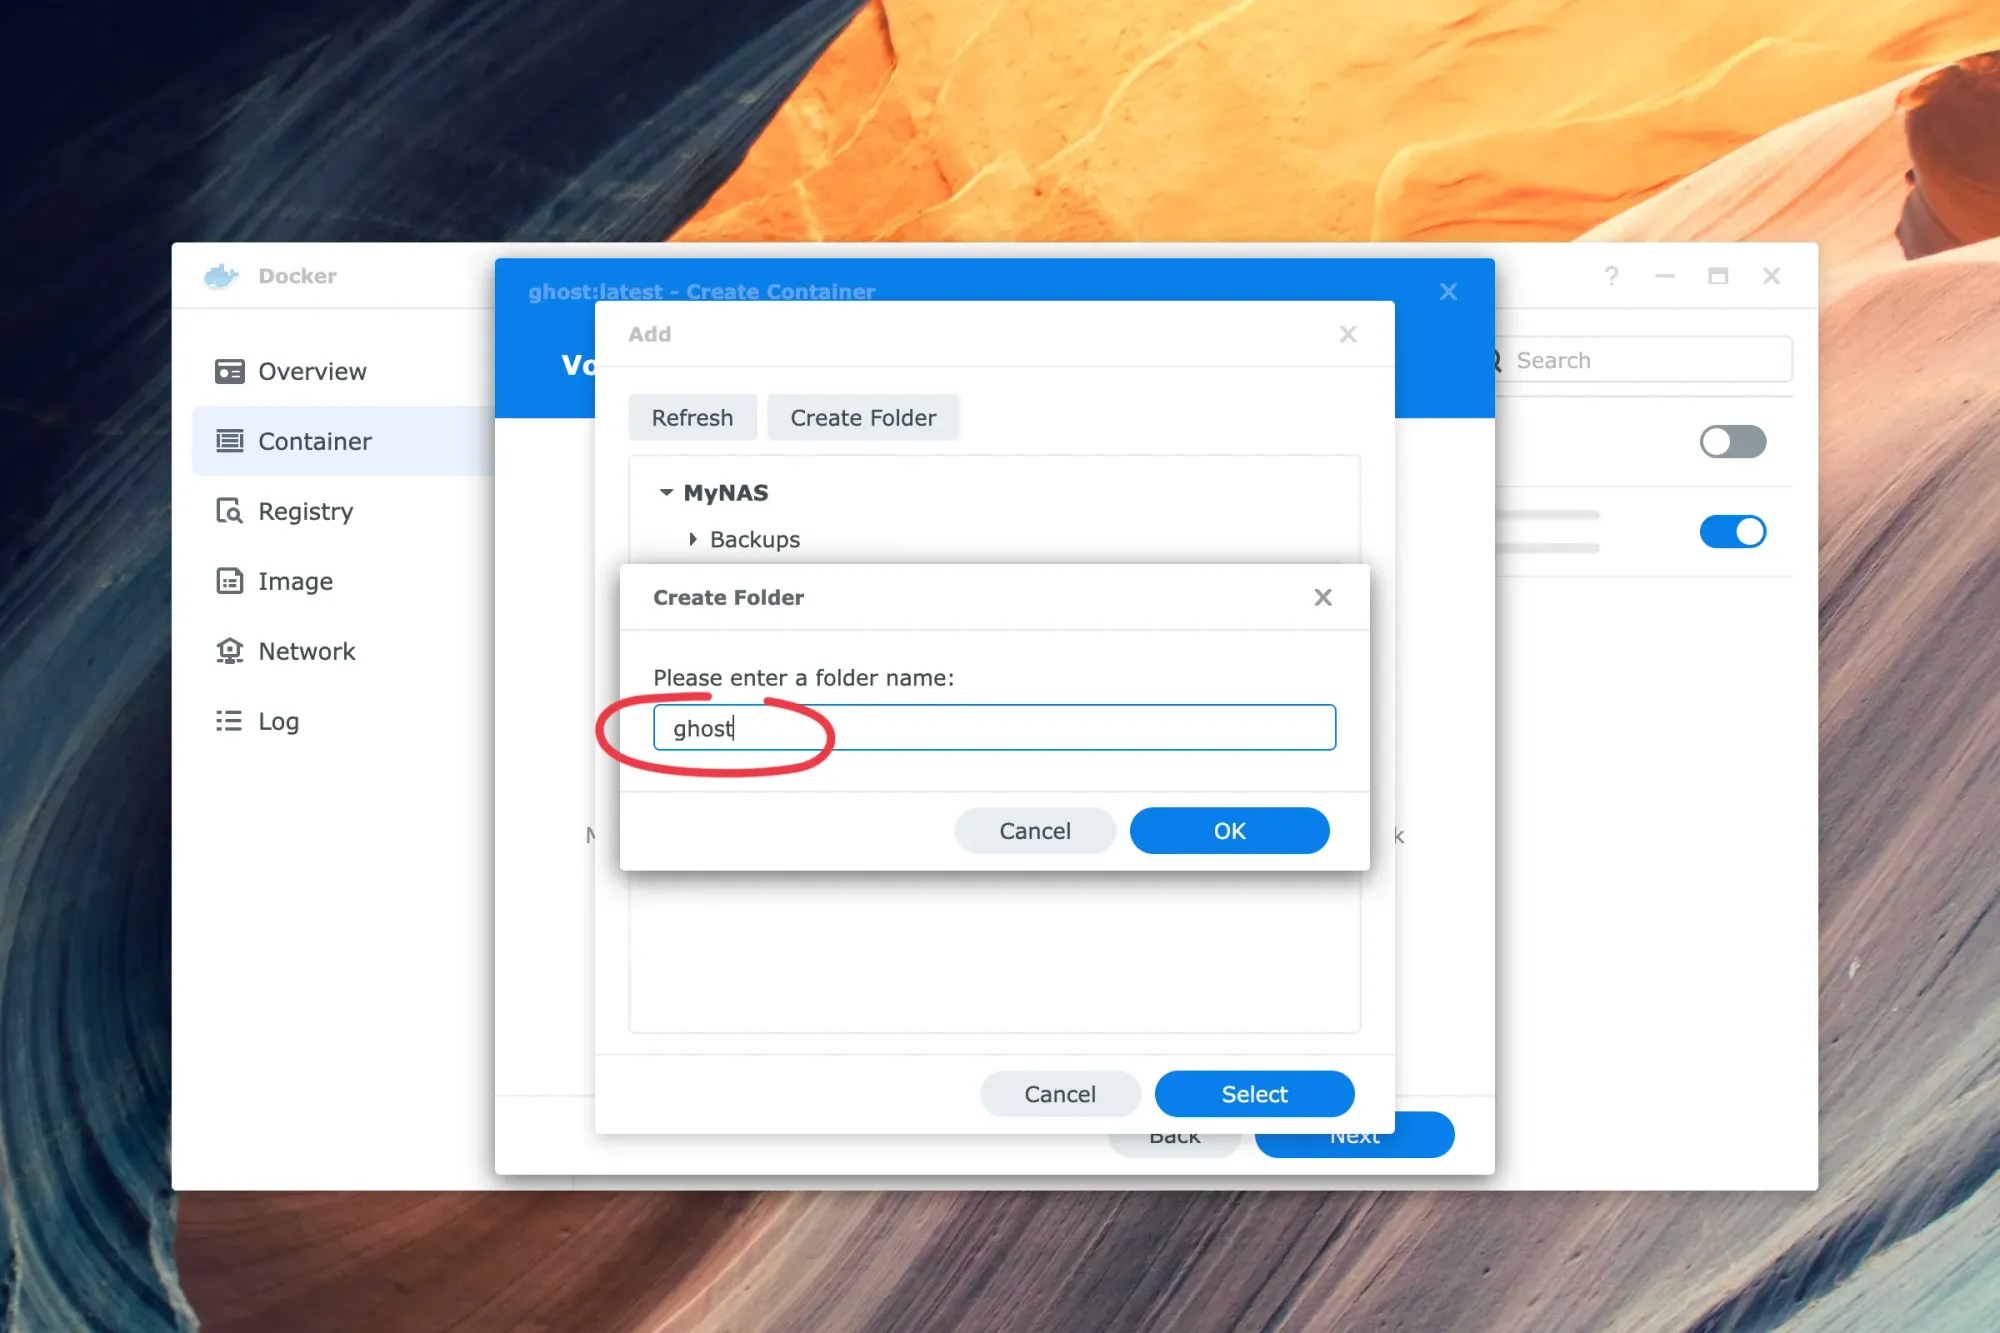
Enter "/var/lib/ghost/content" (without quotes) as the mount path and click "Next".
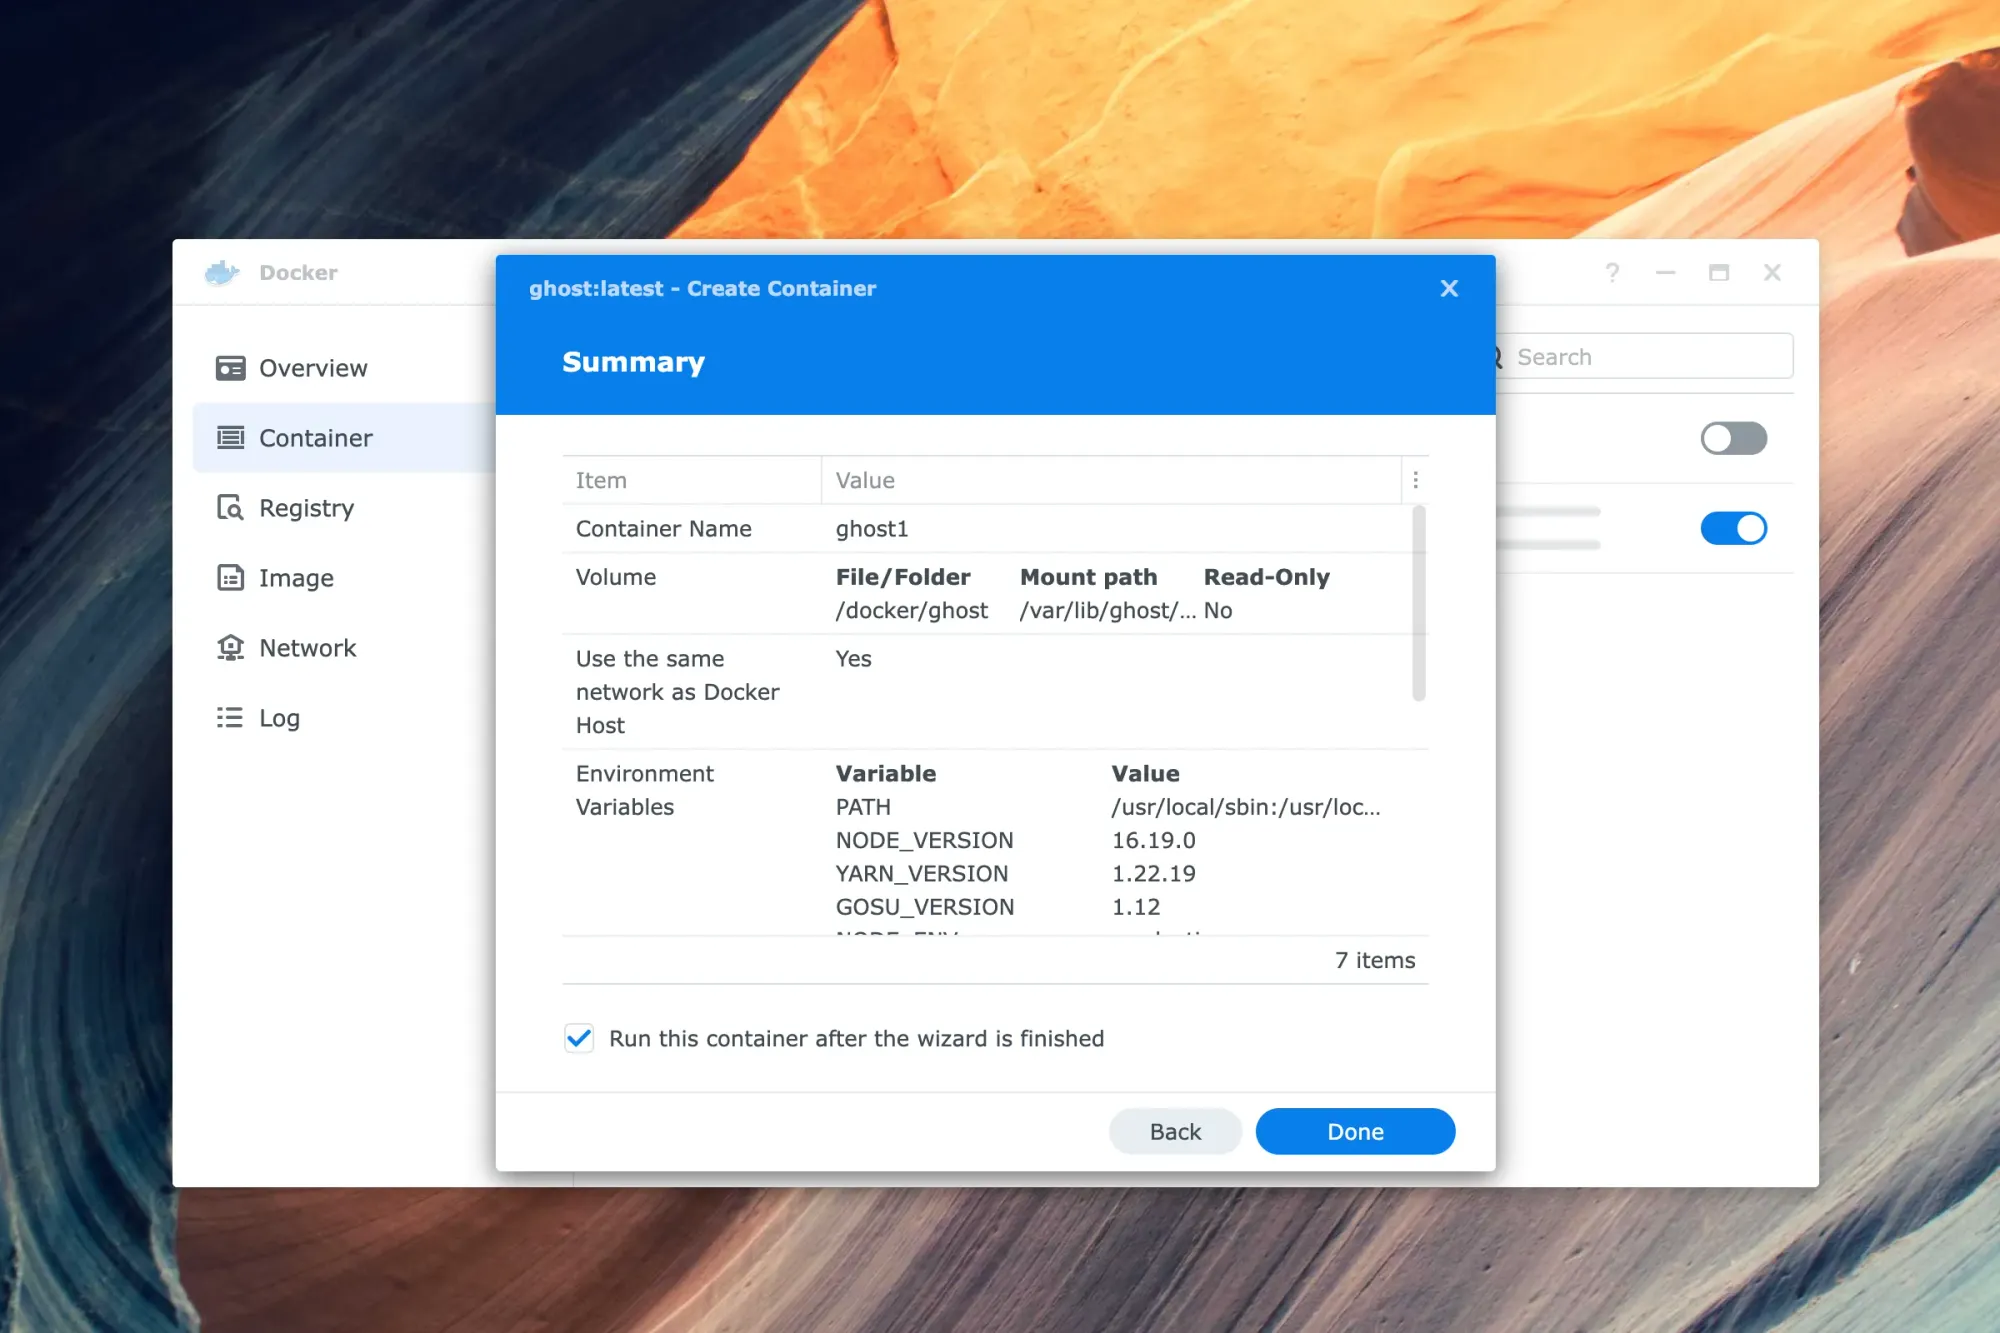
A summary window will be displayed where you can review all the settings before proceeding by clicking "Done".
Once you see the container running under Docker, you can open the browser with the URL matching your Synology NAS IP address. In my case, I'll open http://192.168.0.50:2368.
If you see the screen titled: "We'll be right back", no worries. It will take some time until Ghost completes its initialisation process.
Once Ghost is up and running, open http://192.168.0.50:2368/ghost to complete the setup and create your admin credentials.
Remember, you don't need to follow the next steps if you're happy to keep your Ghost blog accessible from your local network only.
How to make the Ghost blog accessible from the internet
Add and configure a free DDNS domain
The following steps will guide you on how to add and configure a free Synology domain. I've chosen Synology as the DDNS provider just for convenience, but you can use another one if you prefer.
If you haven't done it before, sign in to Synology Account by opening your Synology Control Panel and clicking "Synology Account" on the left sidebar.
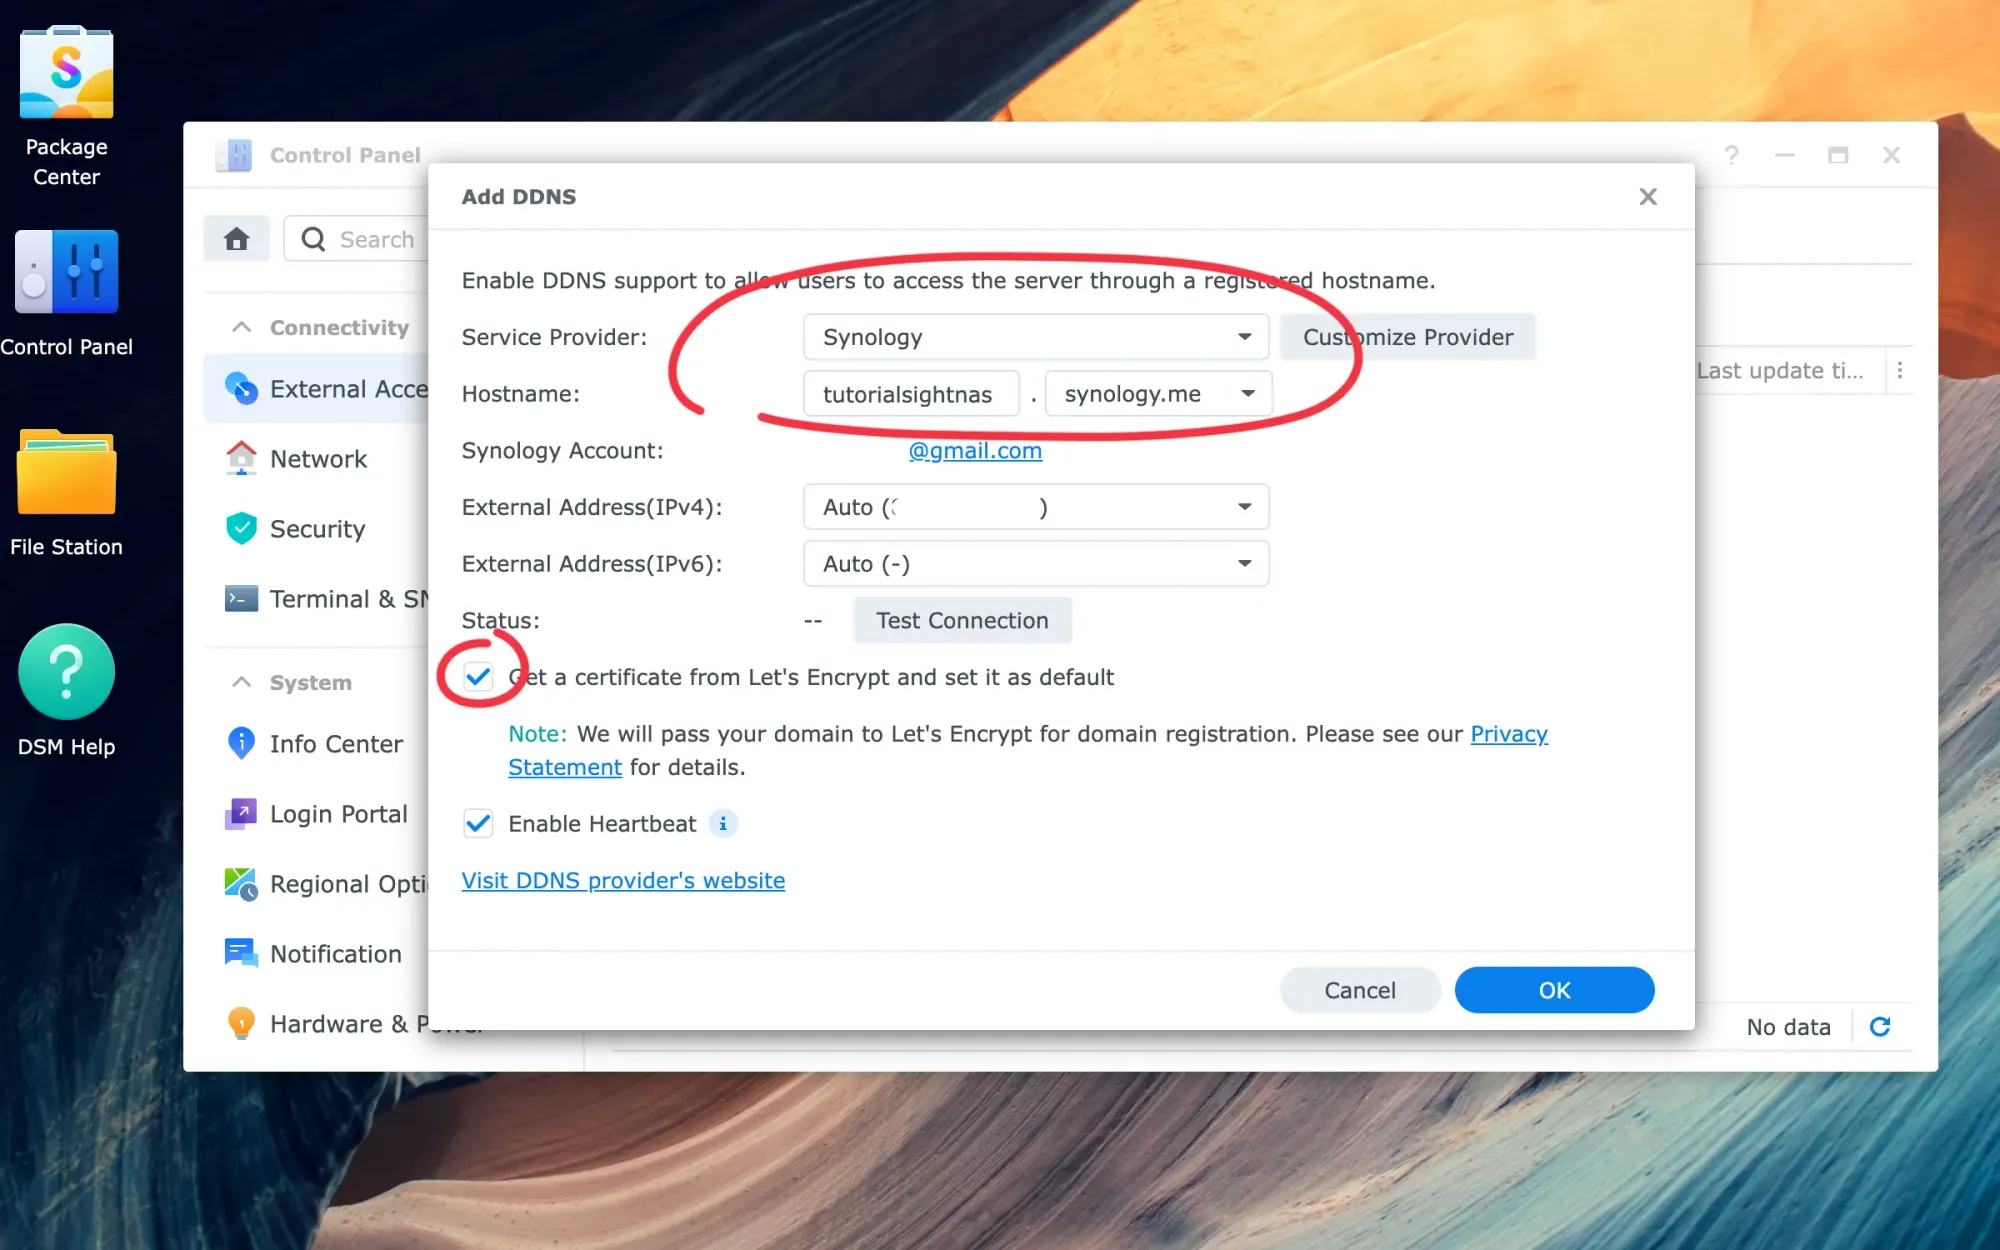
Now that you're signed in, on your Synology Control Panel, click "External Access" on the left sidebar, then click the "DDNS" tab and then click "Add".
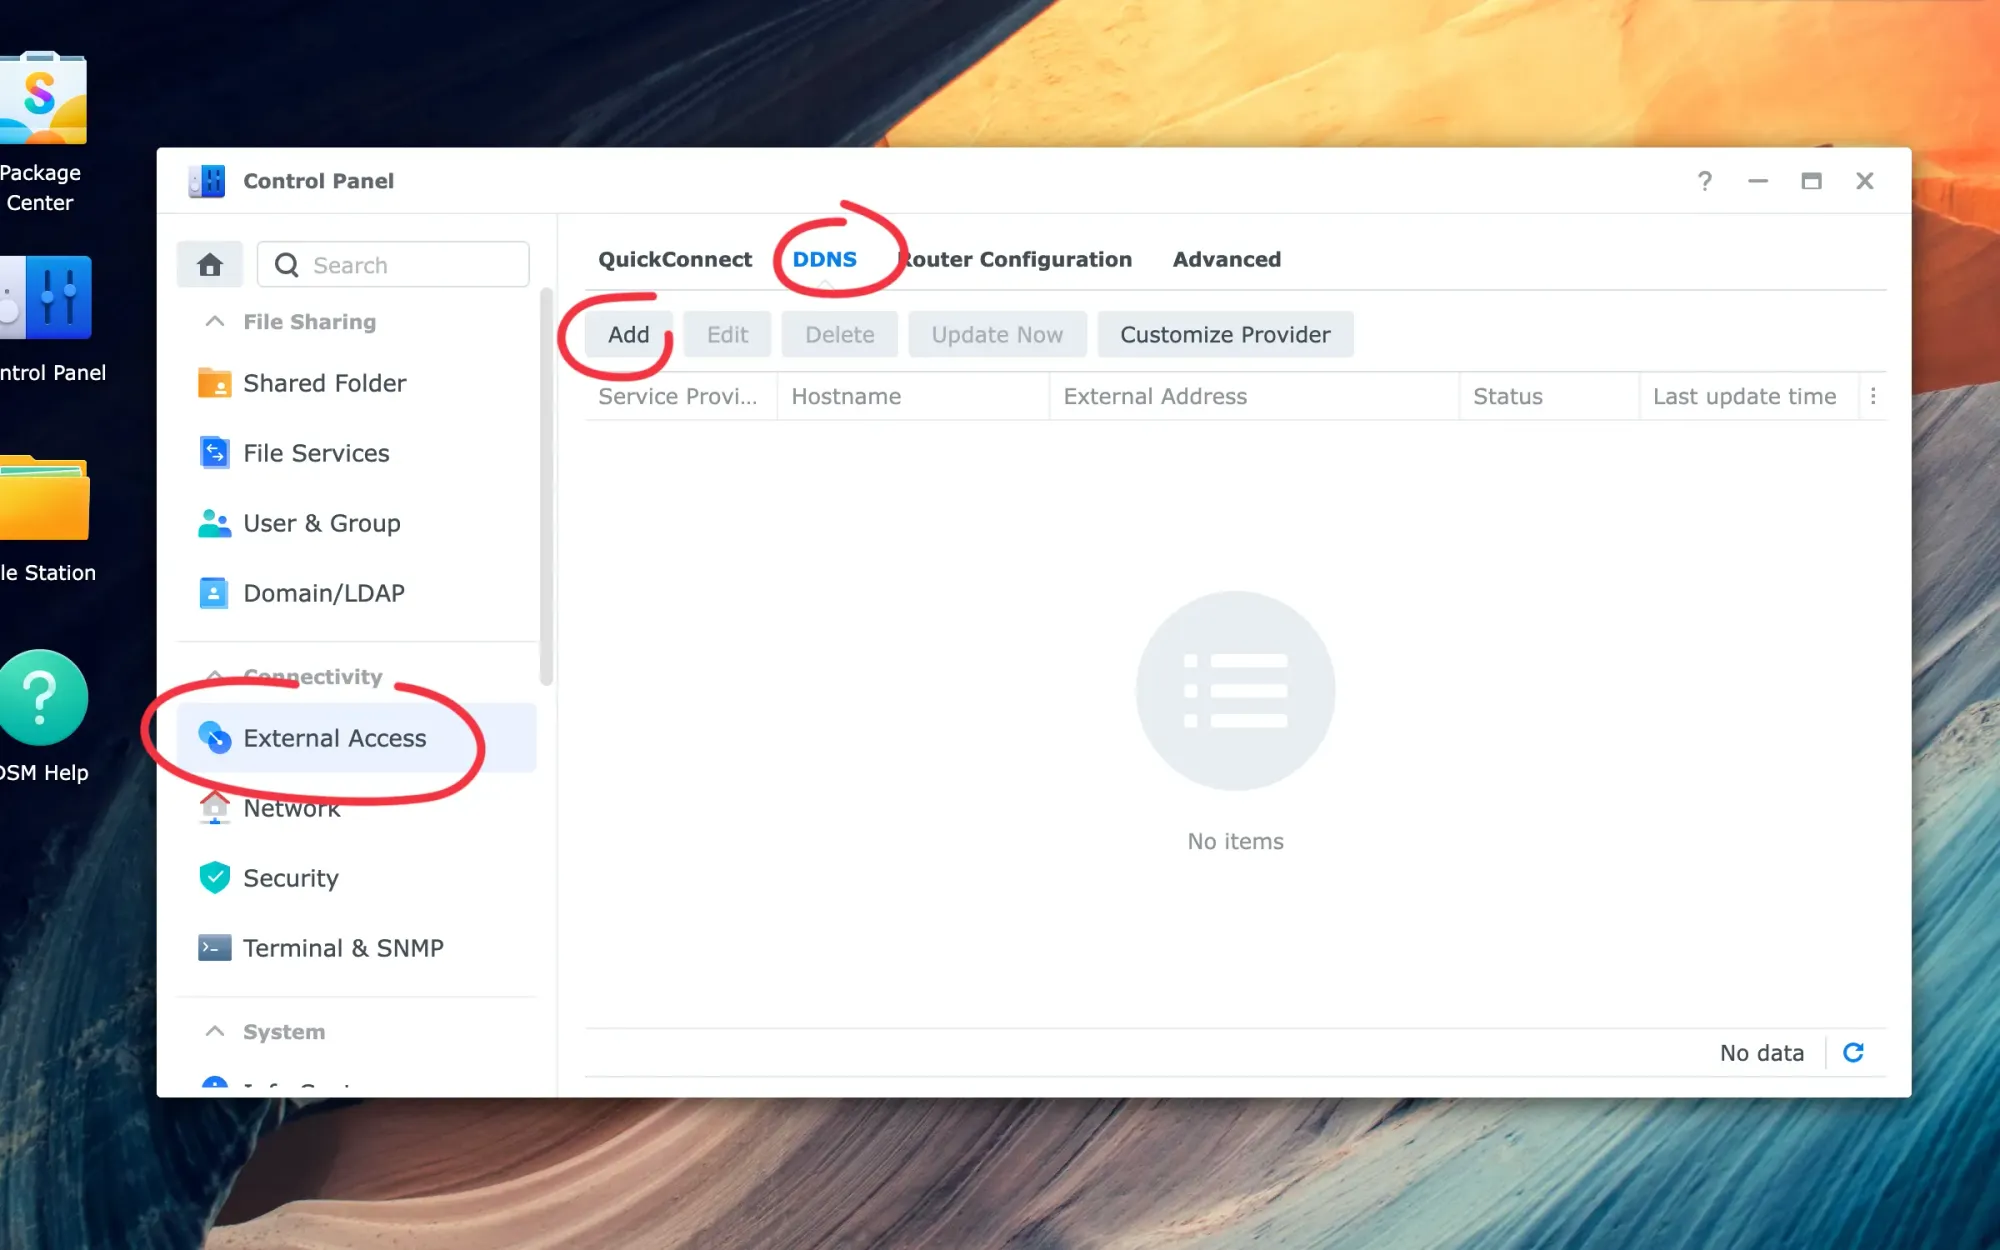
Choose "Synology" from the drop-down list as the service provider, type the desired hostname for your NAS (e.g. tutorialsightnas), check "Get a certificate from Let's Encrypt and set it as default", and click "OK".
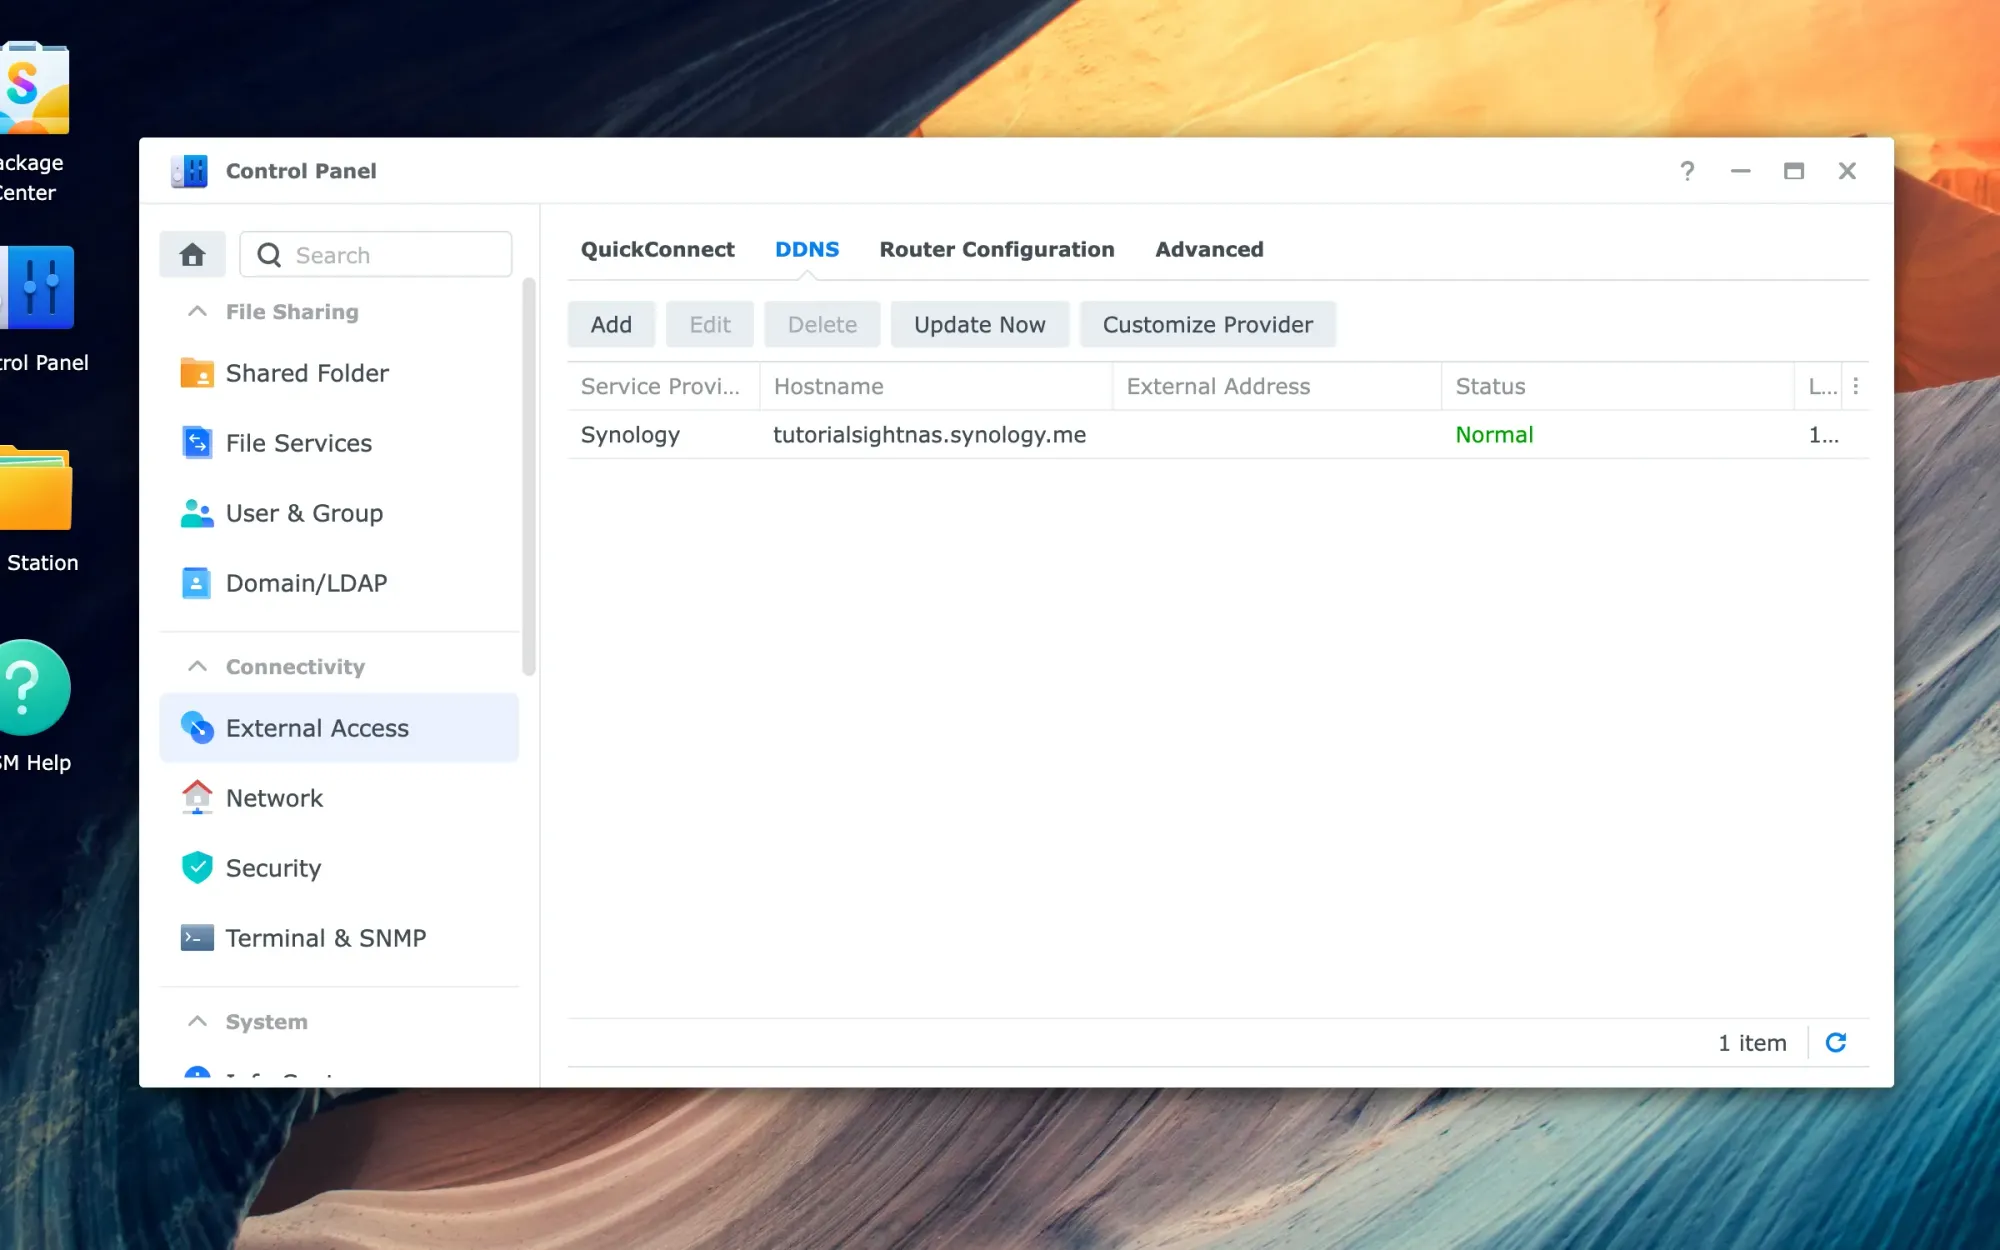
If everything went well, you should see your hostname added to the list with the value "Normal" as a status.
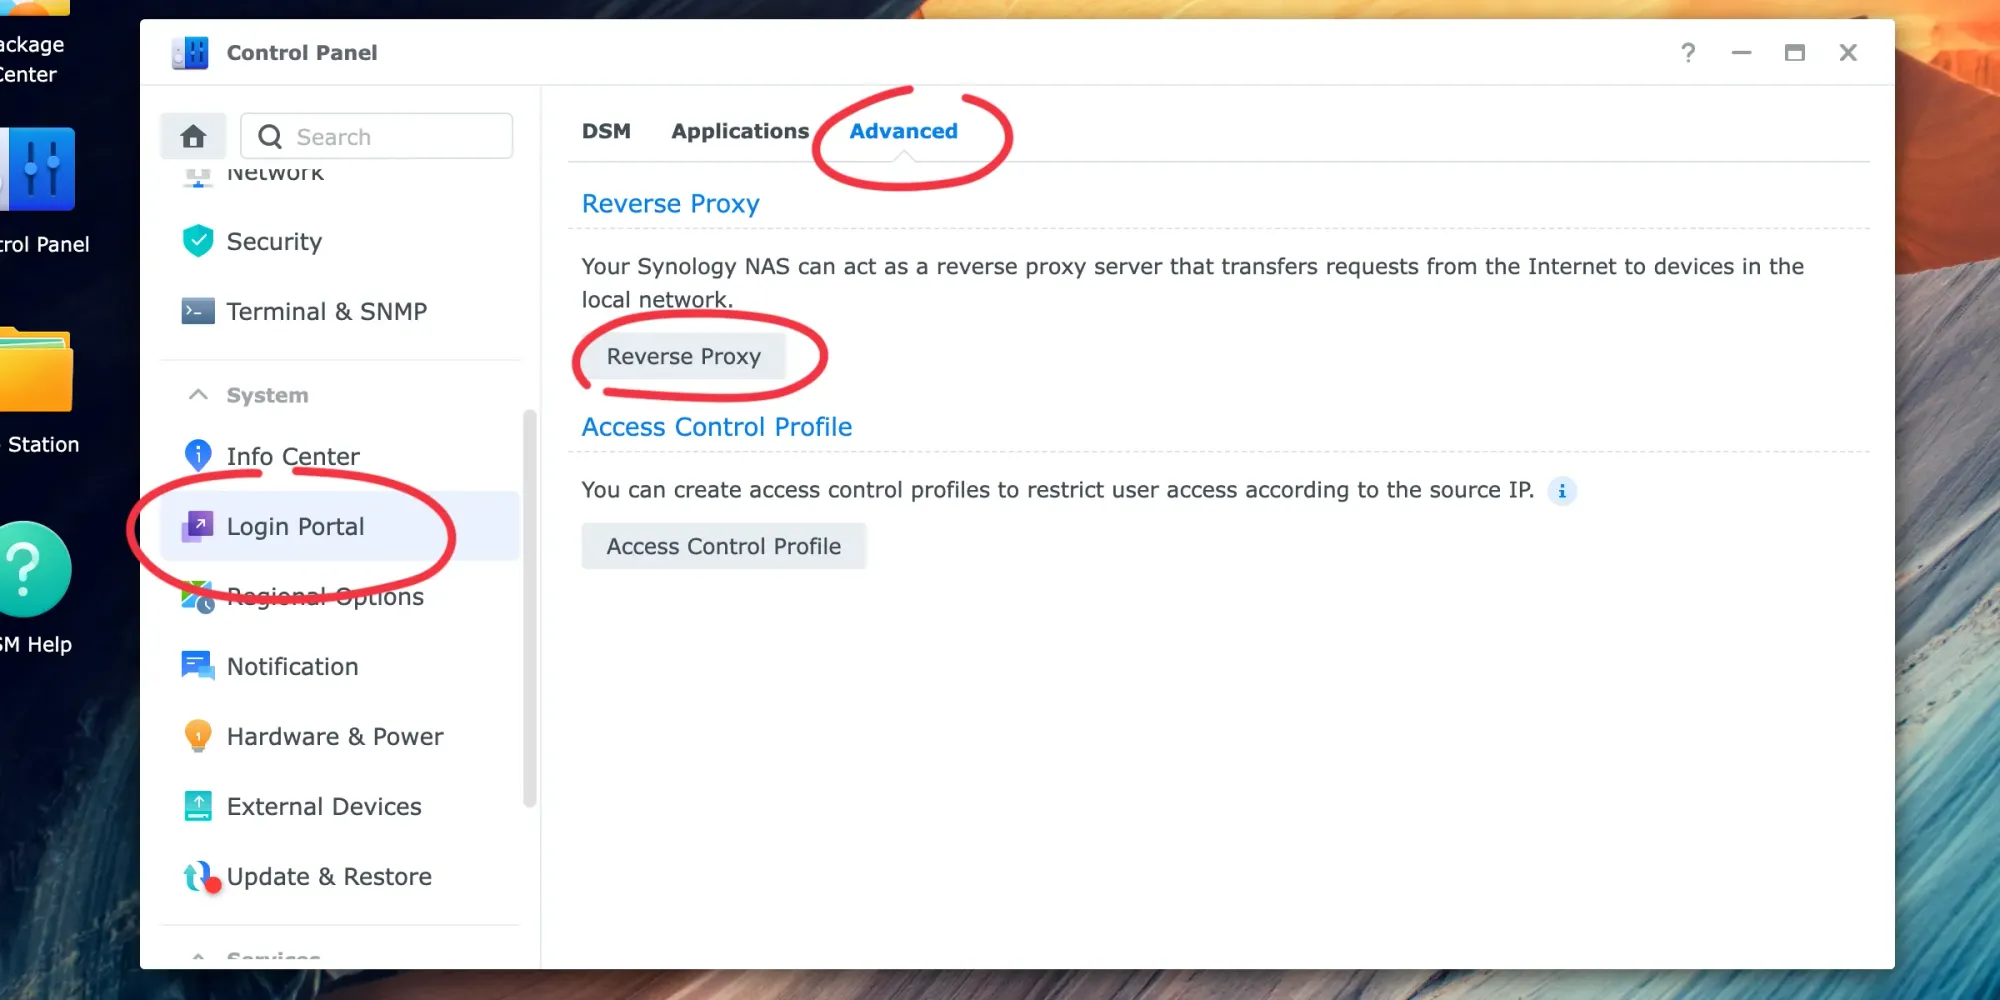
Create a reverse proxy rule for your Ghost blog
To be sure that a visitor typing your site URL on their browser can see your blog, you need to create a reverse proxy rule on your NAS.
In your Synology Control Panel, click "Login Portal" on the left sidebar, then click the tab "Advanced" and then "Reverse Proxy".
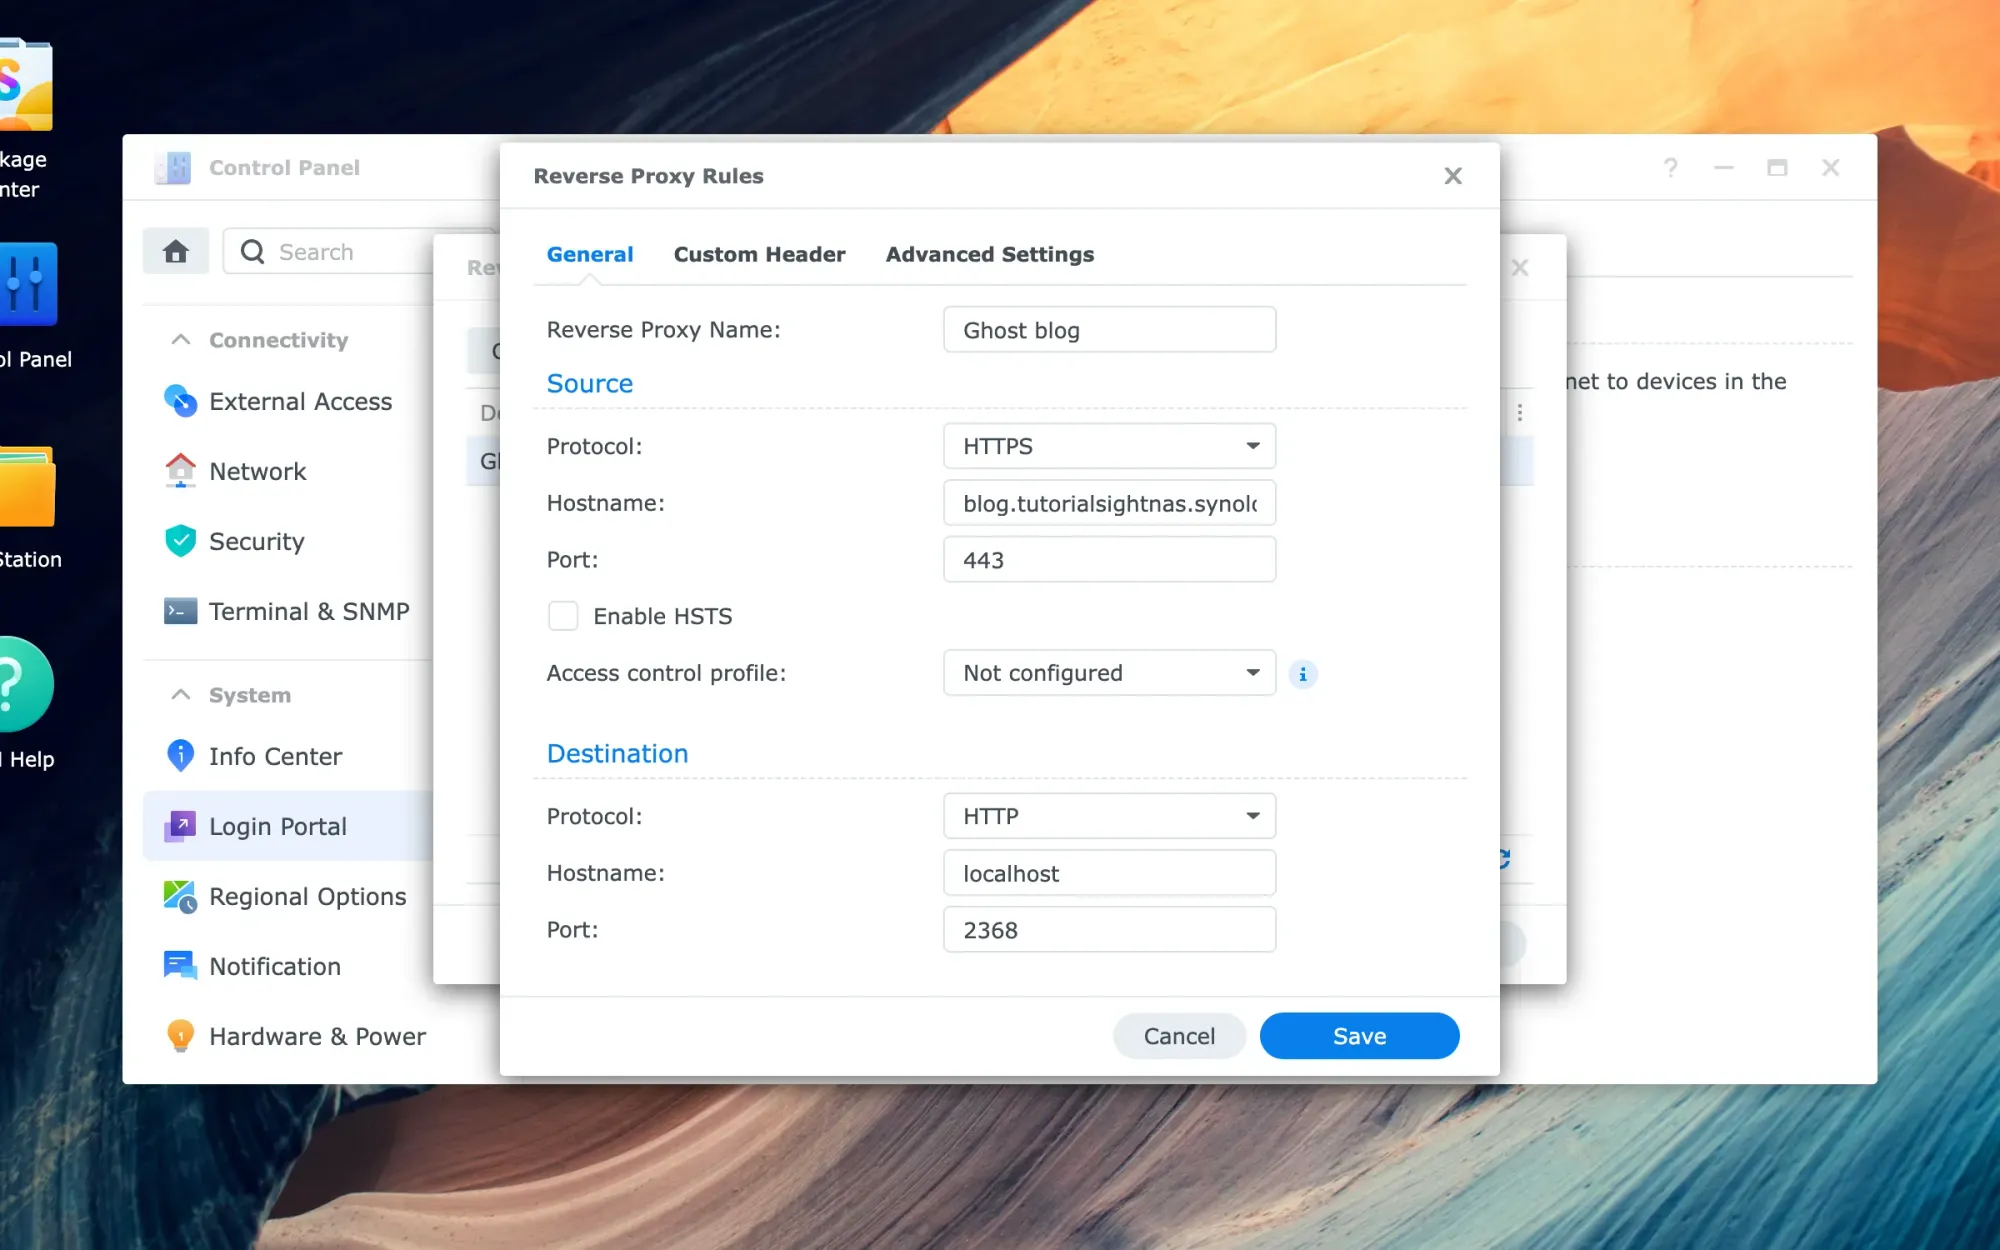
Click "Create", enter "Ghost blog" as the Reverse Proxy Name, and the following values under "Source" (remember to change the hostname with yours):
Protocol: HTTPS
Hostname: blog.tutorialsightnas.synology.me
Port: 443
And then under "Destination":
Protocol: HTTP
Hostname: localhost
Port: 2368
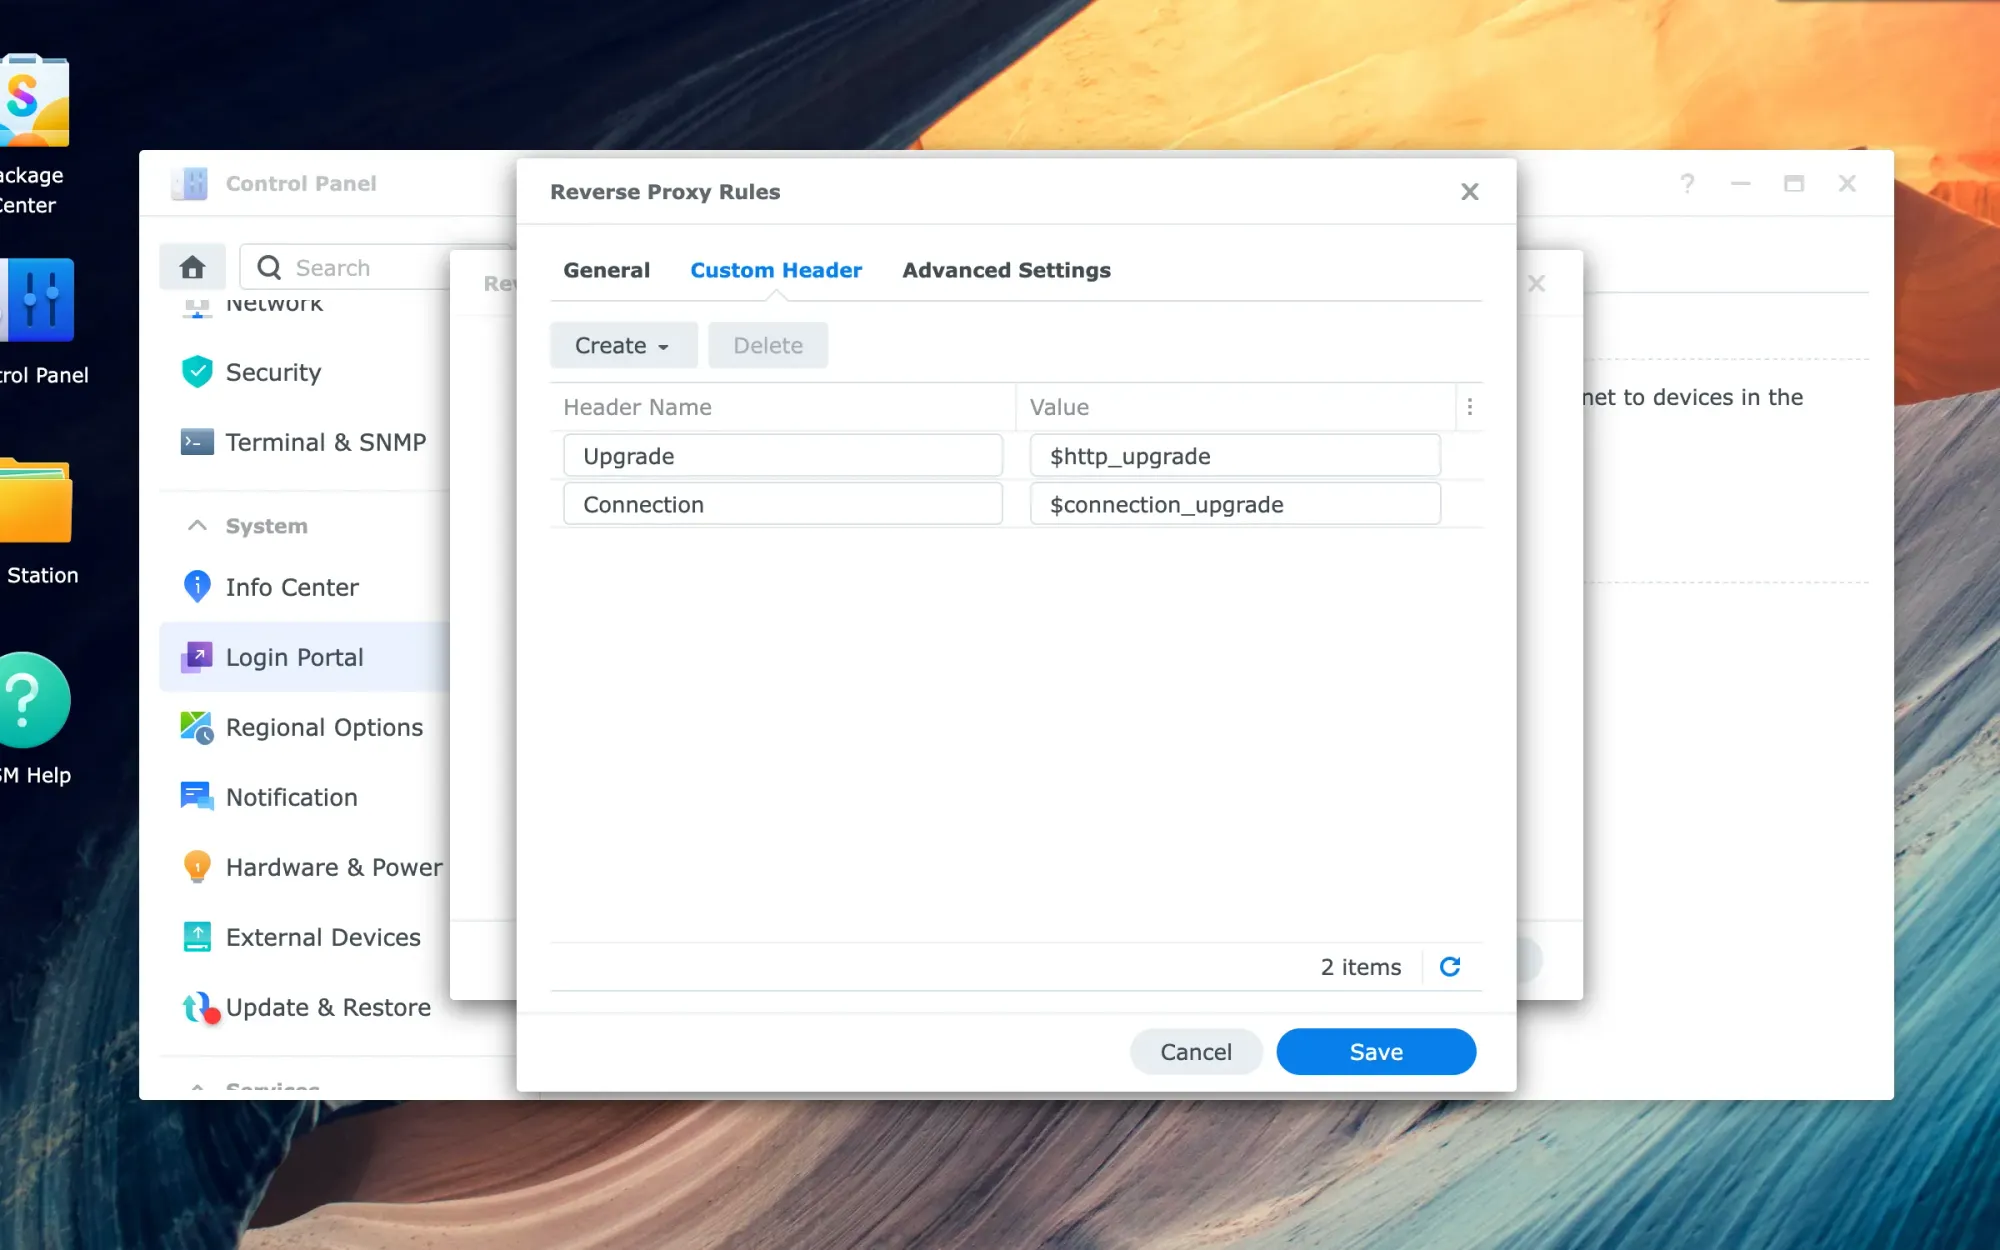
Click the "Custom Header" tab, then click "Create", click "WebSocket", then click "Save", and the two required headers will get added automatically.
Update your Ghost site URL with your free domain name
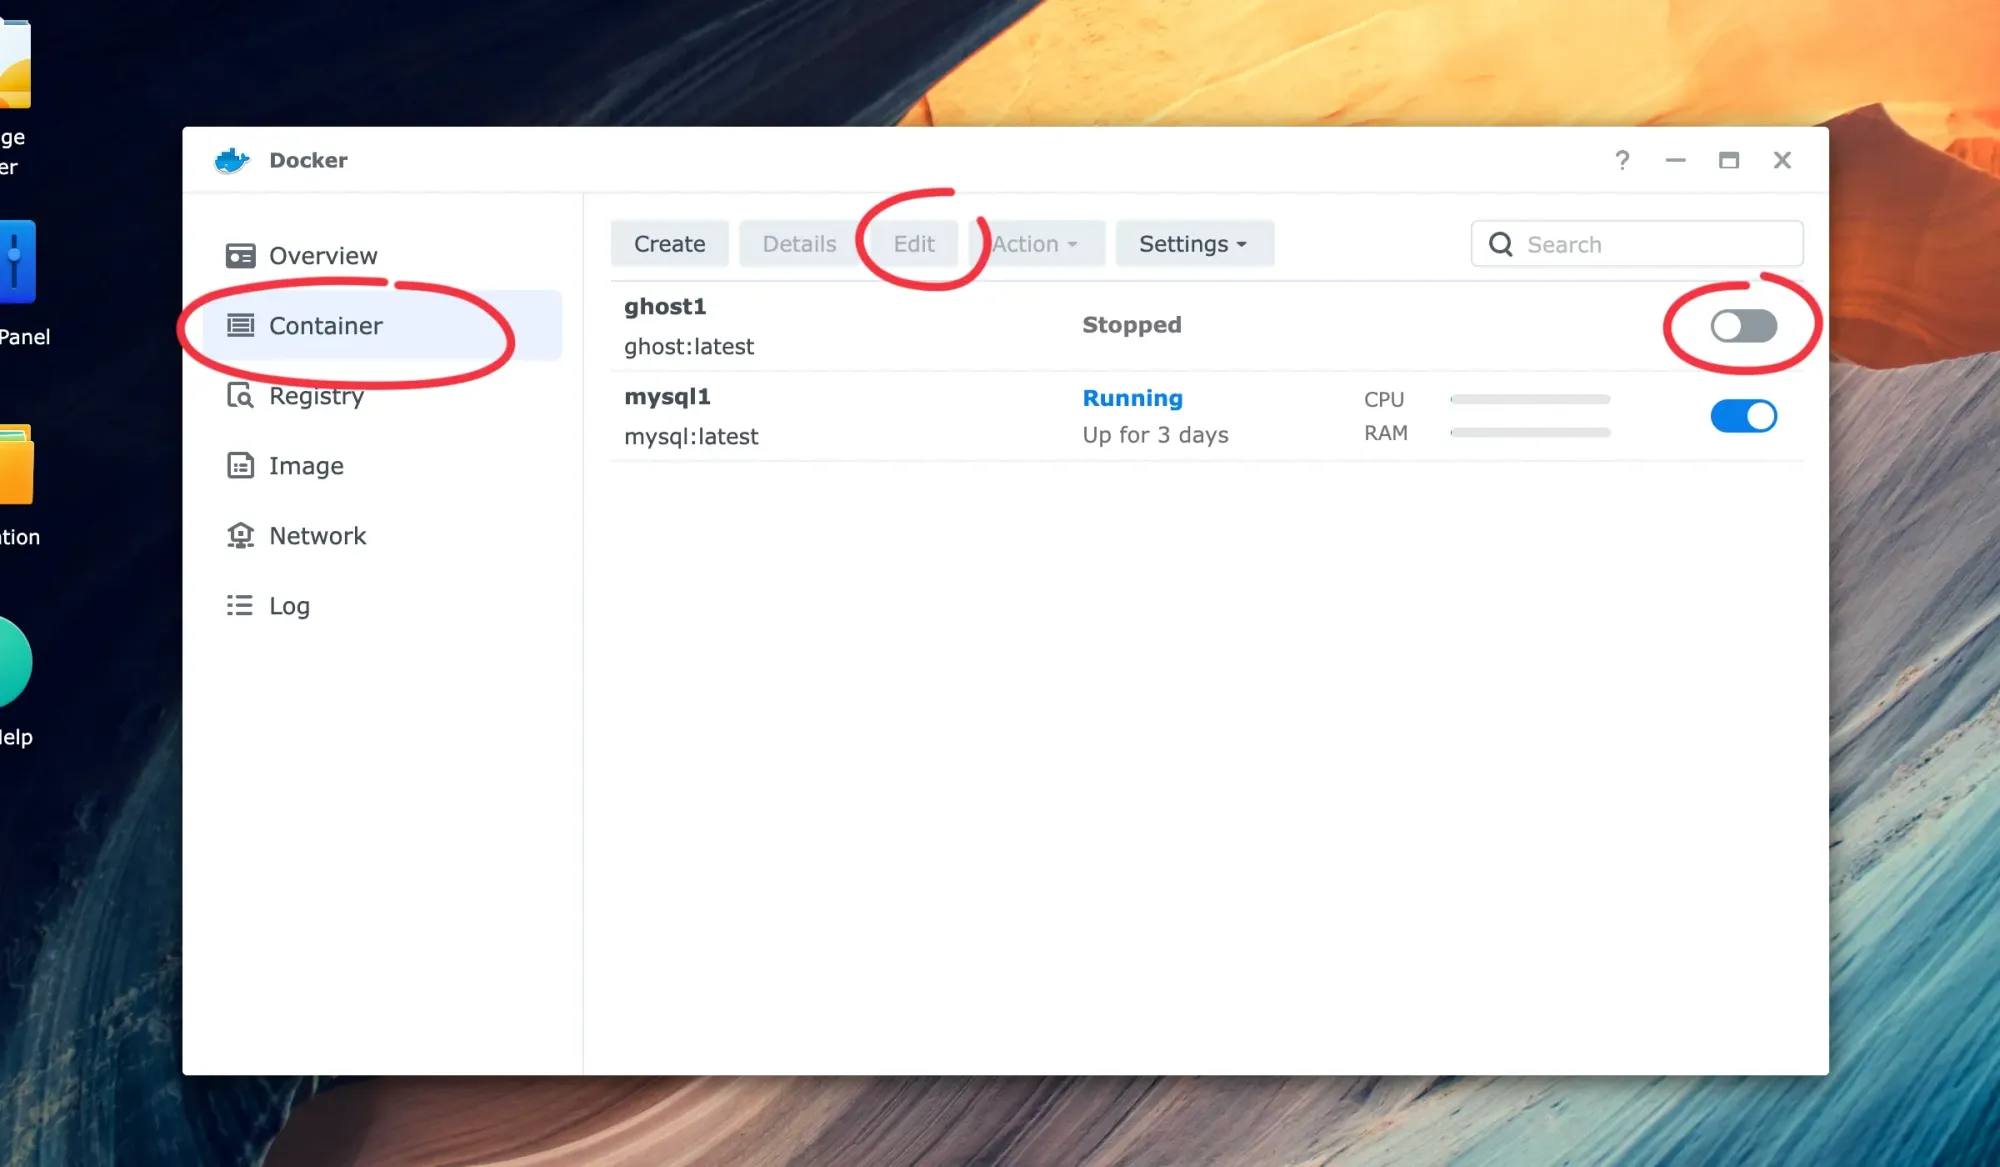
Open Docker, click "Container" on the left sidebar, then if Ghost is running, click the toggle next to it to stop it and then click "Edit".
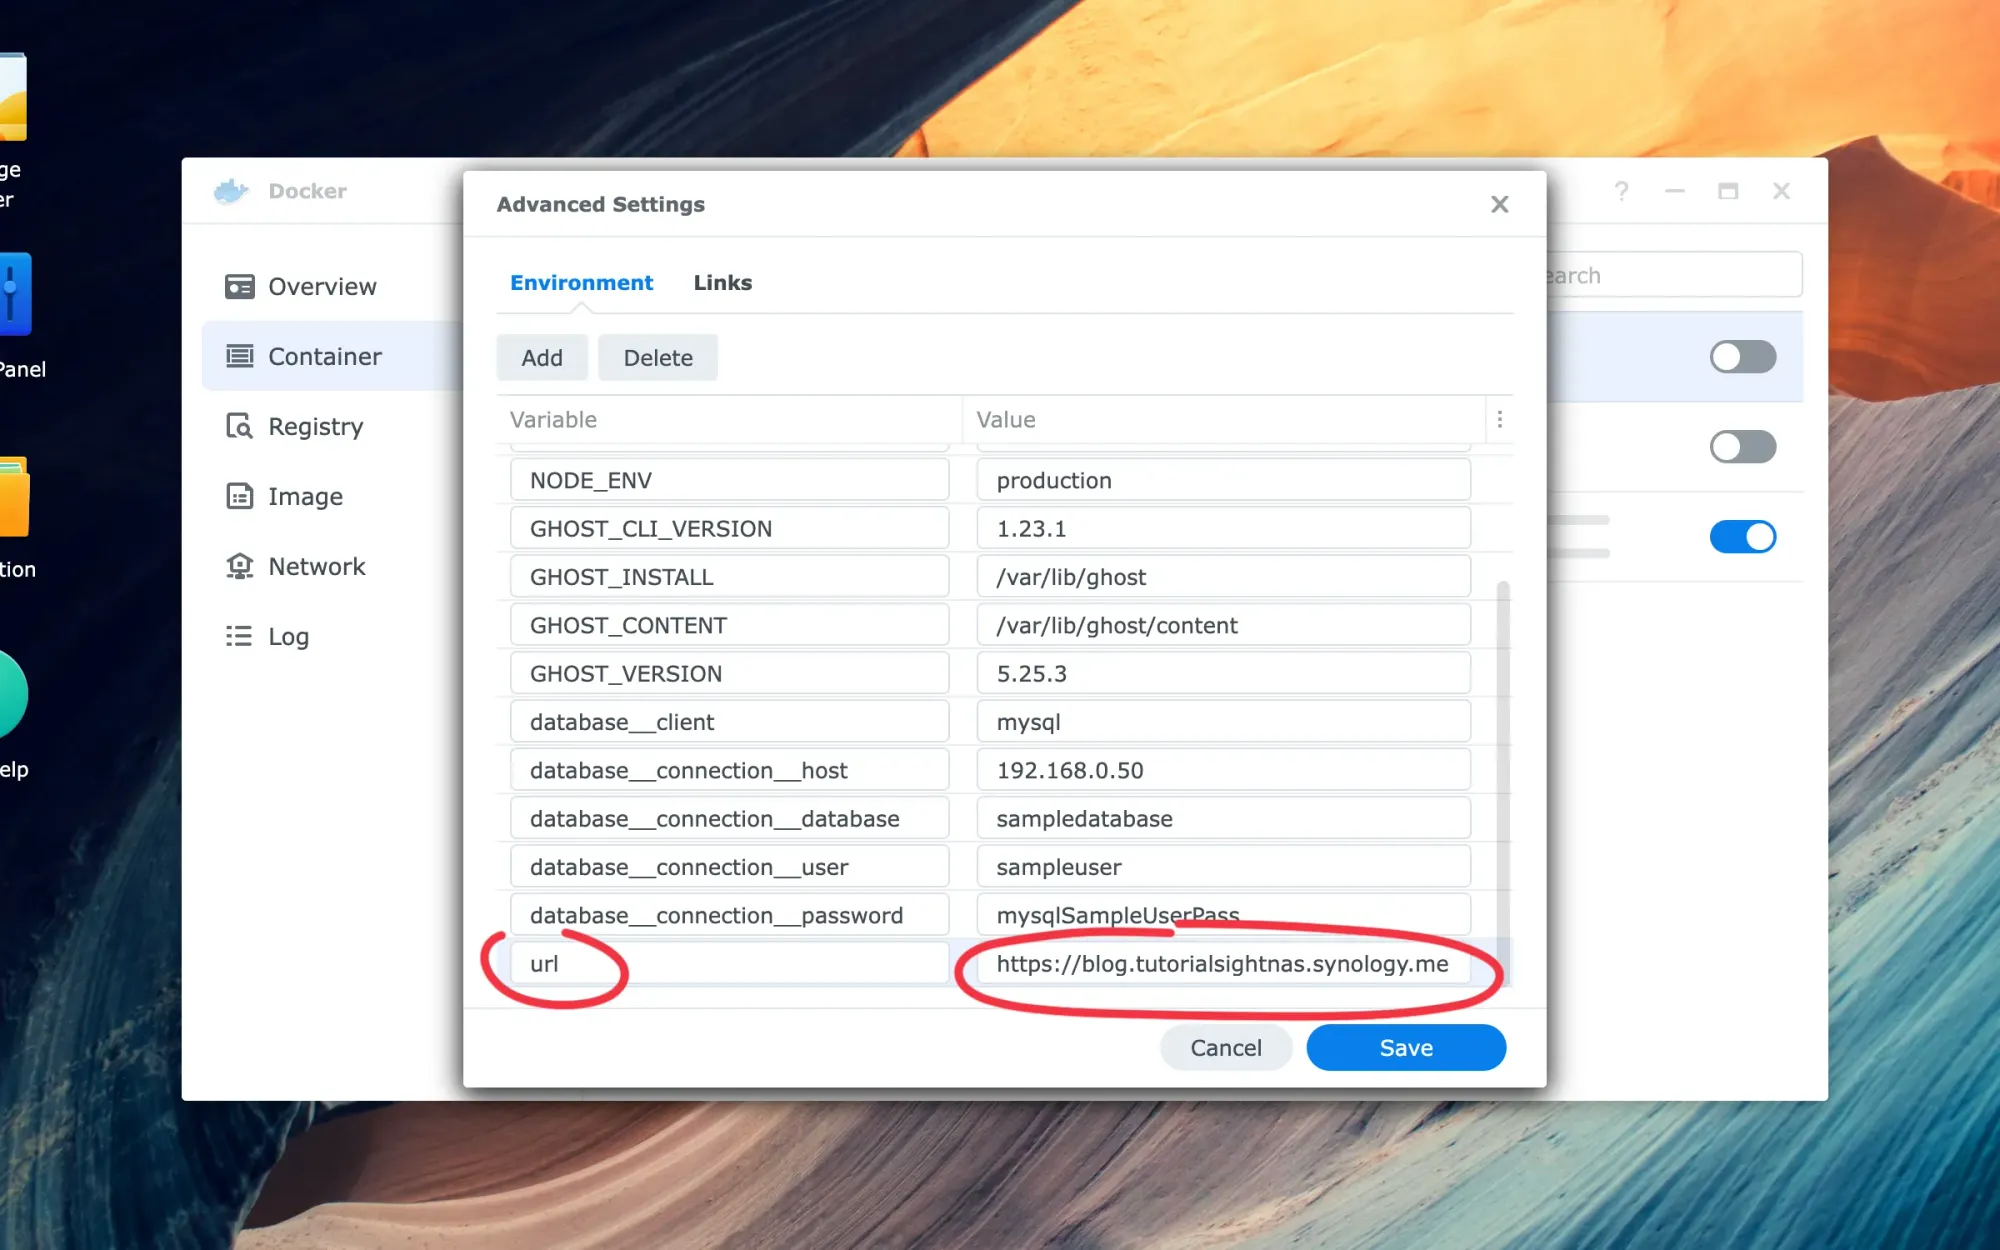
Click "Advanced Settings" and update the variable "url" with the value: "https://blog.tutorialsightnas.synology.me" (without quotes), then save the changes and click the toggle to start the container.
If you haven't done already, you need to create a port forwarding rule on your router and firewall. The protocol must be TCP, the source port 443, the destination IP must match your NAS IP and the destination port 443.
If you've followed all the steps carefully and configured your router and firewall correctly, your Ghost blog should be up and accessible by typing its URL (e.g. https://blog.tutorialsightnas.synology.me).