
How to install MySQL on your Synology NAS using Docker
Introduction
You may need to install MySQL on your Synology NAS because you need it to run a particular software like a blogging platform (e.g. Ghost or WordPress) or maybe because you decided to build some other cool stuff.
Chances are you already know you can install MariaDB as a backwards-compatible database server replacement for MySQL, but you don't want to.
In this guide, I'll help you install MySQL on your Synology NAS using Docker while explaining some of the settings. To conclude, I'll show you how to create a database and a user during the MySQL initialisation process and test that it's up and running.
I'll not focus on how to make your MySQL Database Server or your Synology NAS more secure, so you're fully aware that it's up to you to check if the following configurations don't compromise your Synology NAS security or network security.
Step 1: Install Docker on our Synology NAS
You possibly have already installed and used Docker in your Synology NAS before. If that's the case, you can skip this step.
In a few words, we use Docker because it's the easiest way to run software that isn't available in the Synology Package Center. You can read more about Docker and how it works here.
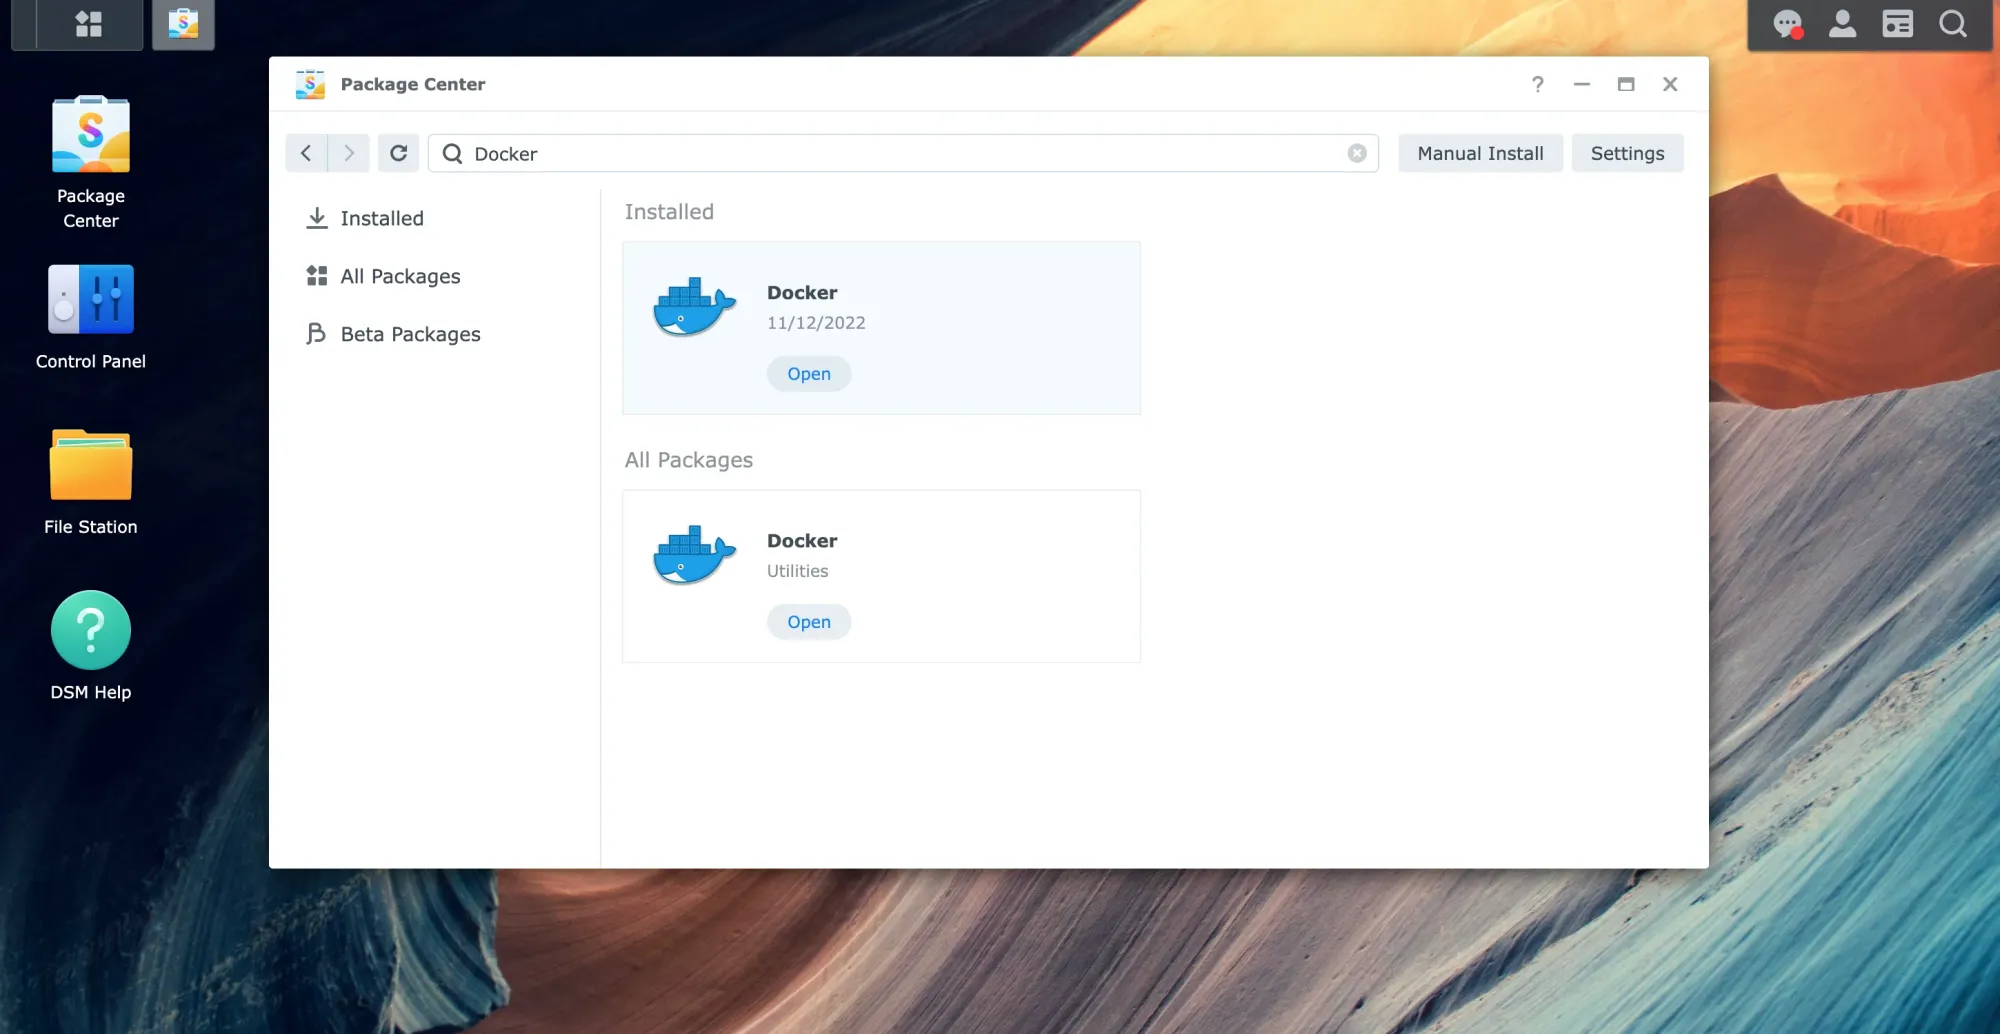
To install Docker, head to the Package Center, search for it and click "Install".
Step2: Create a Docker container for MySQL
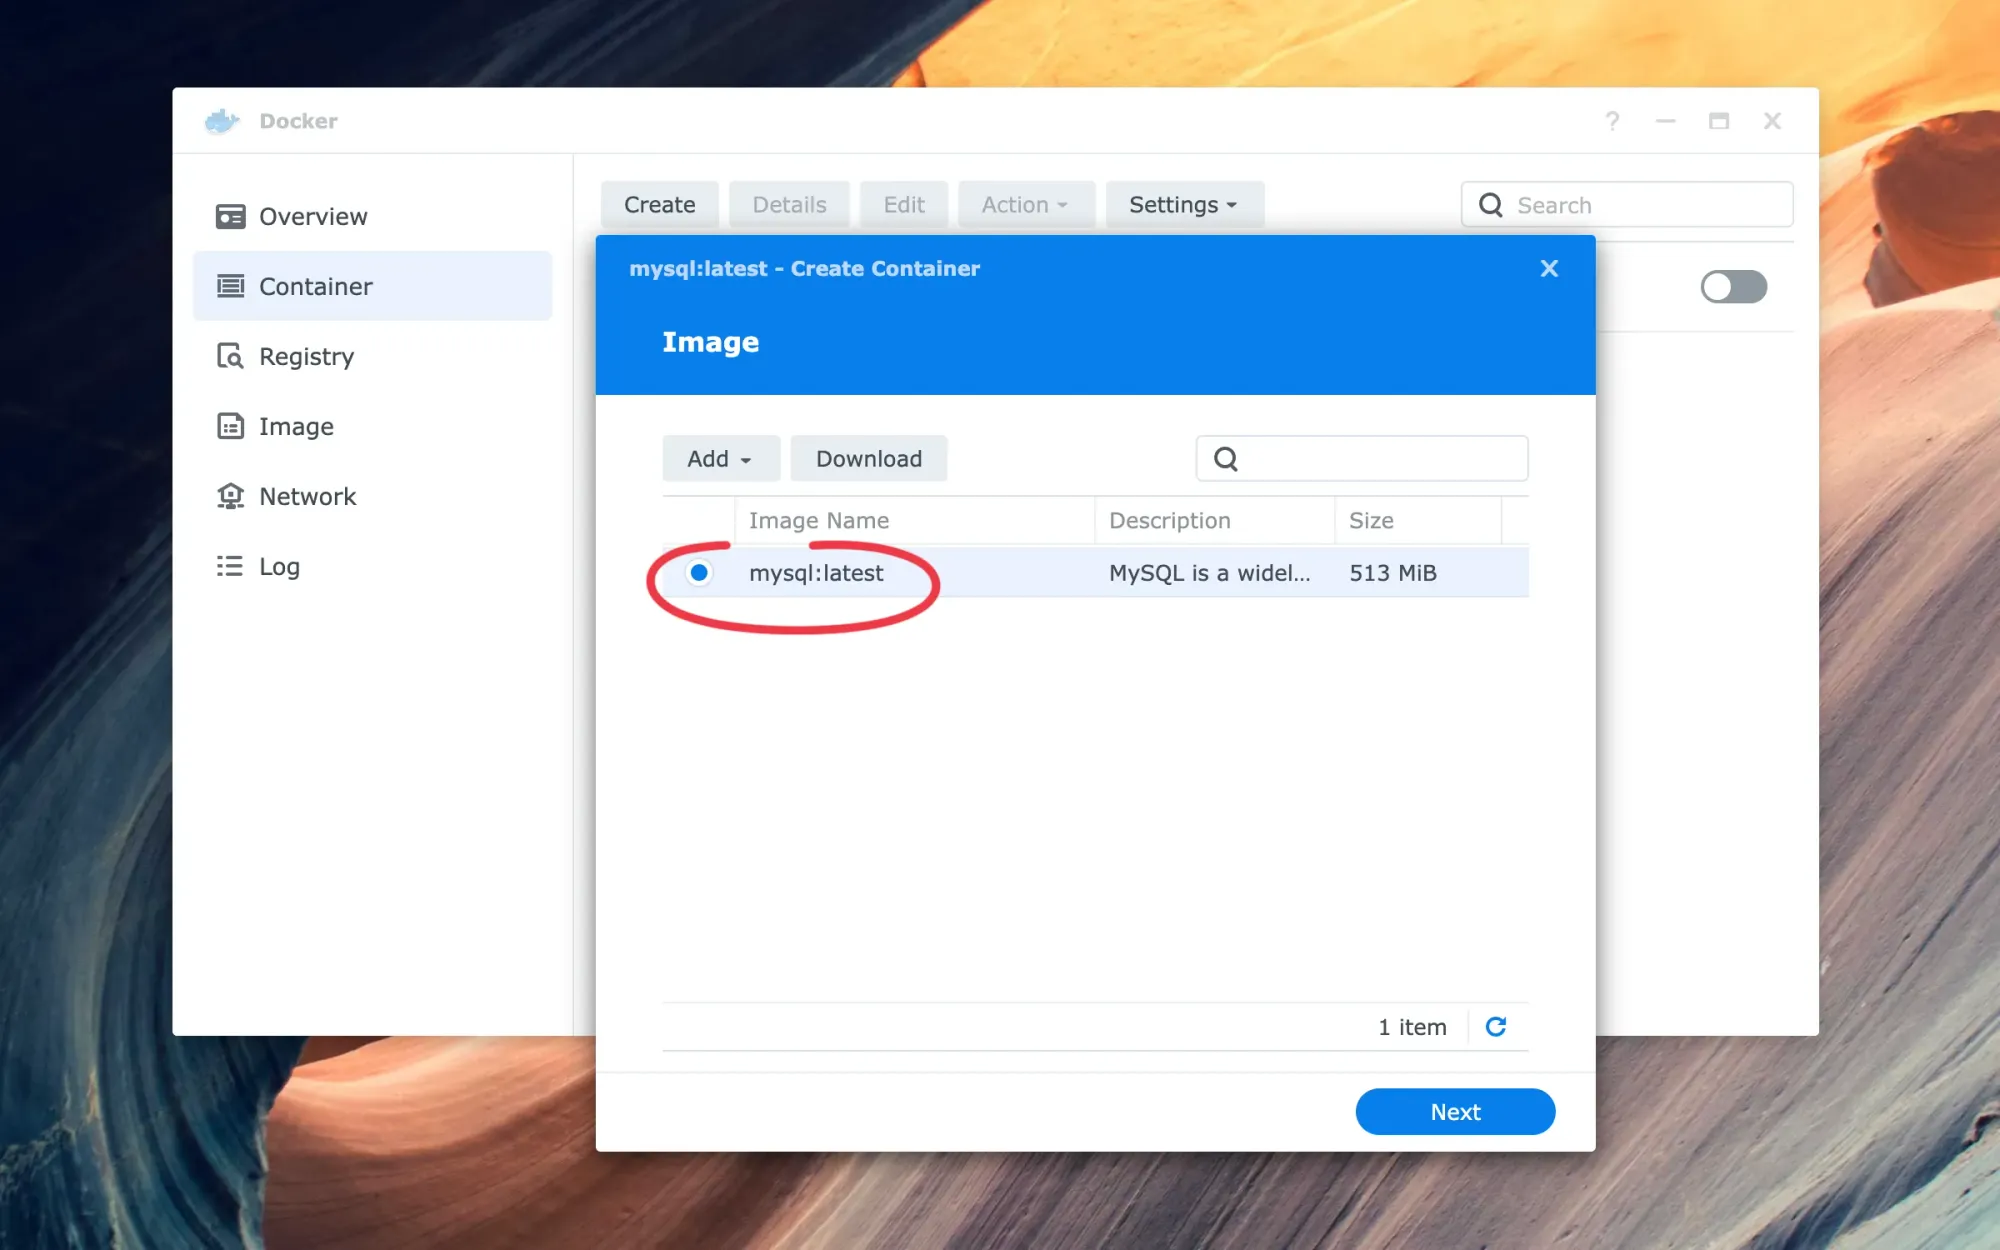
Download the MySQL server image from the online repository
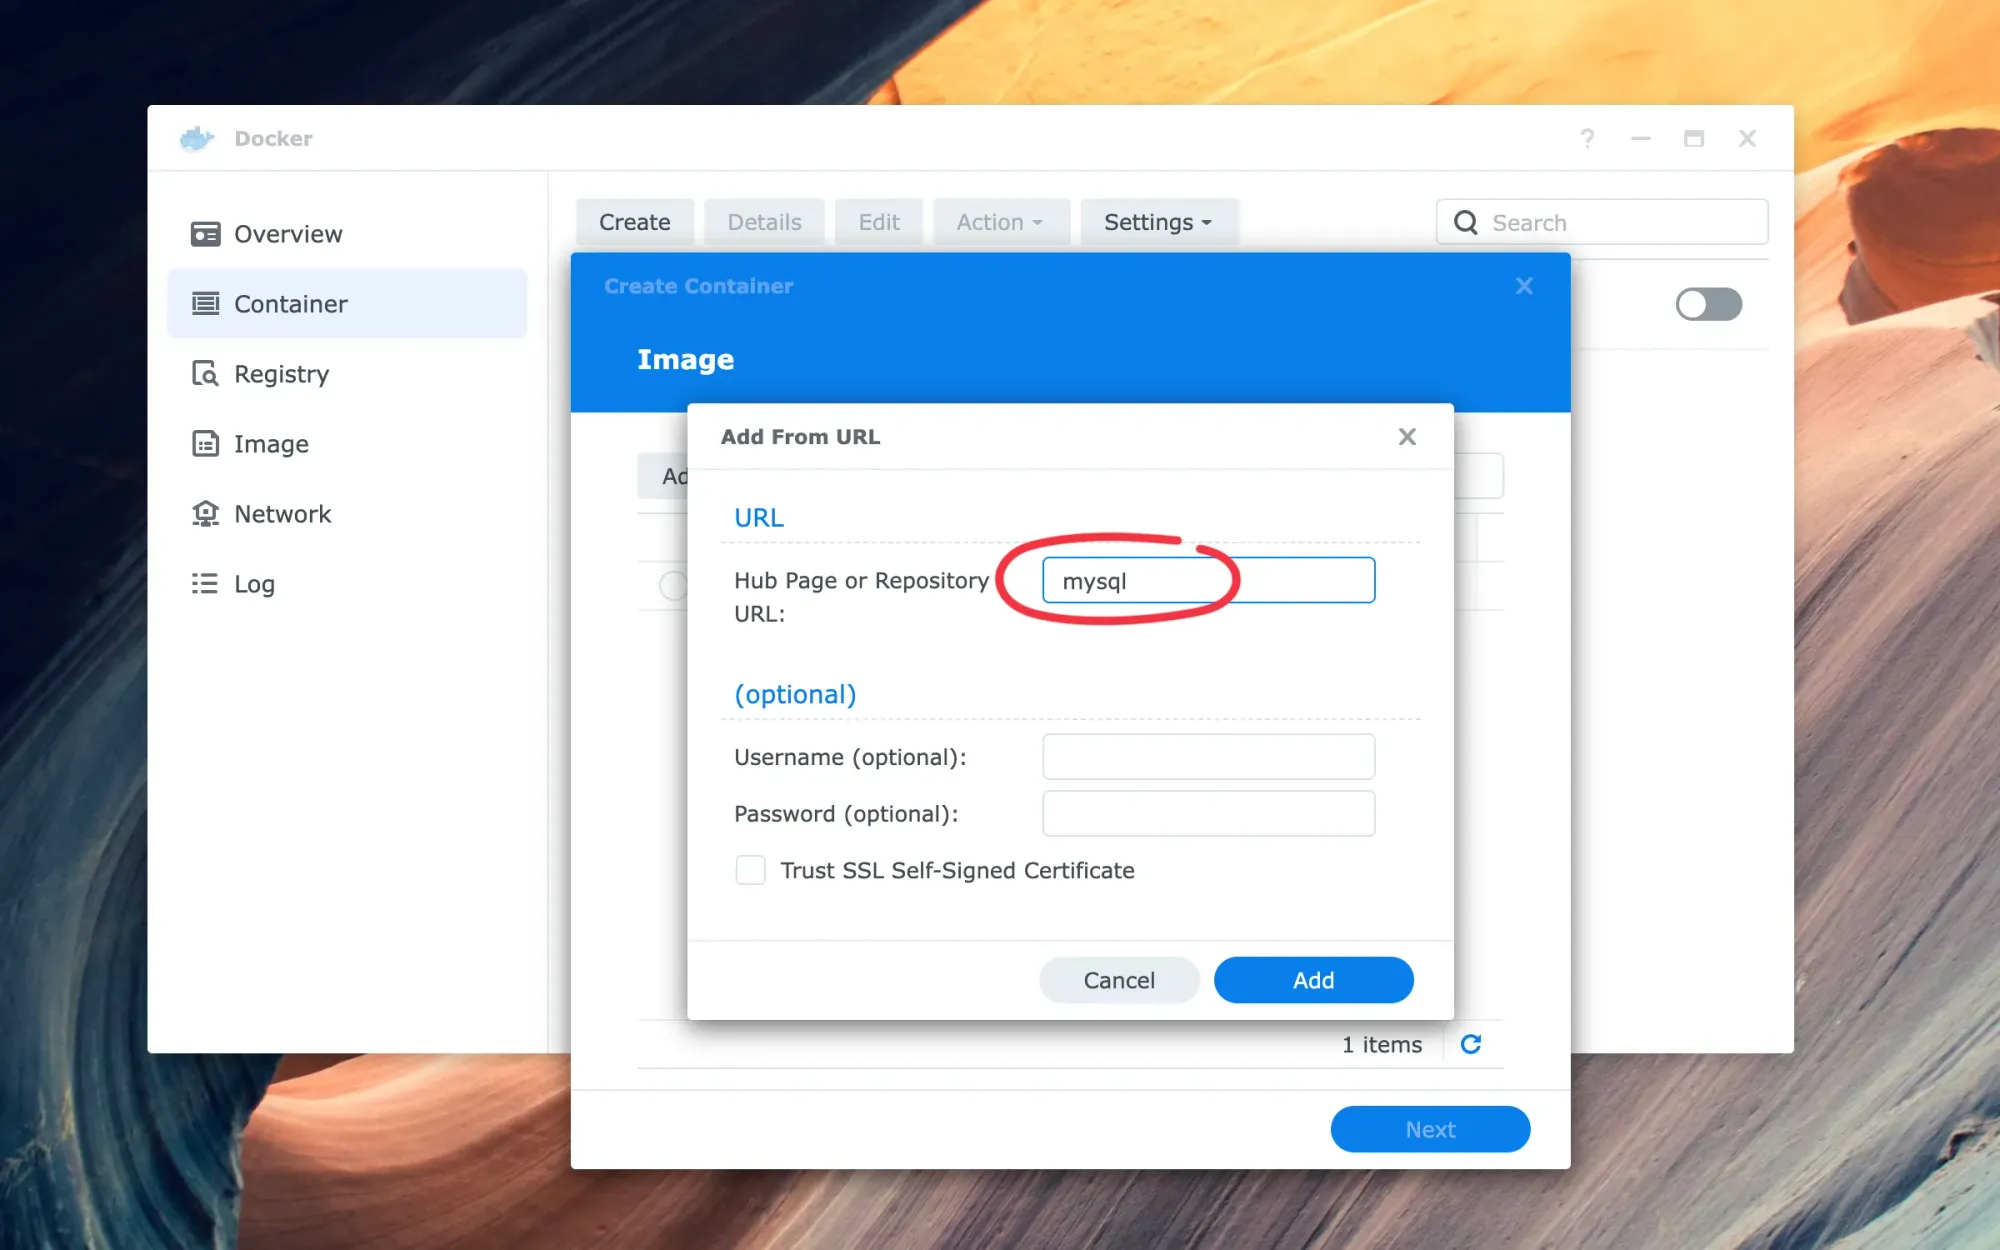
In the Docker application, go to the "Container" section on the left side, and click "Create" to open the "Create Container" window. Now you need to specify where to find the Ghost image for Docker. Click on the "Add" dropdown button and then "Add From URL".
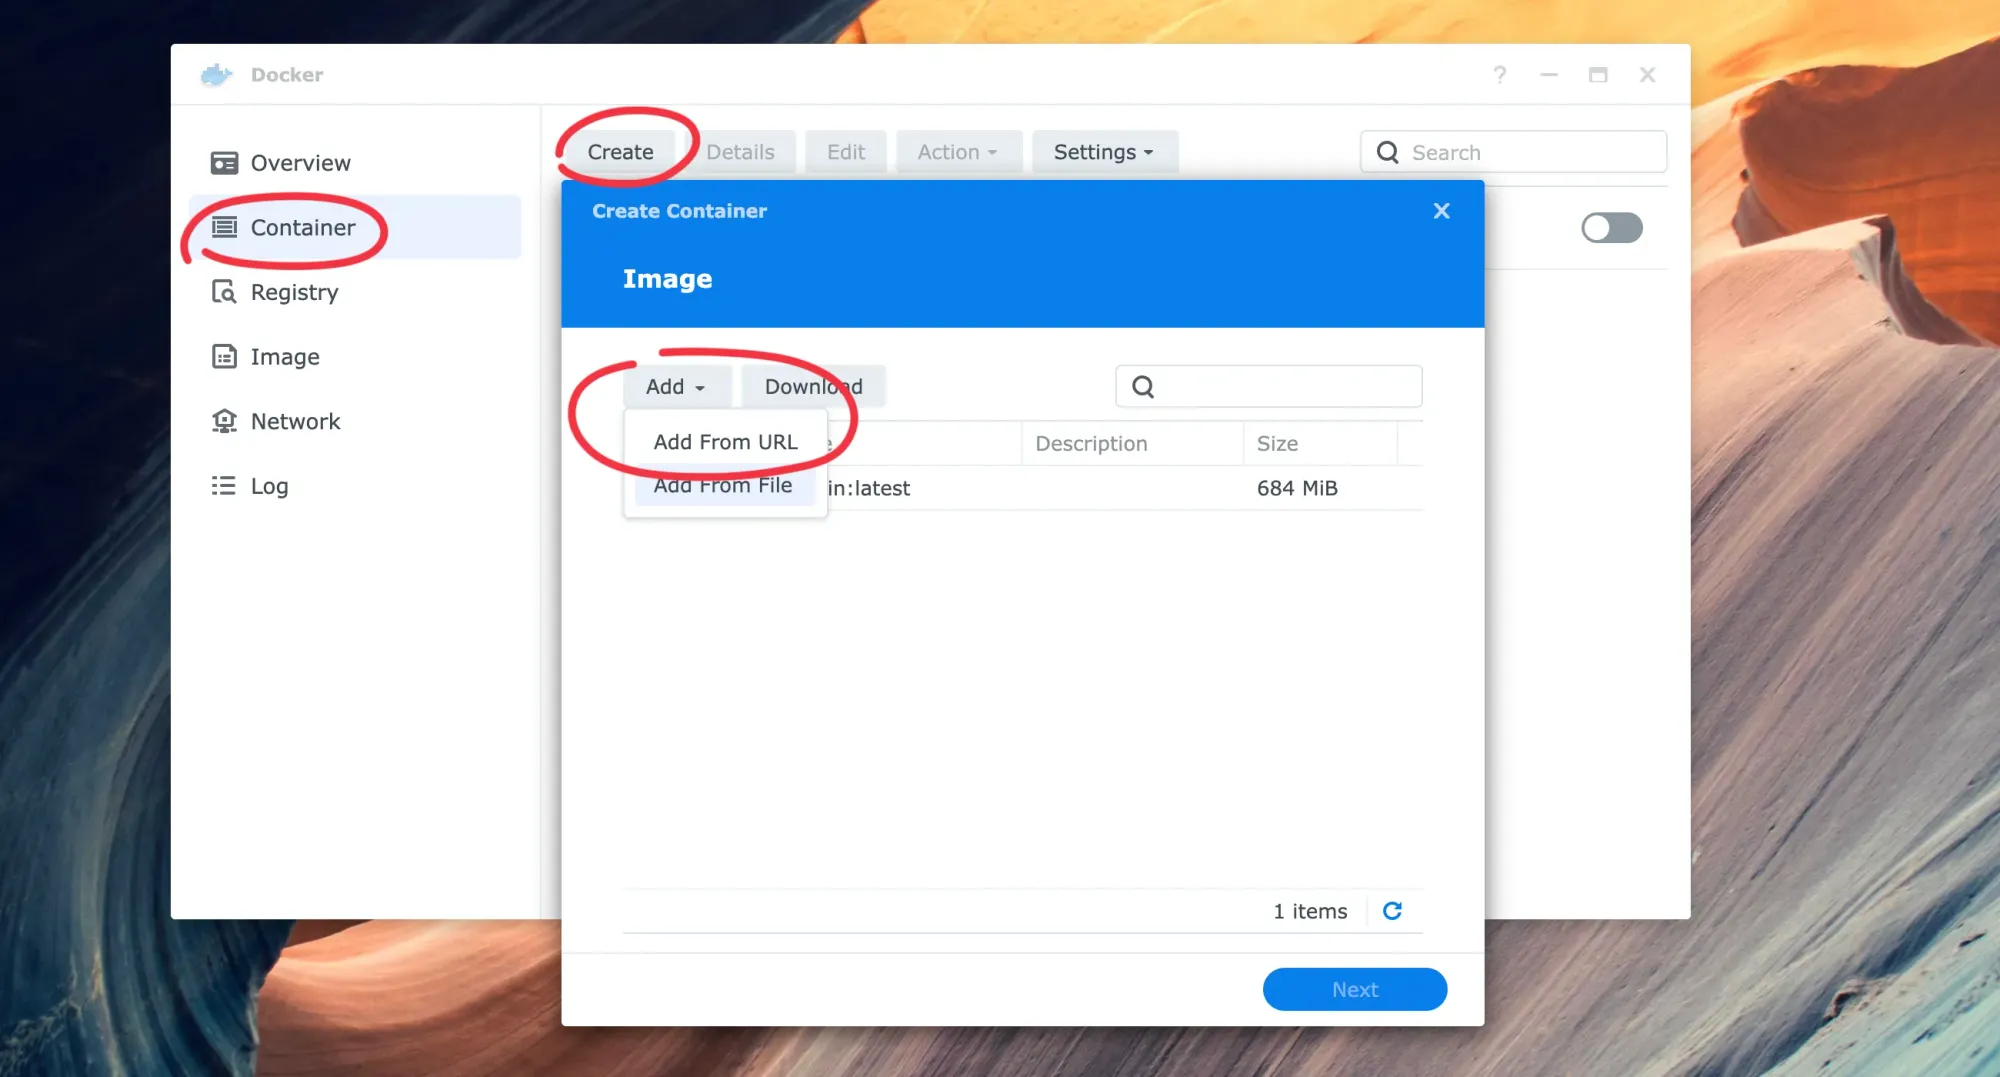
Just type "mysql" (without quotes) in the URL field and click "Add".
When asked to choose a tag, keep the default value to dowload the latest version and click the "Select" button to start the download of the image.
Once the image has been downloaded successfully, you should be able to select it and click "Next" to proceed with the container creation.
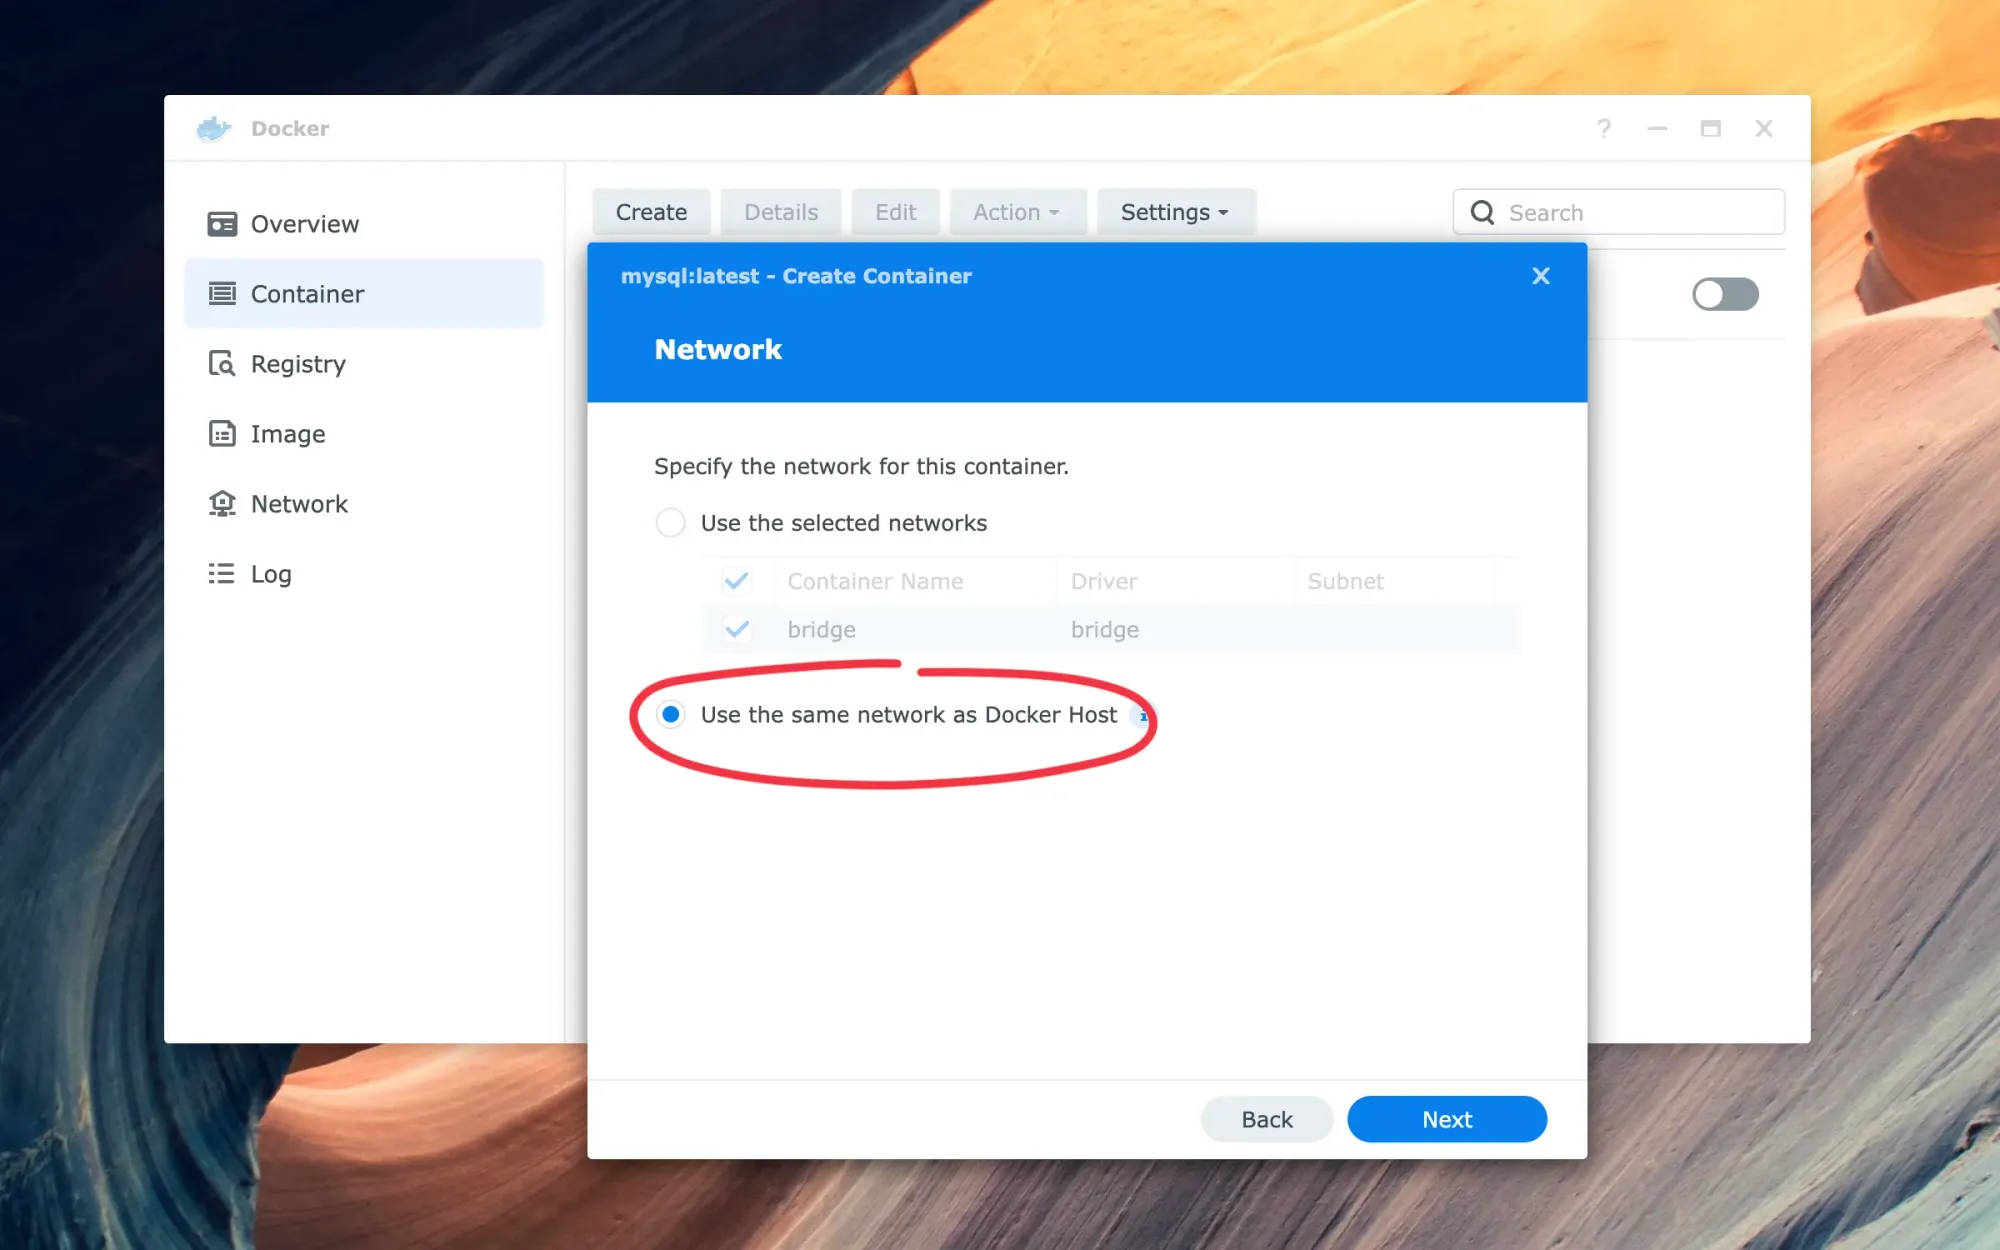
Choose the network settings for the MySQL container
When asked to specify the network for the container, select "Use the same network as Docker Host" and click "Next". The container will then use the same network address as your Synology NAS.
For example, I assigned the IP: 192.168.0.50 to my NAS, and by choosing to use the same network as Docker Host, then, I was able to connect to MySQL by using the same IP address.
Choose the general settings for the MySQL container
On the General Settings screen, you'll have some options to limit the resource consumption of the container. Other than changing the container's name, I suggest you leave the rest as default.

Specify some initialisation settings for MySQL
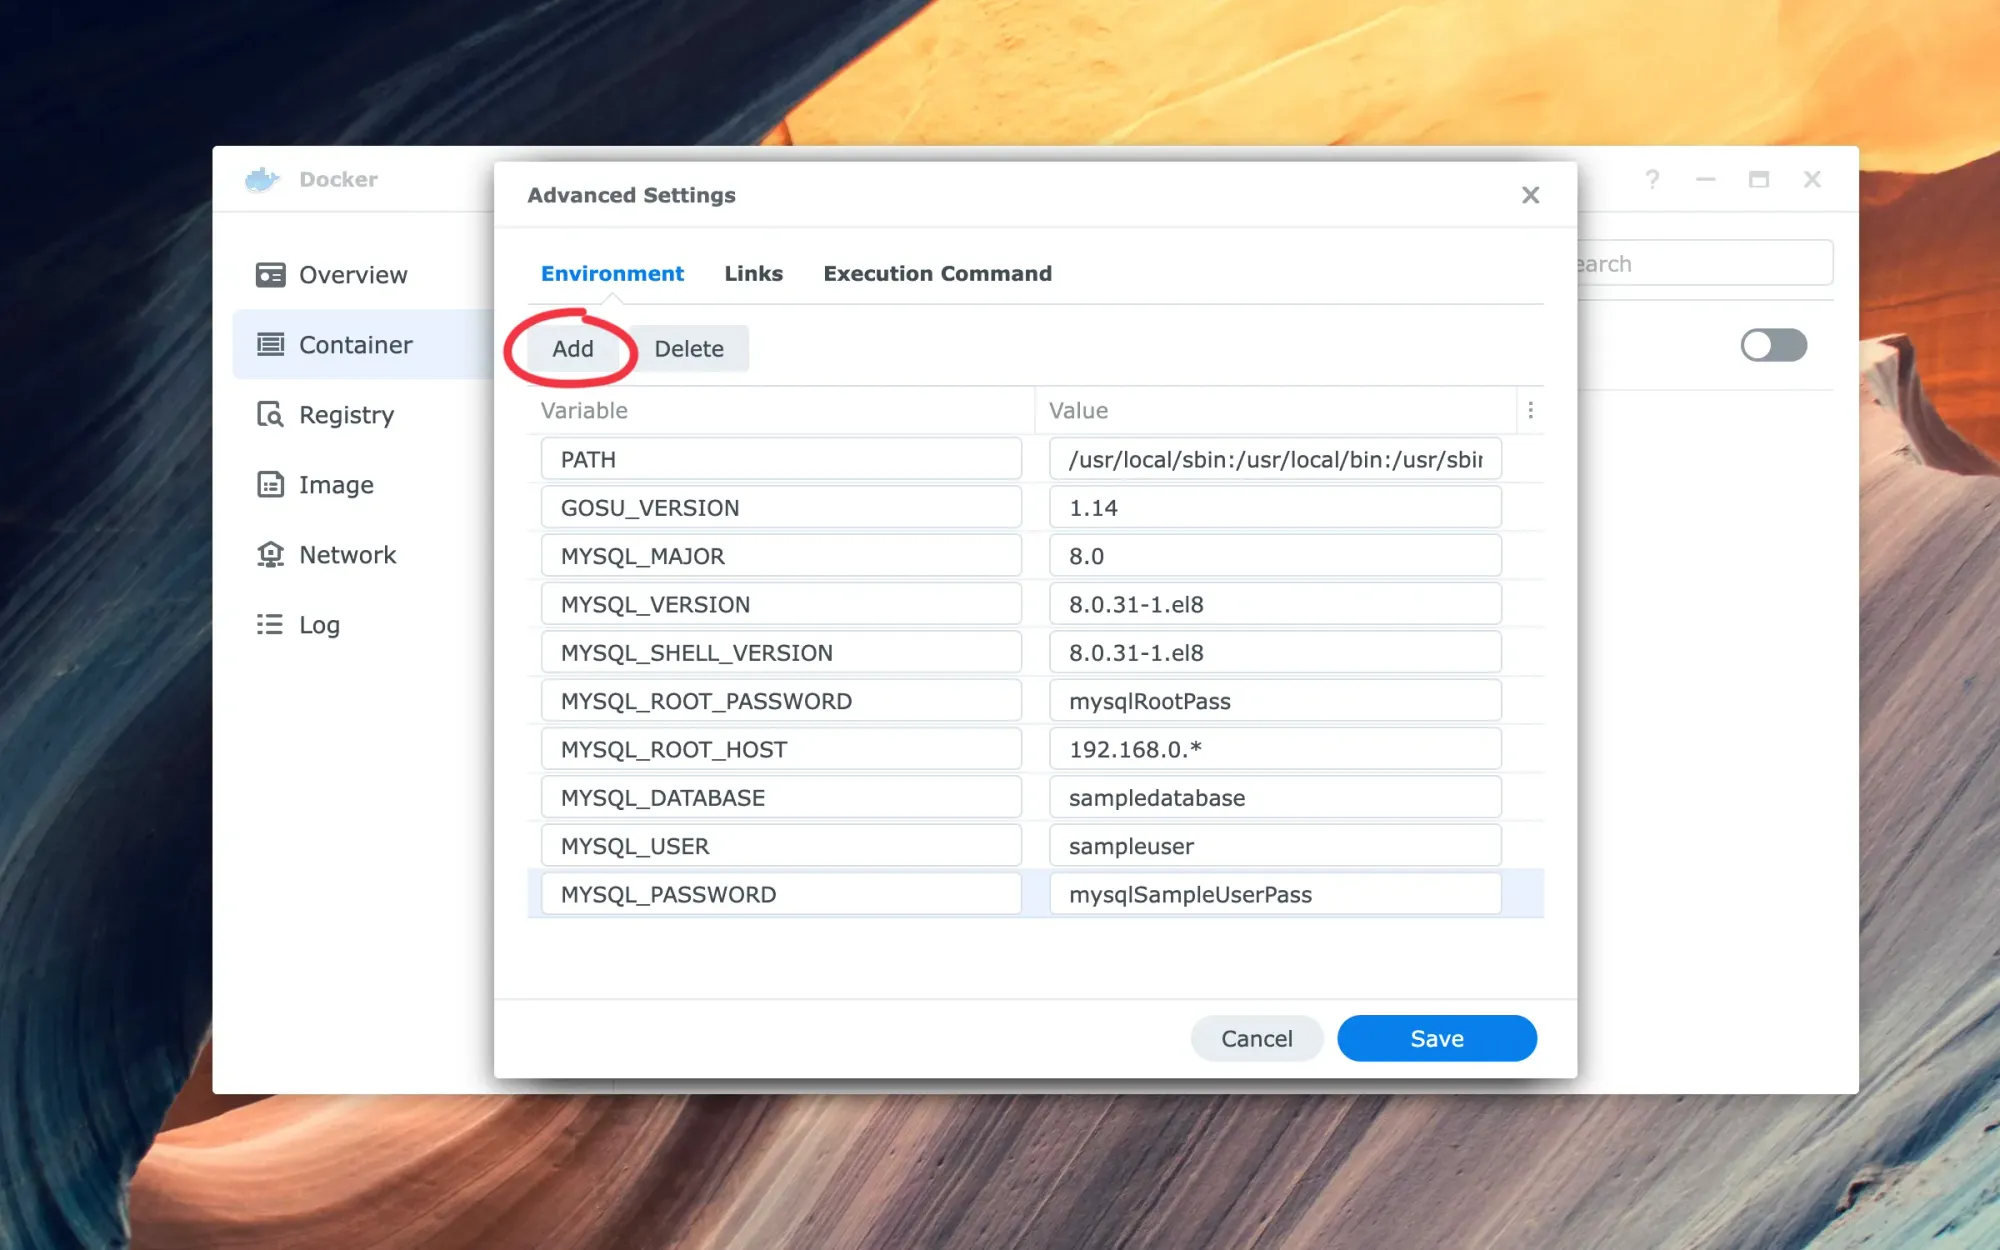
Before proceeding to the next screen, click "Advanced Settings", so you can add some environment variables that will be used only once during the initialisation process when the container runs for the first time.
You have to tell MySQL to set up the password for the root user by adding the key: MYSQL_ROOT_PASSWORD, with a password of your choice as a value.
By default, for security reasons, the root user can log in to MySQL from within the container (localhost). You might want to remove this restriction and allow access from your local area network.
The most common network setup at home has a router with IP 192.168.0.1 or 192.168.1.1, and all the other devices have an IP starting with the same three octets as the router's IP.
As I mentioned earlier, my Synology NAS IP address is 192.168.0.50. My router is 192.168.0.1, one of my computers is 192.168.0.100, and another one is 192.168.0.101. If I want to allow root access from my network devices, I can set the value 192.168.0.* for the MYSQL_ROOT_HOST key.
You can specify upfront to create a user and a database by adding the following environment variables:
MYSQL_DATABASE: sampledatabase
MYSQL_USER: sampleuser
MYSQL_PASSWORD: mysqlSampleUserPass
The above values are just an example. You can choose the name of the user, the database and a password of your choice.
Once done, click "Save" and then "Next".
Volume Settings: tell Docker to store MySQL data in a shared folder
You need to map the volume to a shared folder on your Synology NAS, so that MySQL can store its data. Click "Add Folder", "Create Folder", type "mysql" (without quotes) when requested to enter a folder name, click "OK", and then "Select".
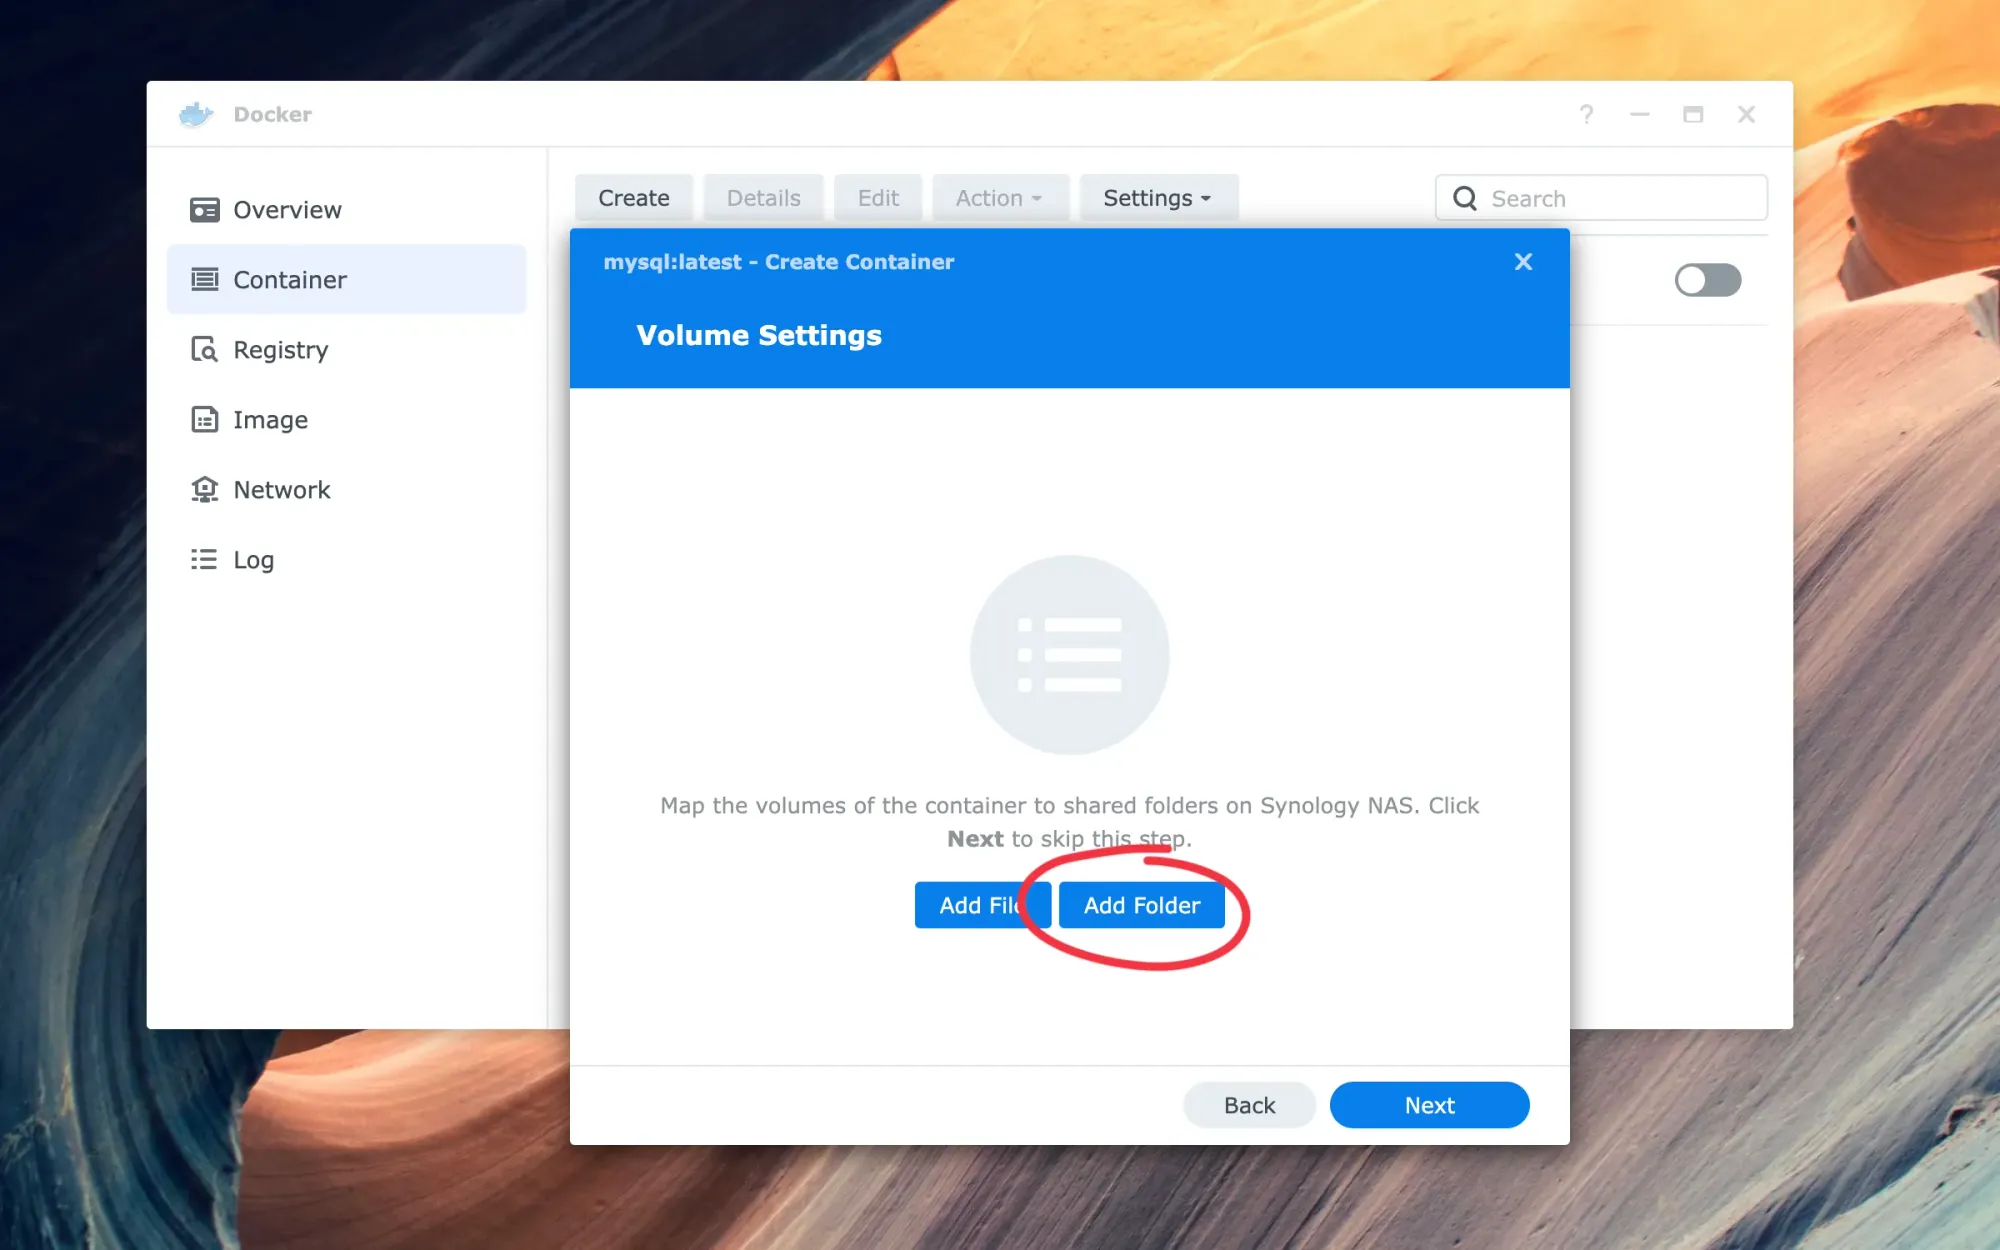
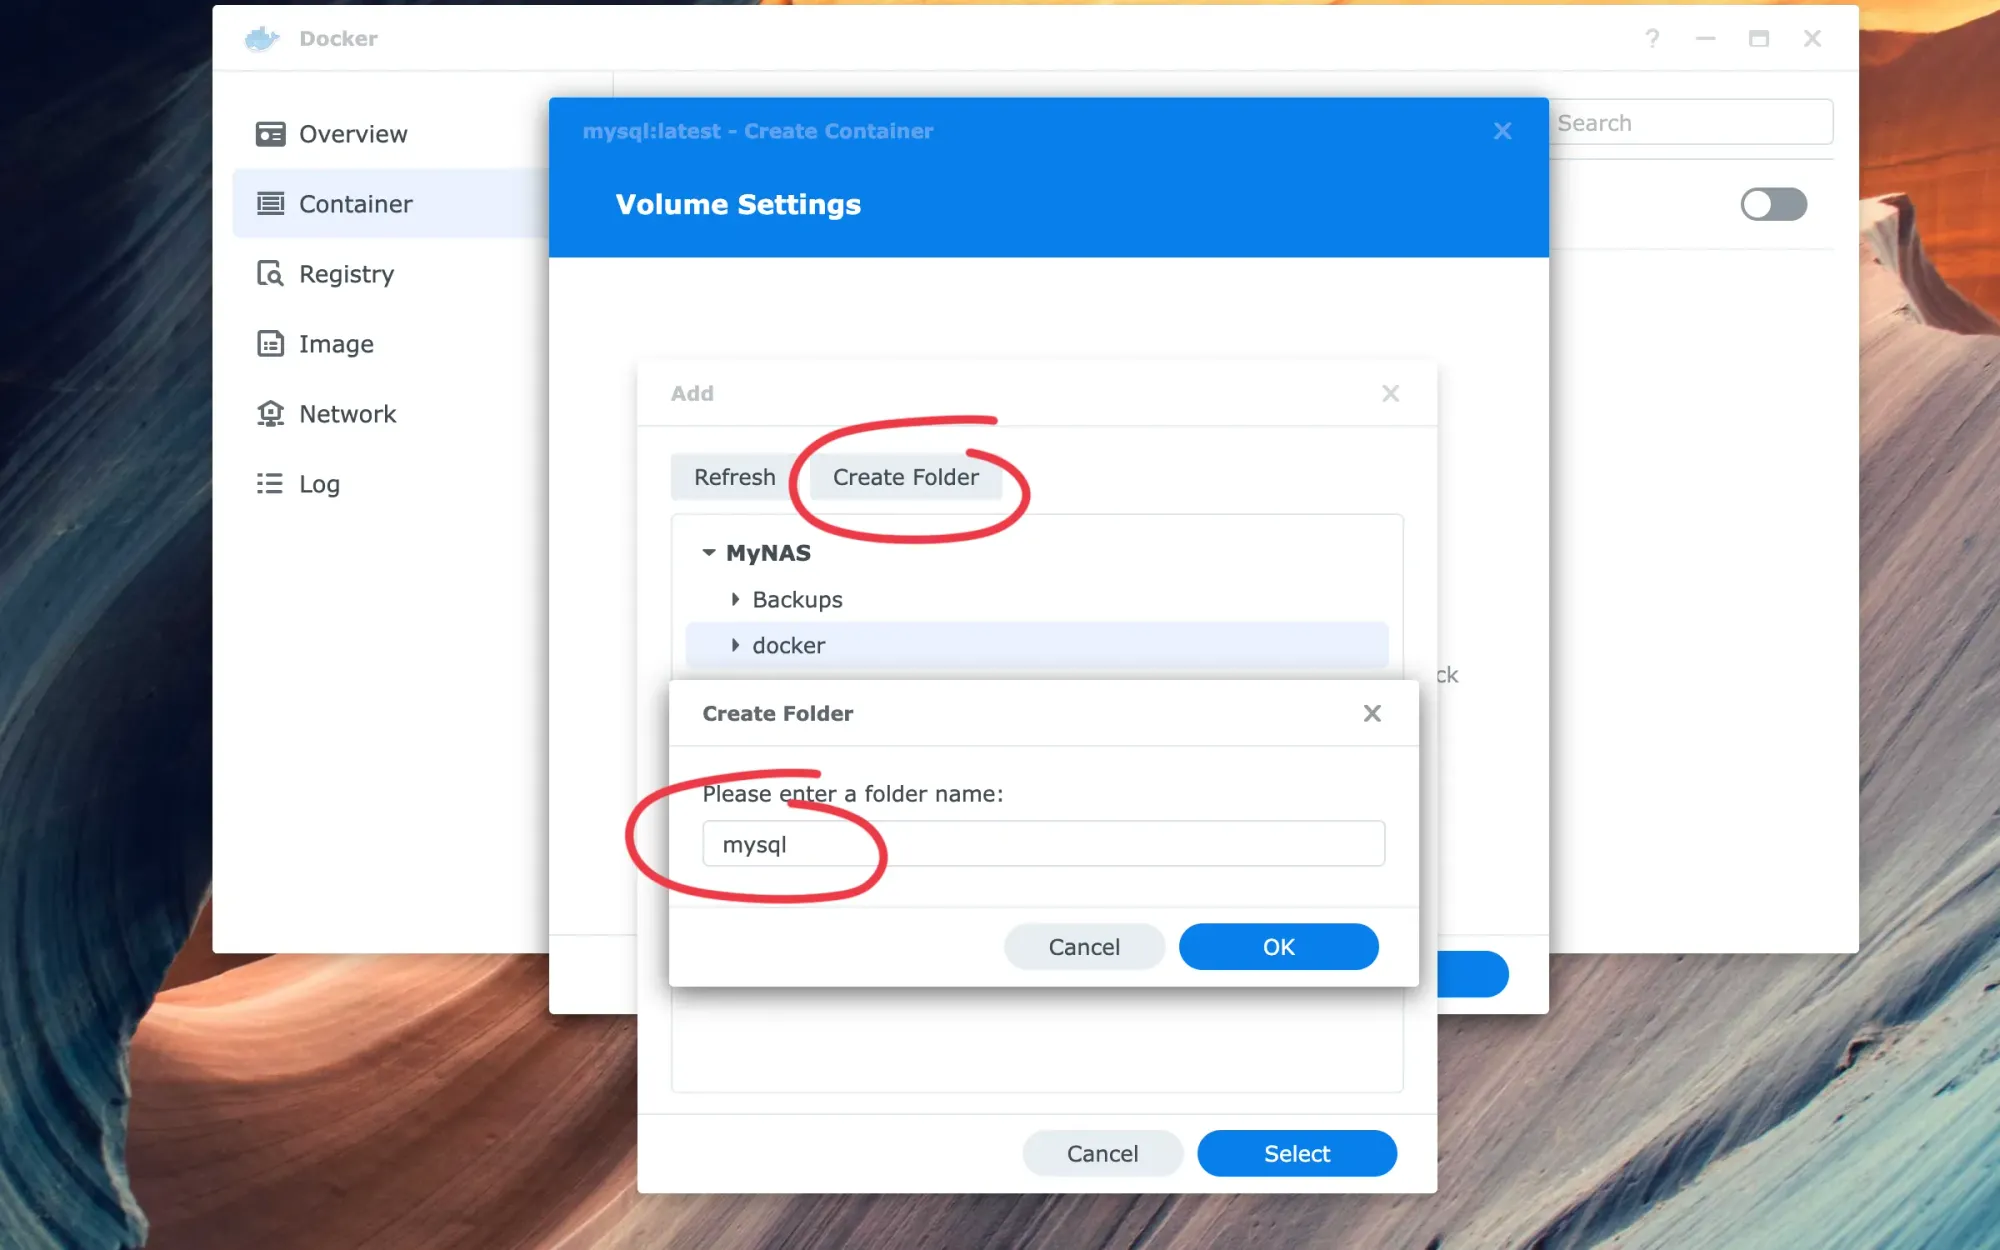
Enter "/var/lib/mysql" (without quotes) as the mount path and click "Next".

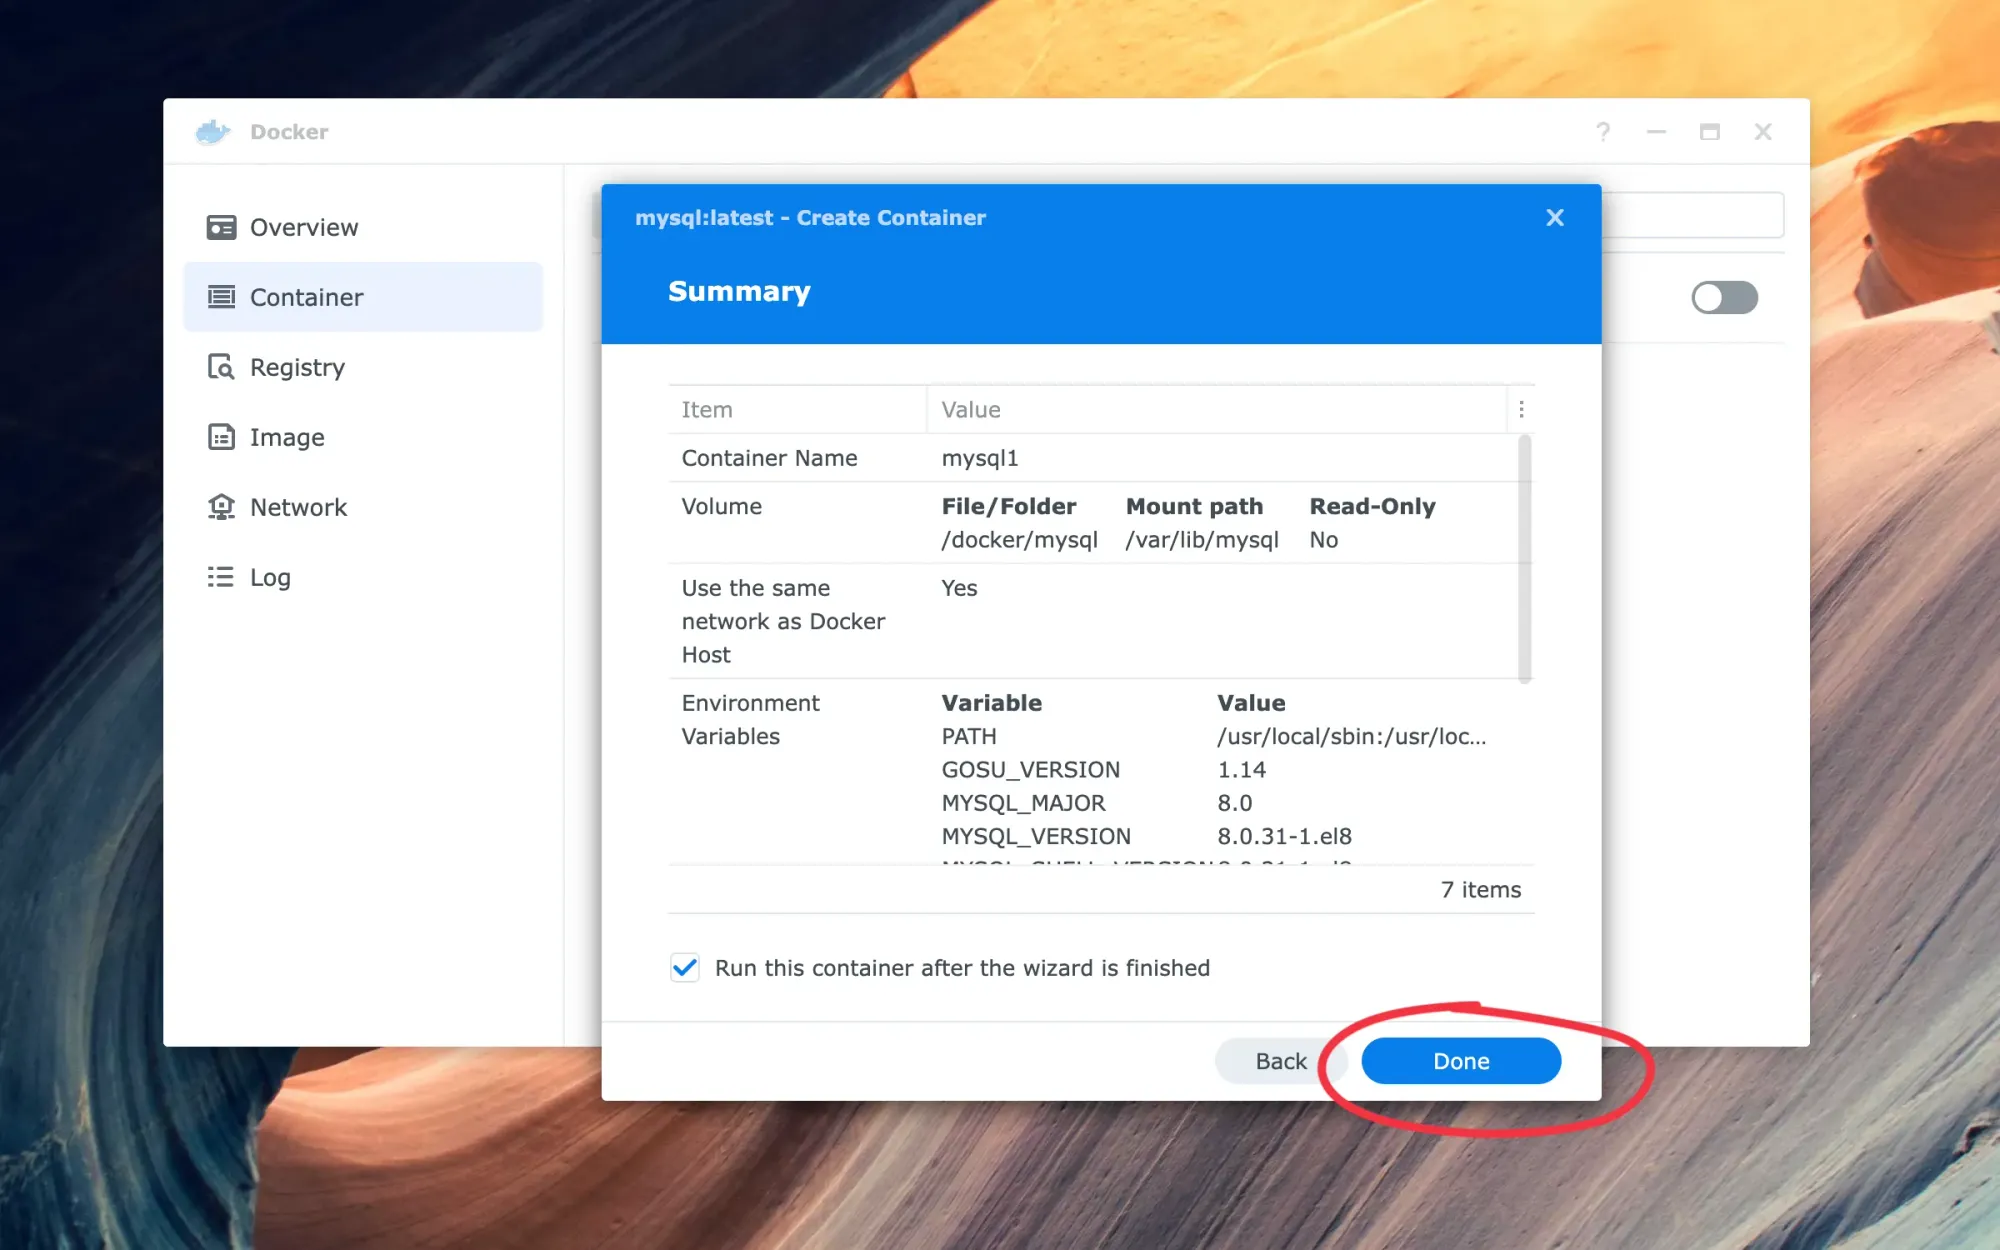
A summary window will be displayed where you can review all the settings before proceeding by clicking "Done".
Once you see the container running under Docker, you still need to let it run for around 10 minutes before you're able to login into MySQL. That's because, as we mentioned some steps earlier, MySQL will have to execute some initialisation steps when it runs for the first time.
Step 3: Test MySQL connection and cleanup
You can now test that MySQL is configured correctly, by connecting to it using a software of your choice. My favourite tool to manage my databases is MySQLWorkbench, which you can download here. You should be able to connect using the newly created credentials or the root user and password (see "Specify some initialisation settings for MySQL").
Also, don't forget to edit your newly created container and remove the environment variables entered a few steps before.